


Andres and I were finally able to complete the Magic Cooler project and present it at the Freescale booth at Austin Mini Maker Faire 2015! Now to document!
This project started out as something to help educate kids in learning to control Christmas lights with music using a microcontroller in an easy-to-use environment last year in the Makerspace for my son’s middle school. At that time, we used an Arduino Uno, but I was able to pretty easily convert to using the much more practical and powerful Teensy 3.1 thanks to the Teensyduino software add-on.
The most challenging part of that Makerspace music project was the AC circuit side of the hookup. To not modify the Christmas lights being controlled, I had to cut off the plugs on some sacrificial Christmas lights to serve as the controlled outlets.
I had since wanted to do a project upgrade, using regular AC duplex outlets to control many more lights! And fit it all into a portable, rugged “box” of some sort.
As with any project, I started off with some thoughts:

Initial concept drawing
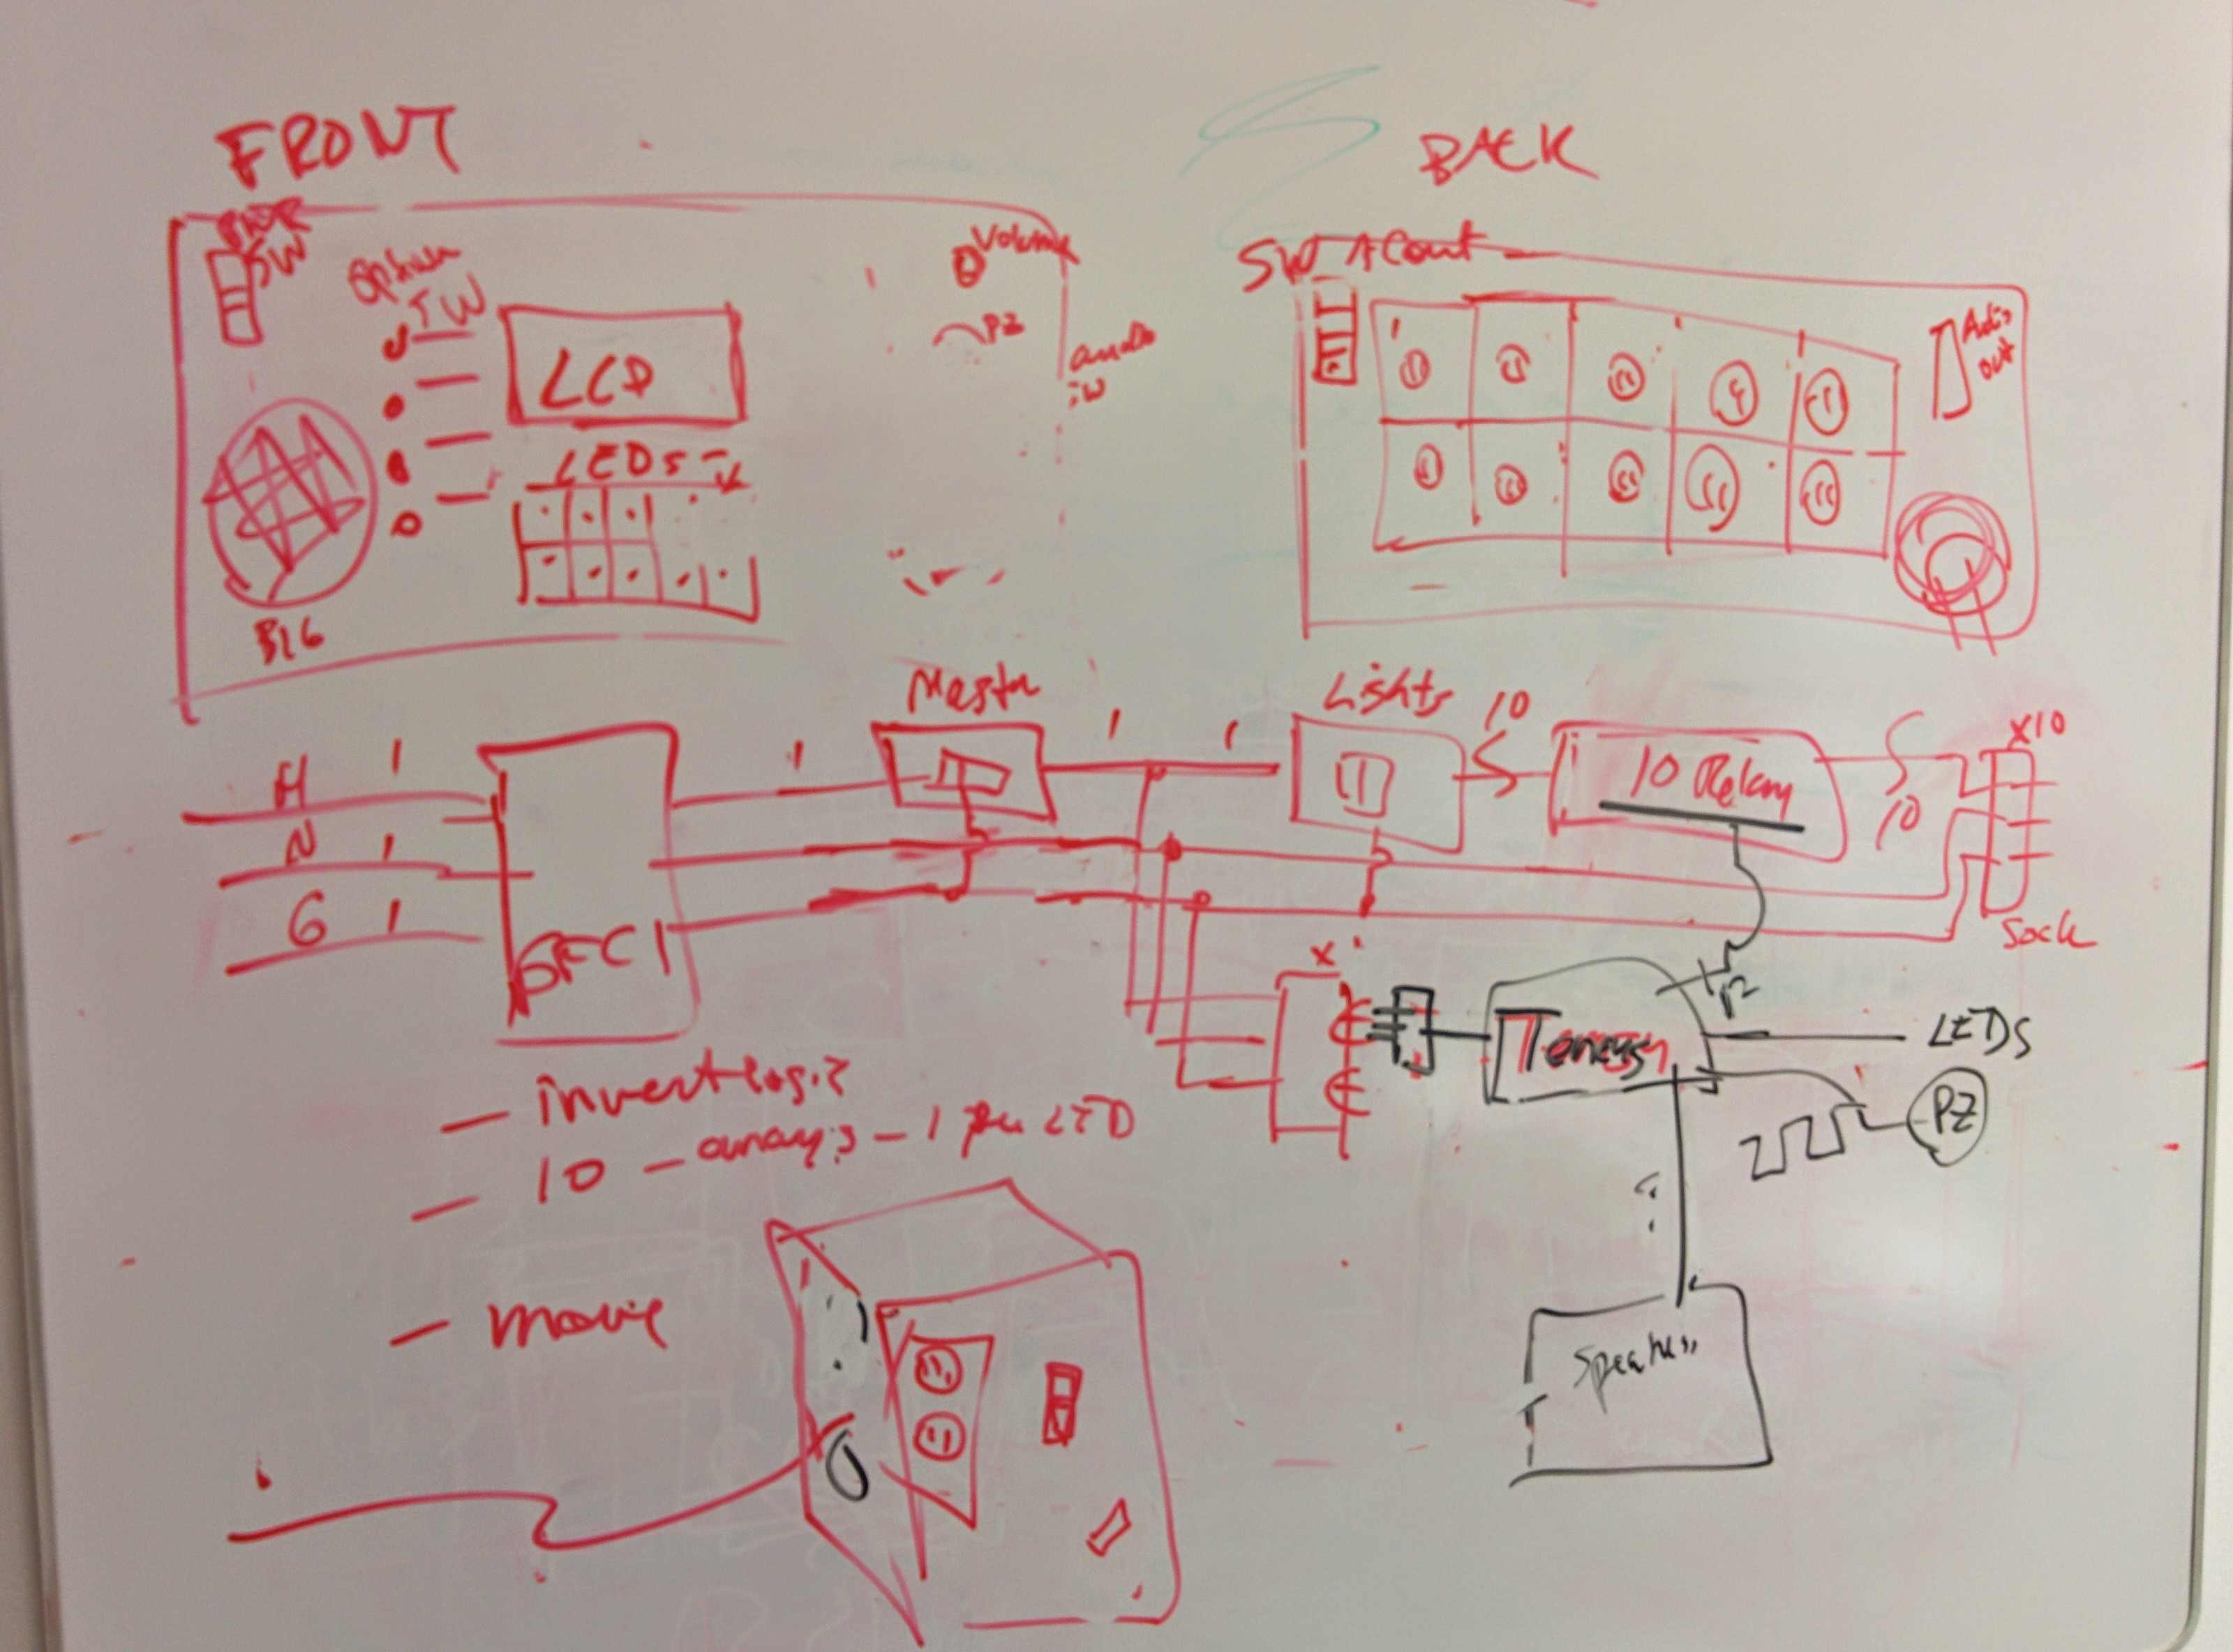
A bit of circuit diagram in there.
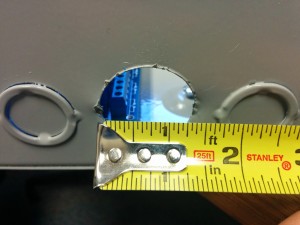
Initially, I had wanted to use a cheap, black toolbox to house the AC circuits. But after some measurements of the interior, it seemed a bit cramped for what I wanted to add, and the walls seemed too thin to support installing the ‘blue boxes’ needed to properly contain the AC outlets.
Fortuitously, I was cleaning out the garage around this time, taking stuff to Goodwill. As I was putting this blue Coleman cooler with broken lid hinges into the trunk of the car, it hit me that this would be the perfect container for a portable music and light show:
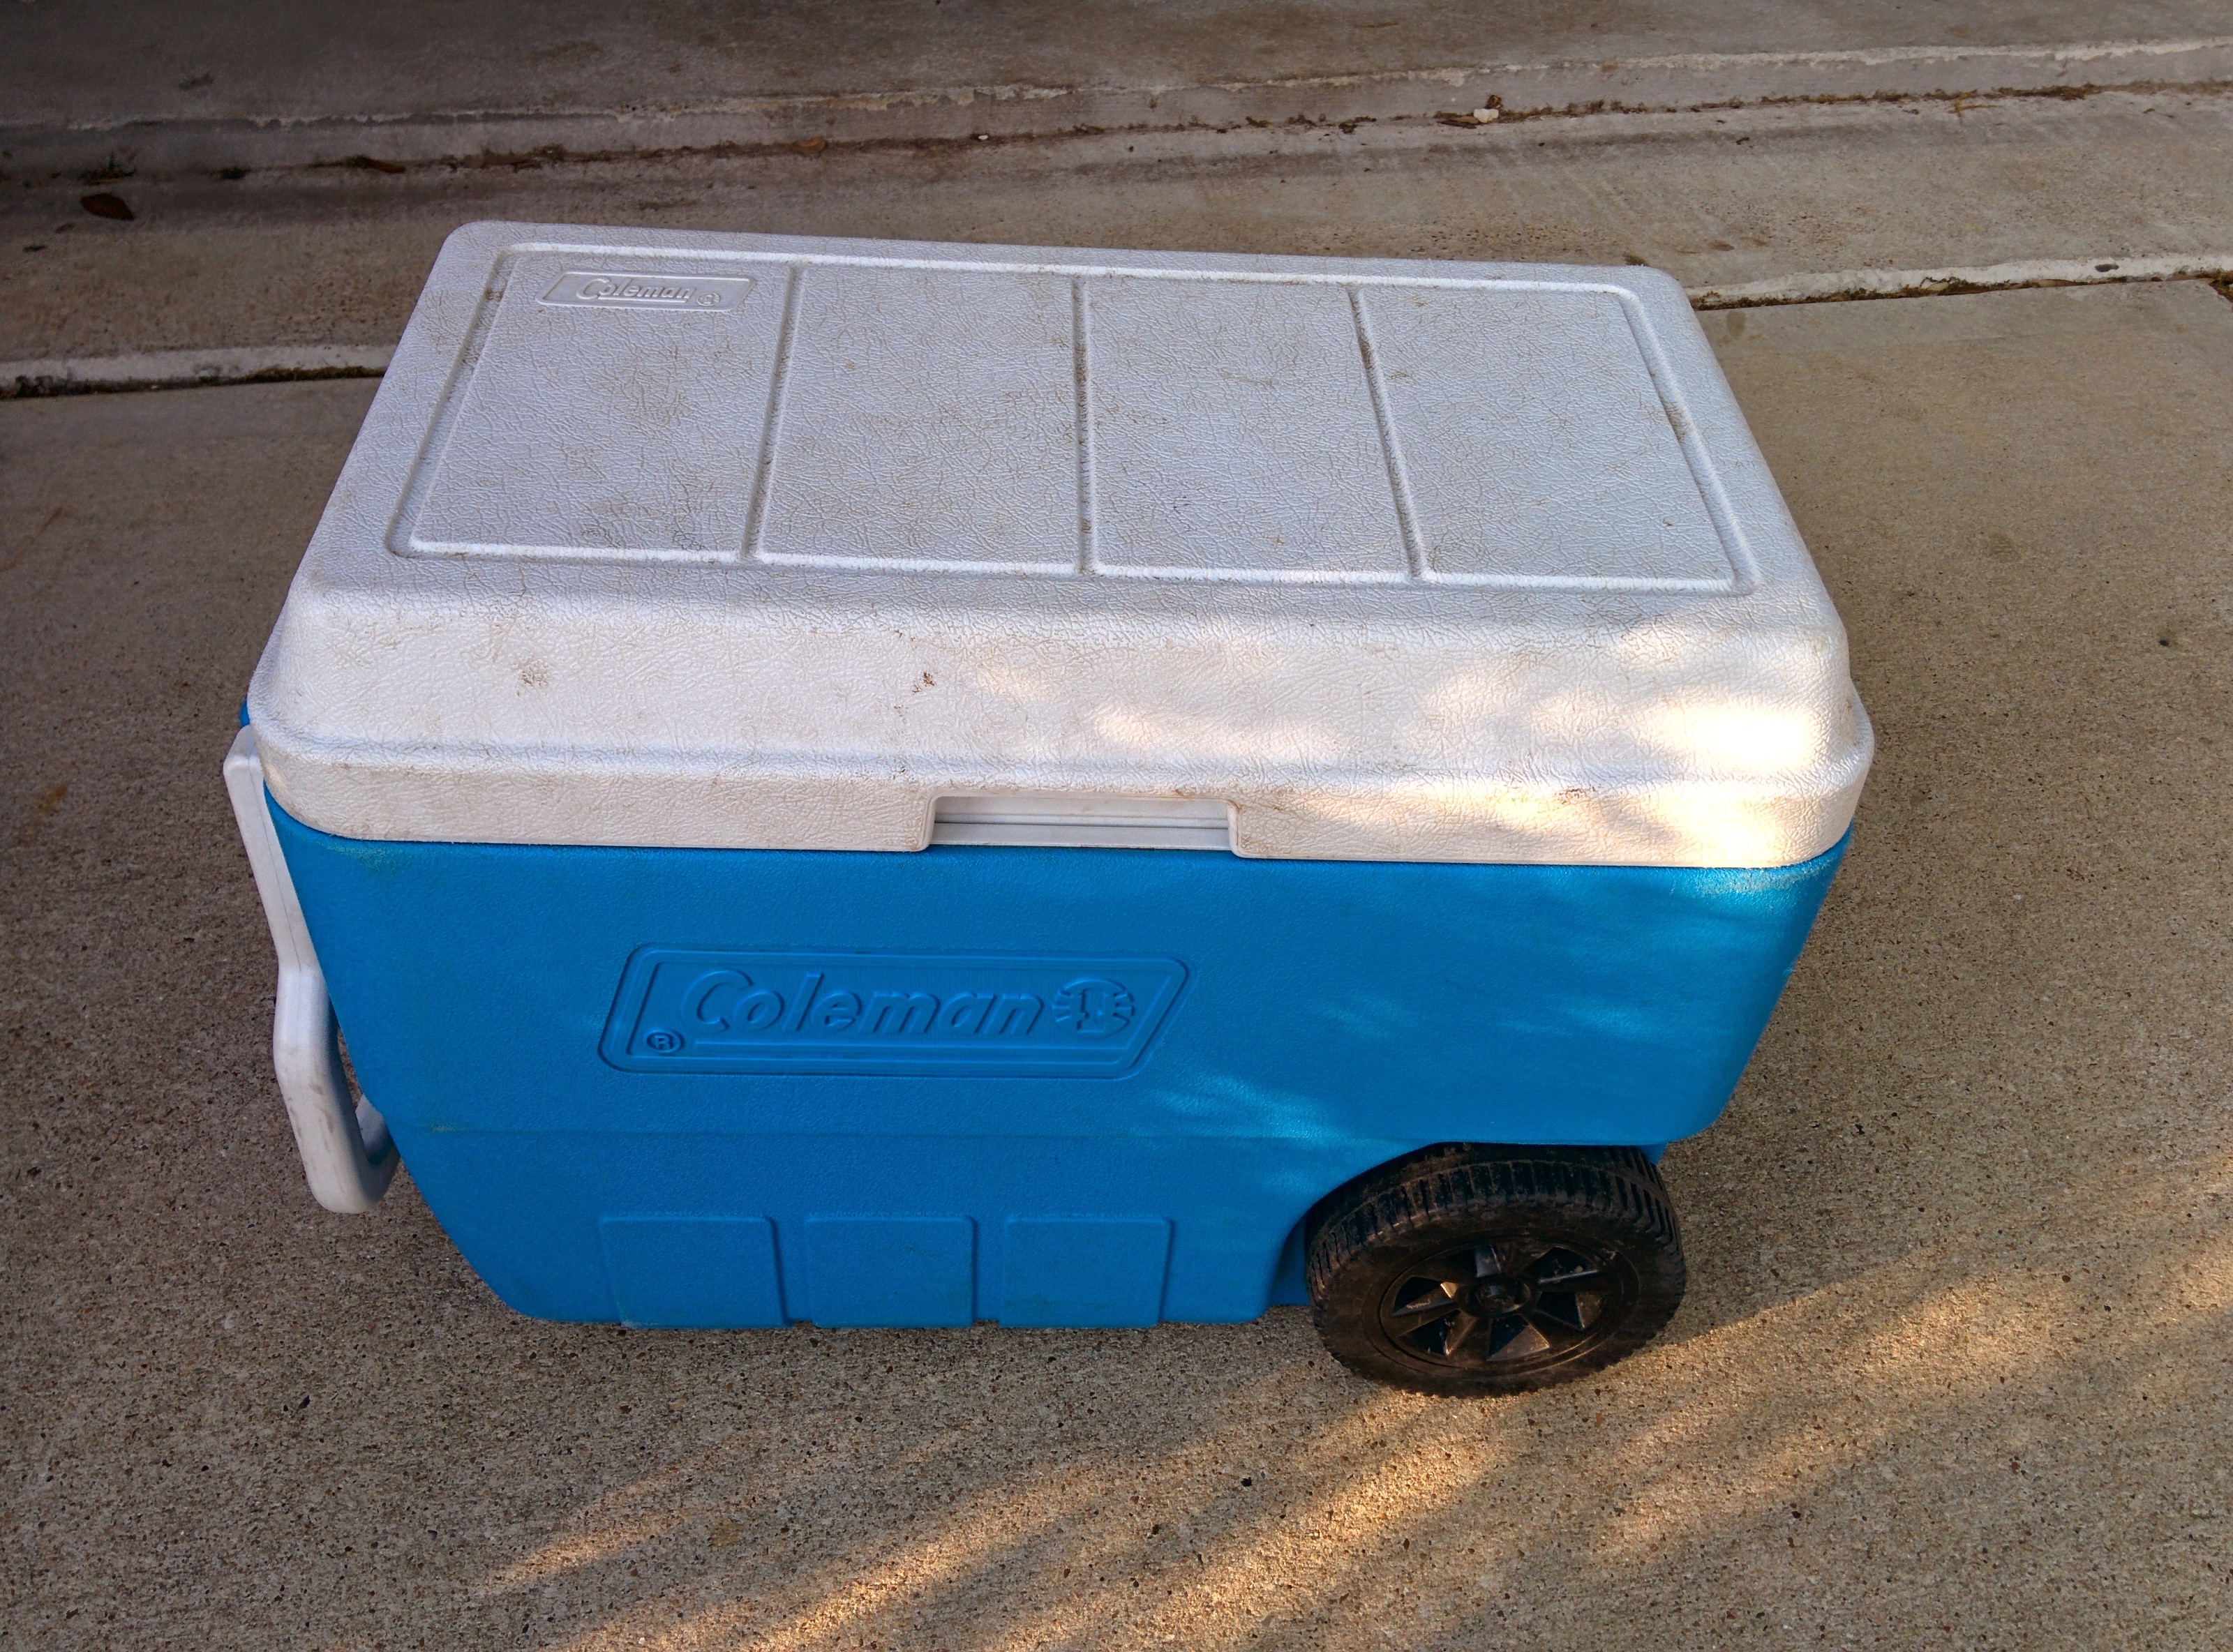
All kinds of possibilities!
It has 1″ thick walls, lots of room inside, a handle and wheels! The lid not being hinged on is actually a plus as it allows removing the lid completely to permit work inside.
Part 1 of this article will focus on the physical and AC electrical side of the build.
Electricity and Safety
I wanted first and foremost for the AC part to be as safe as possible. Just like in the walls in your house, what that means is containment of all connections via blue boxes and a master junction box. It also means having a circuit breaker or a ground-fault circuit interrupter. I chose the latter.
Step 1: Install the AC blue boxes and outlets in the sidewalls of the cooler.
I wanted to have 10 outlets total as I have 10 relays available for control, which means having 5 duplex outlets. I also wanted a simple light switch to help to turn off all exterior outlets if necessary, for safety reasons and to permit debugging code and music without having to worry about driving the external lights. The outlets were planned to be on the ‘back side’ of the cooler.
Out came the cutting tools…
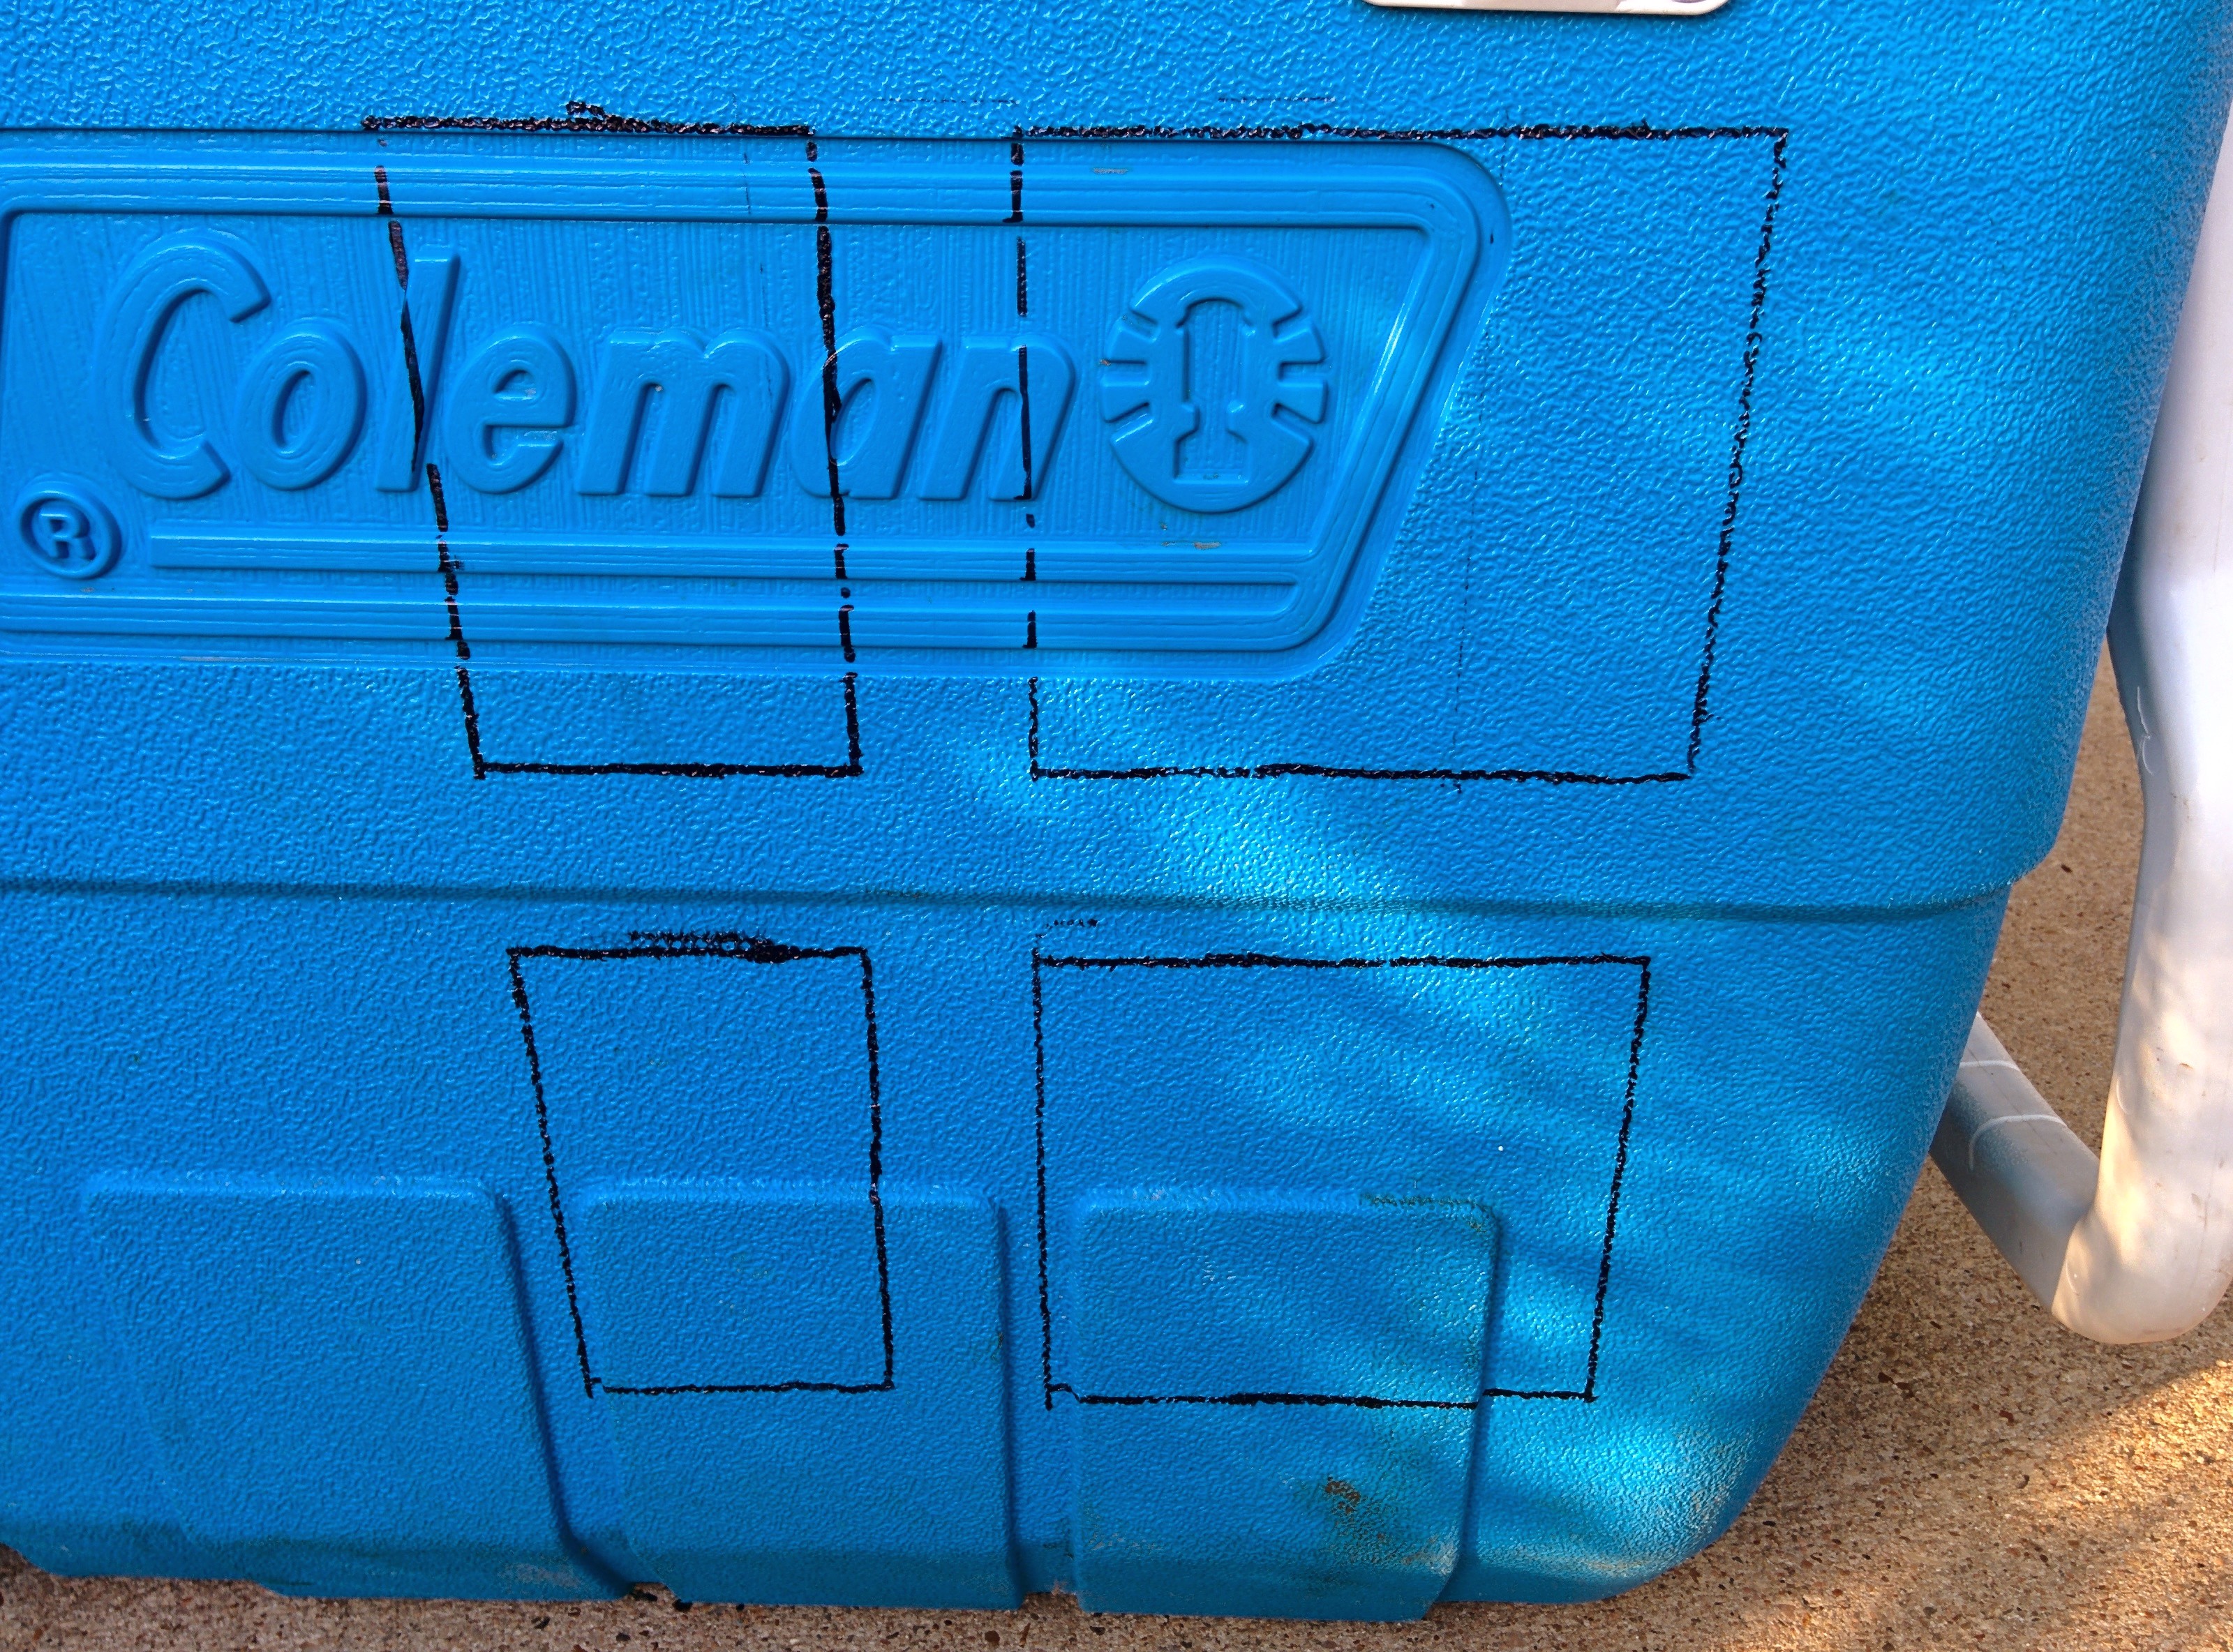
Outline for blue boxes on Cooler back side.
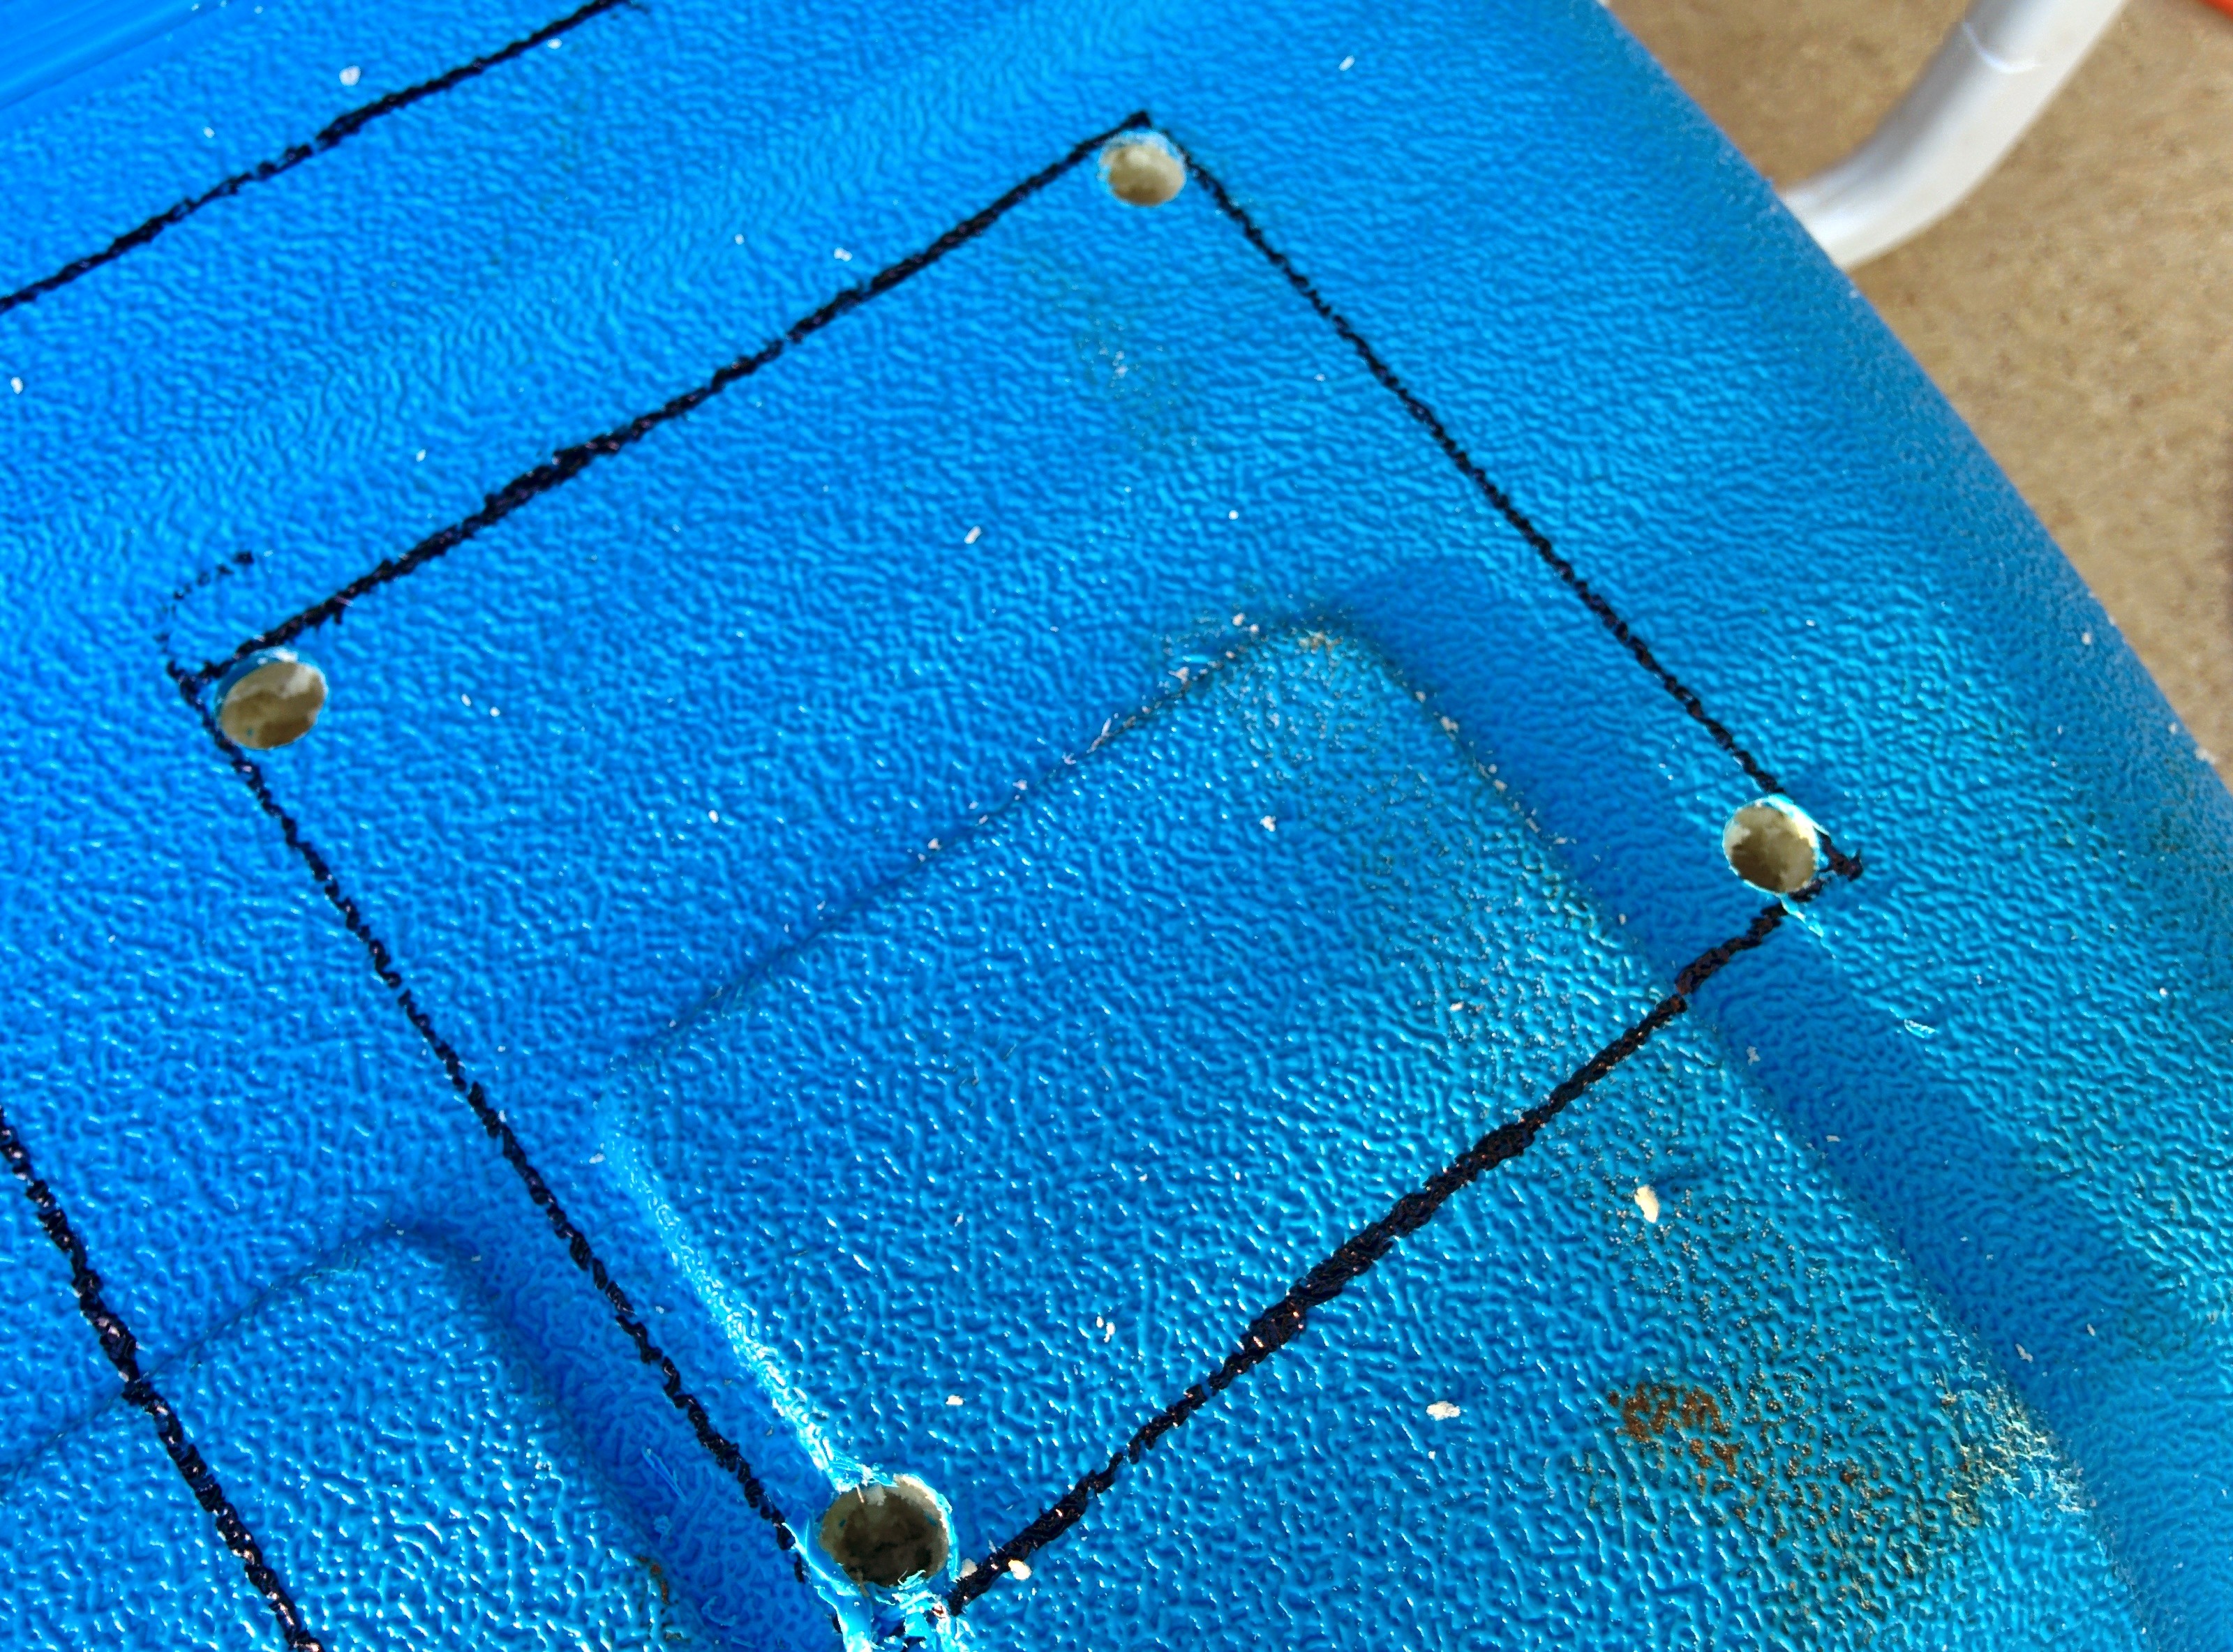
Holes drilled at the corners. Used a bit large enough to permit inserting jigsaw blade later.

Used a jigsaw inserted into the corner holes to cut out the rectangles.
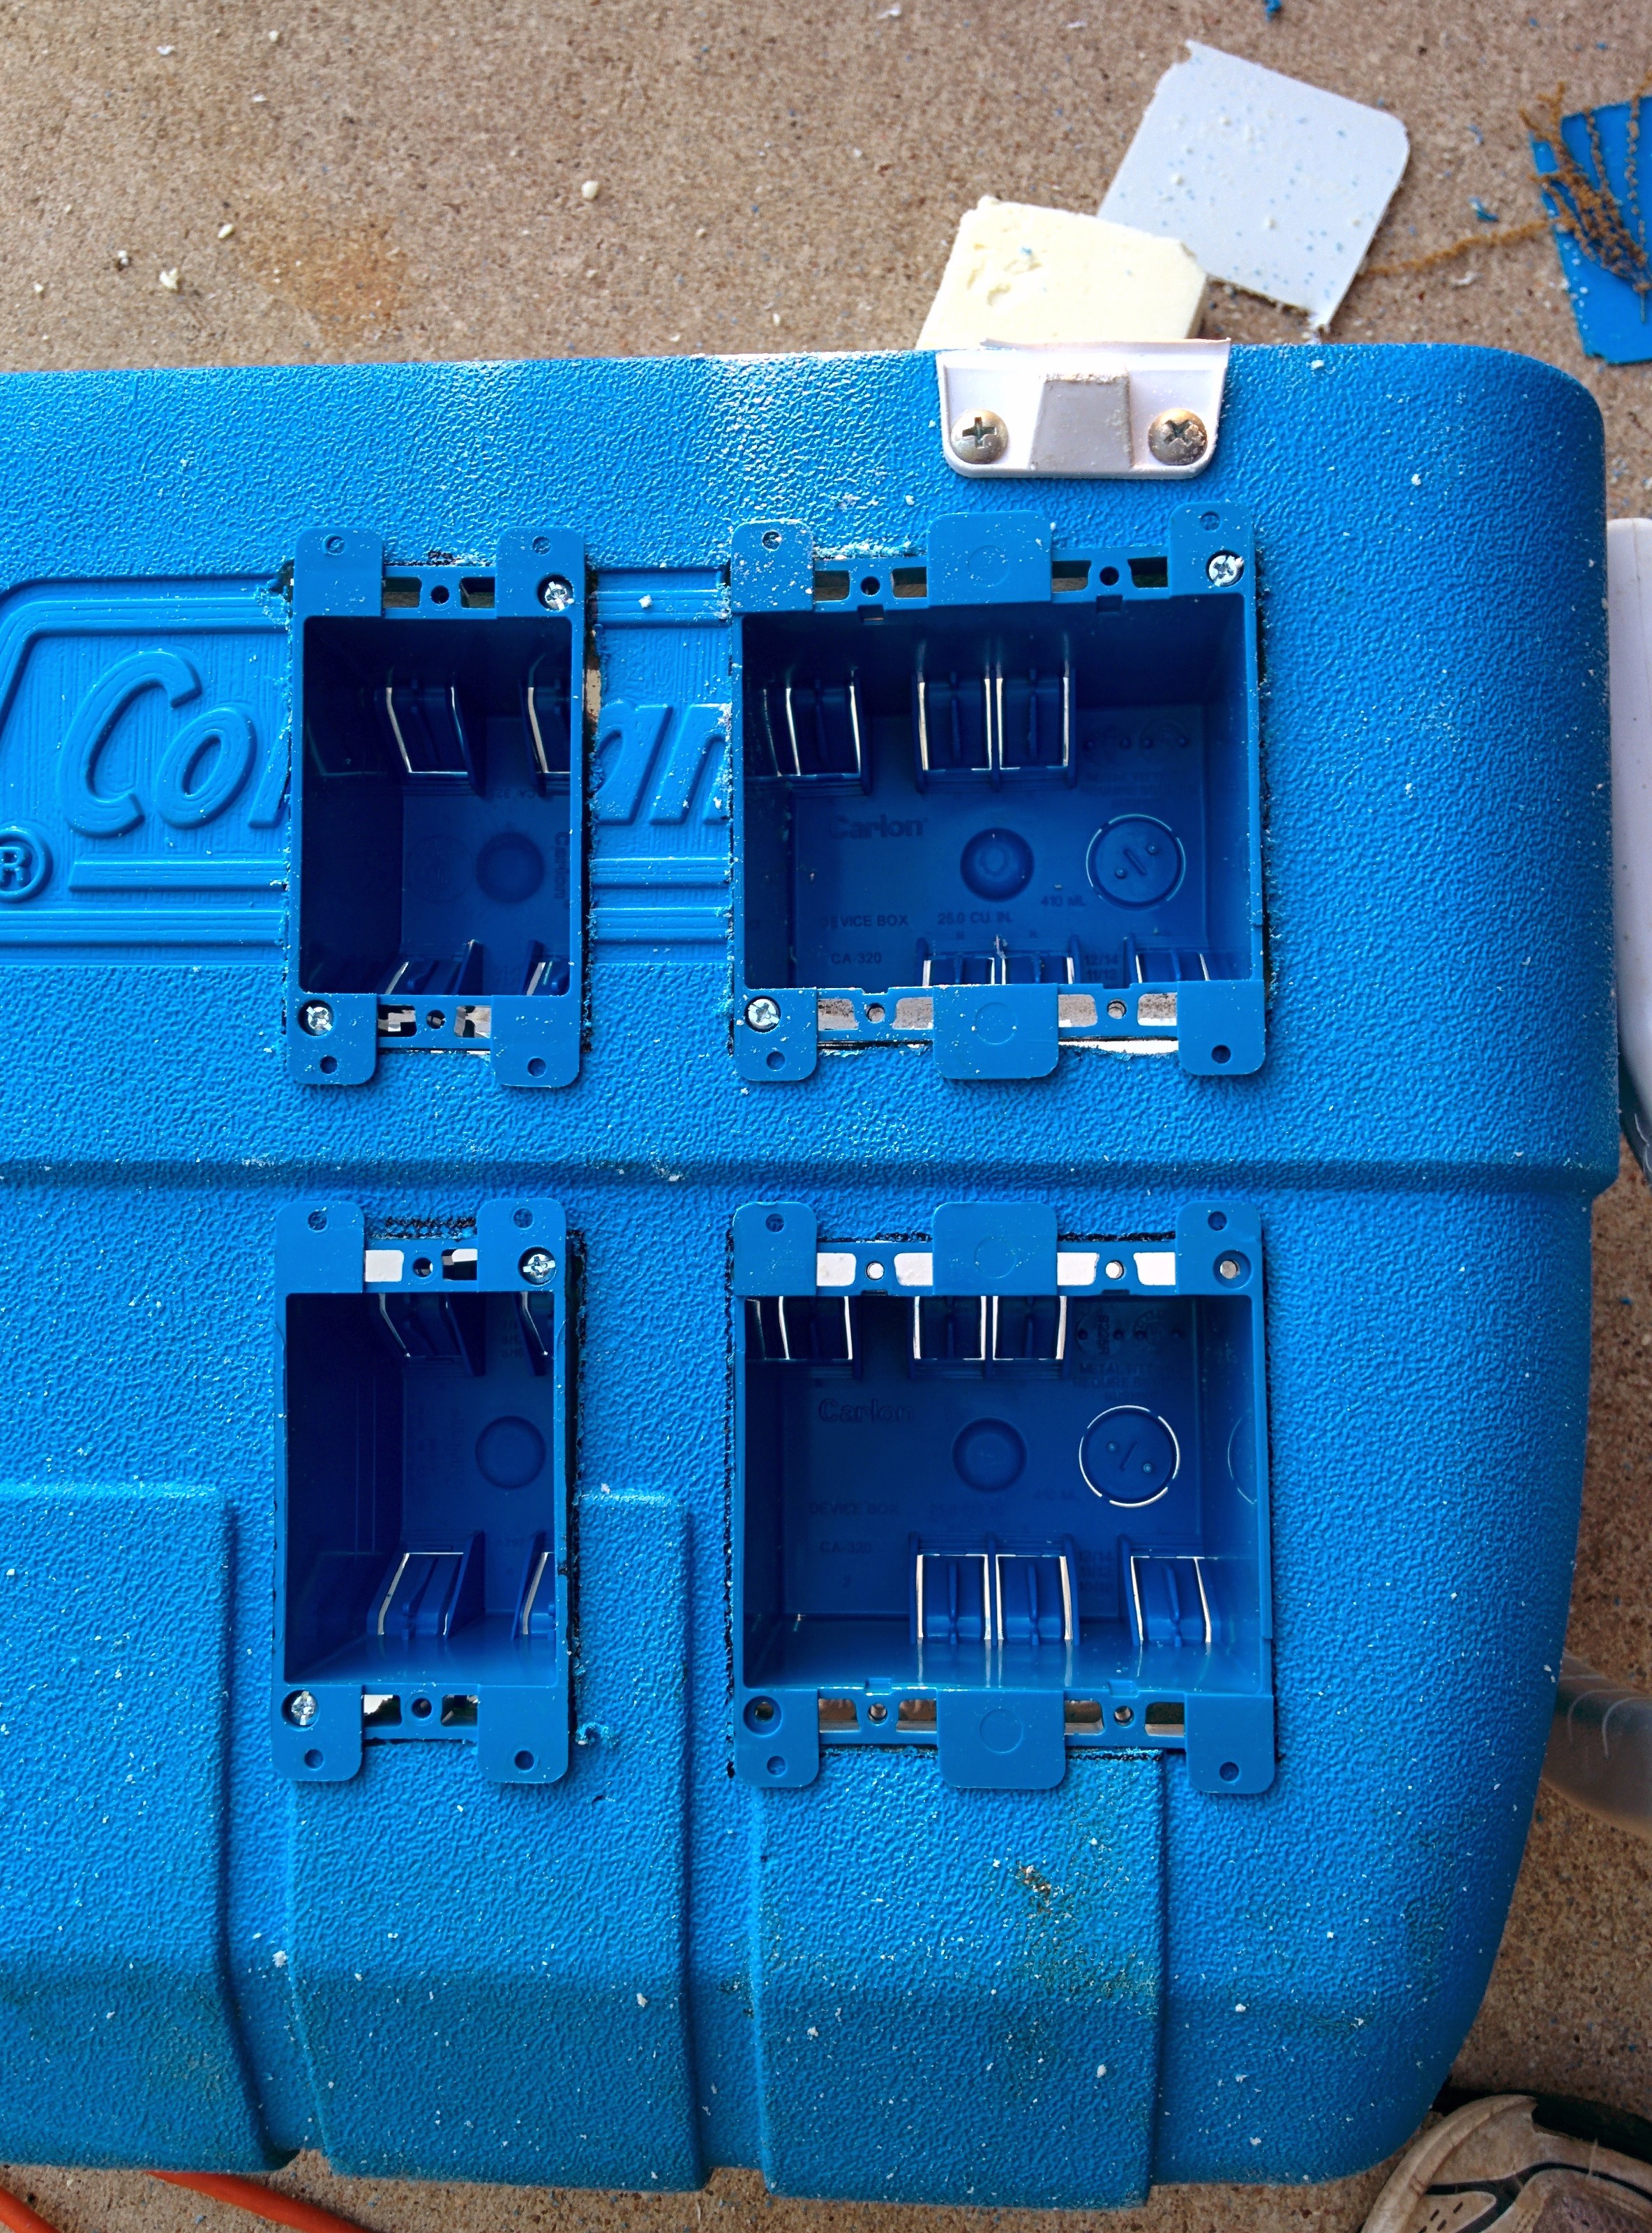
Screwed in the boxes.
Normally, in a house wall you’d want to attach these blue boxes to a stud behind the drywall. However, in this case the plastic exterior and interior of the cooler were tense enough to support the boxes.
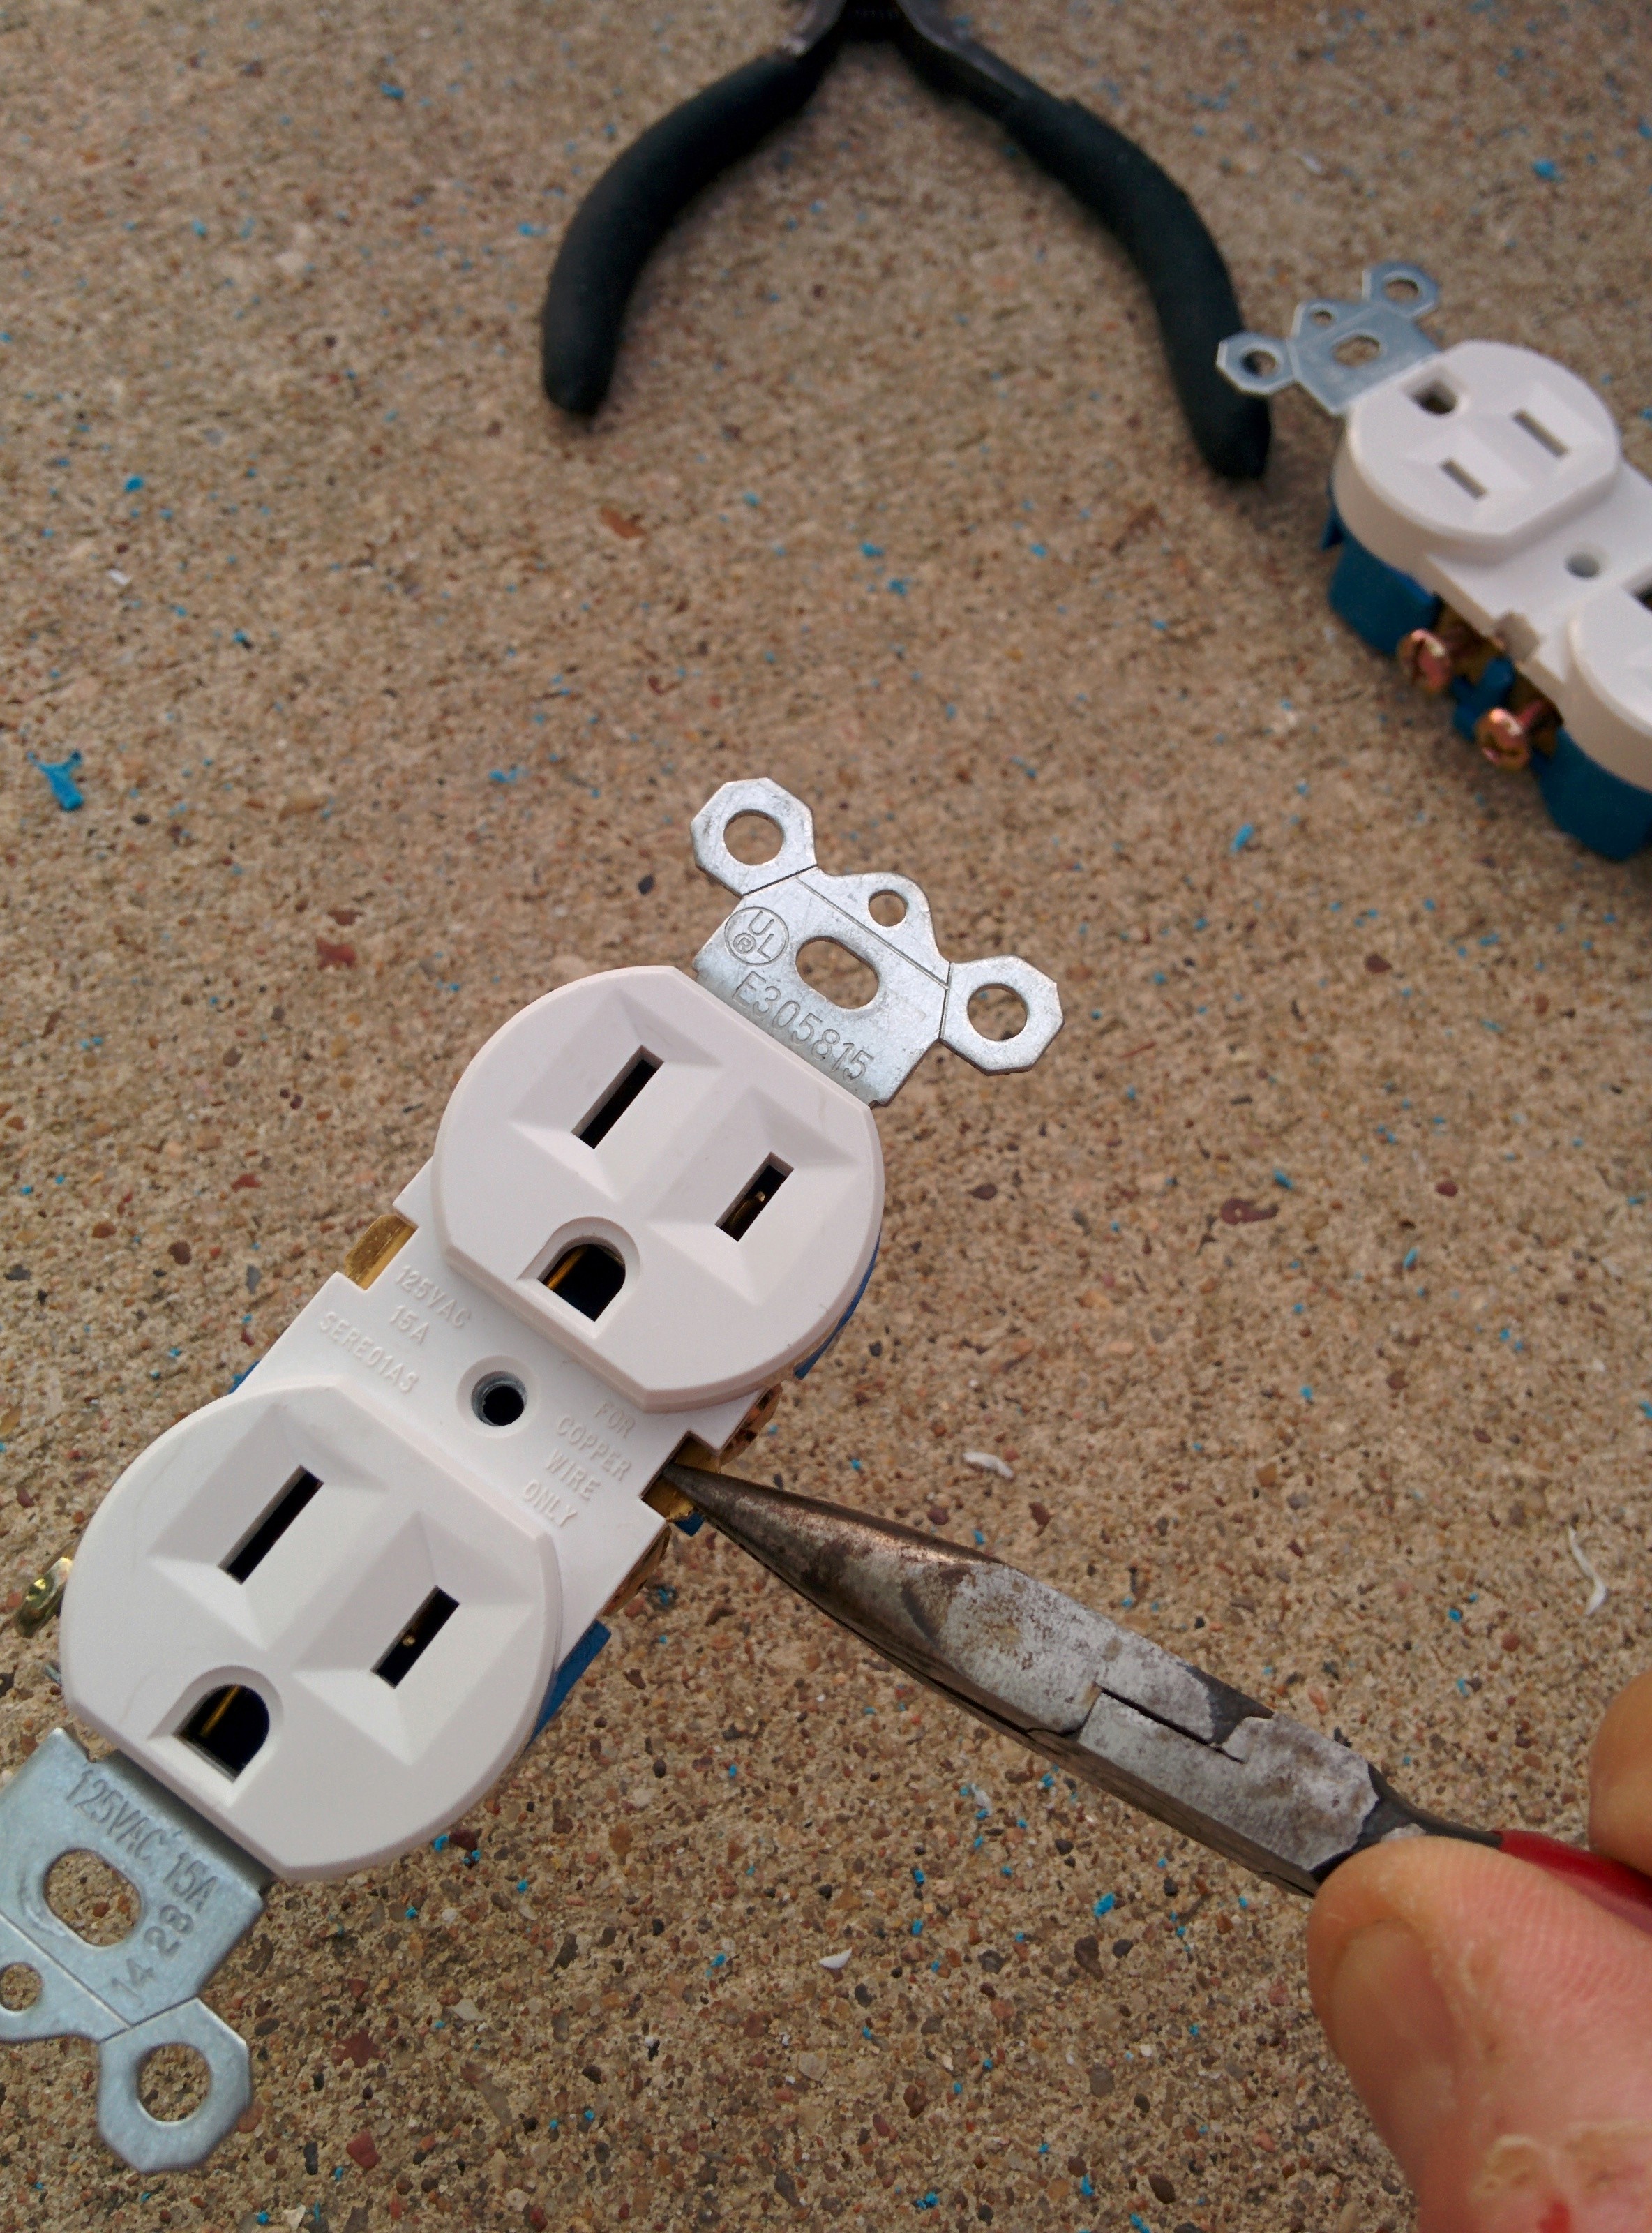
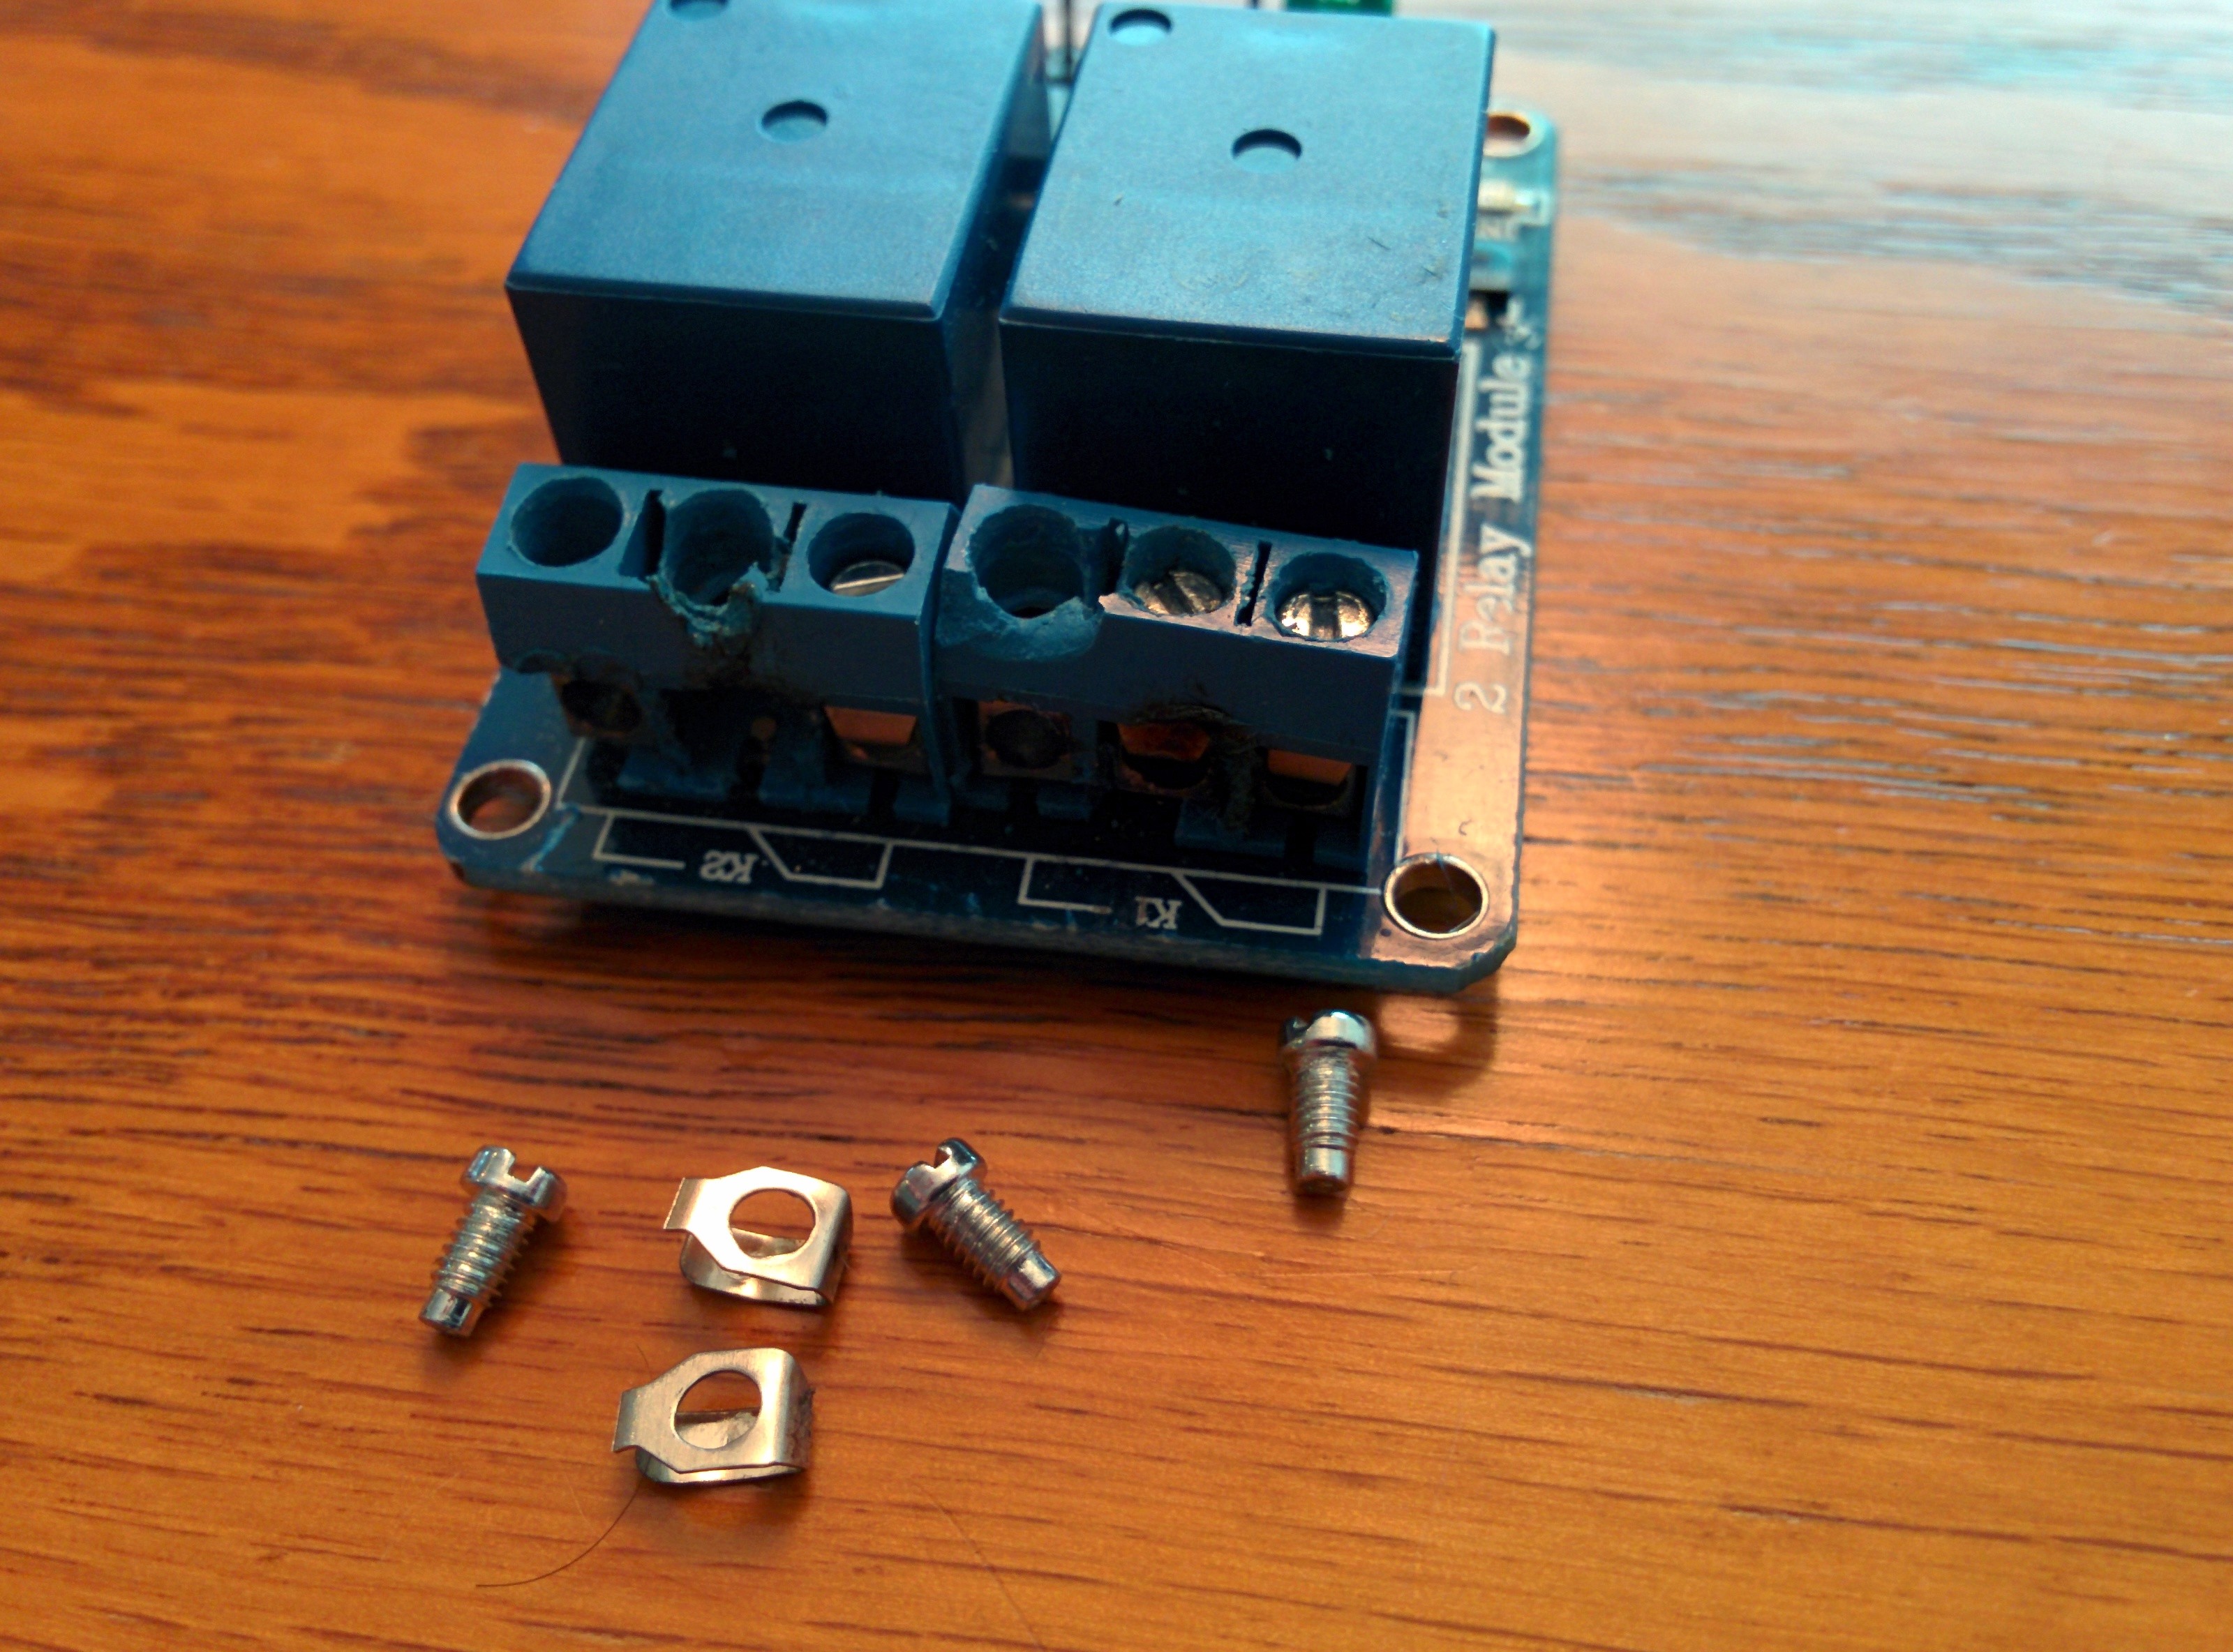
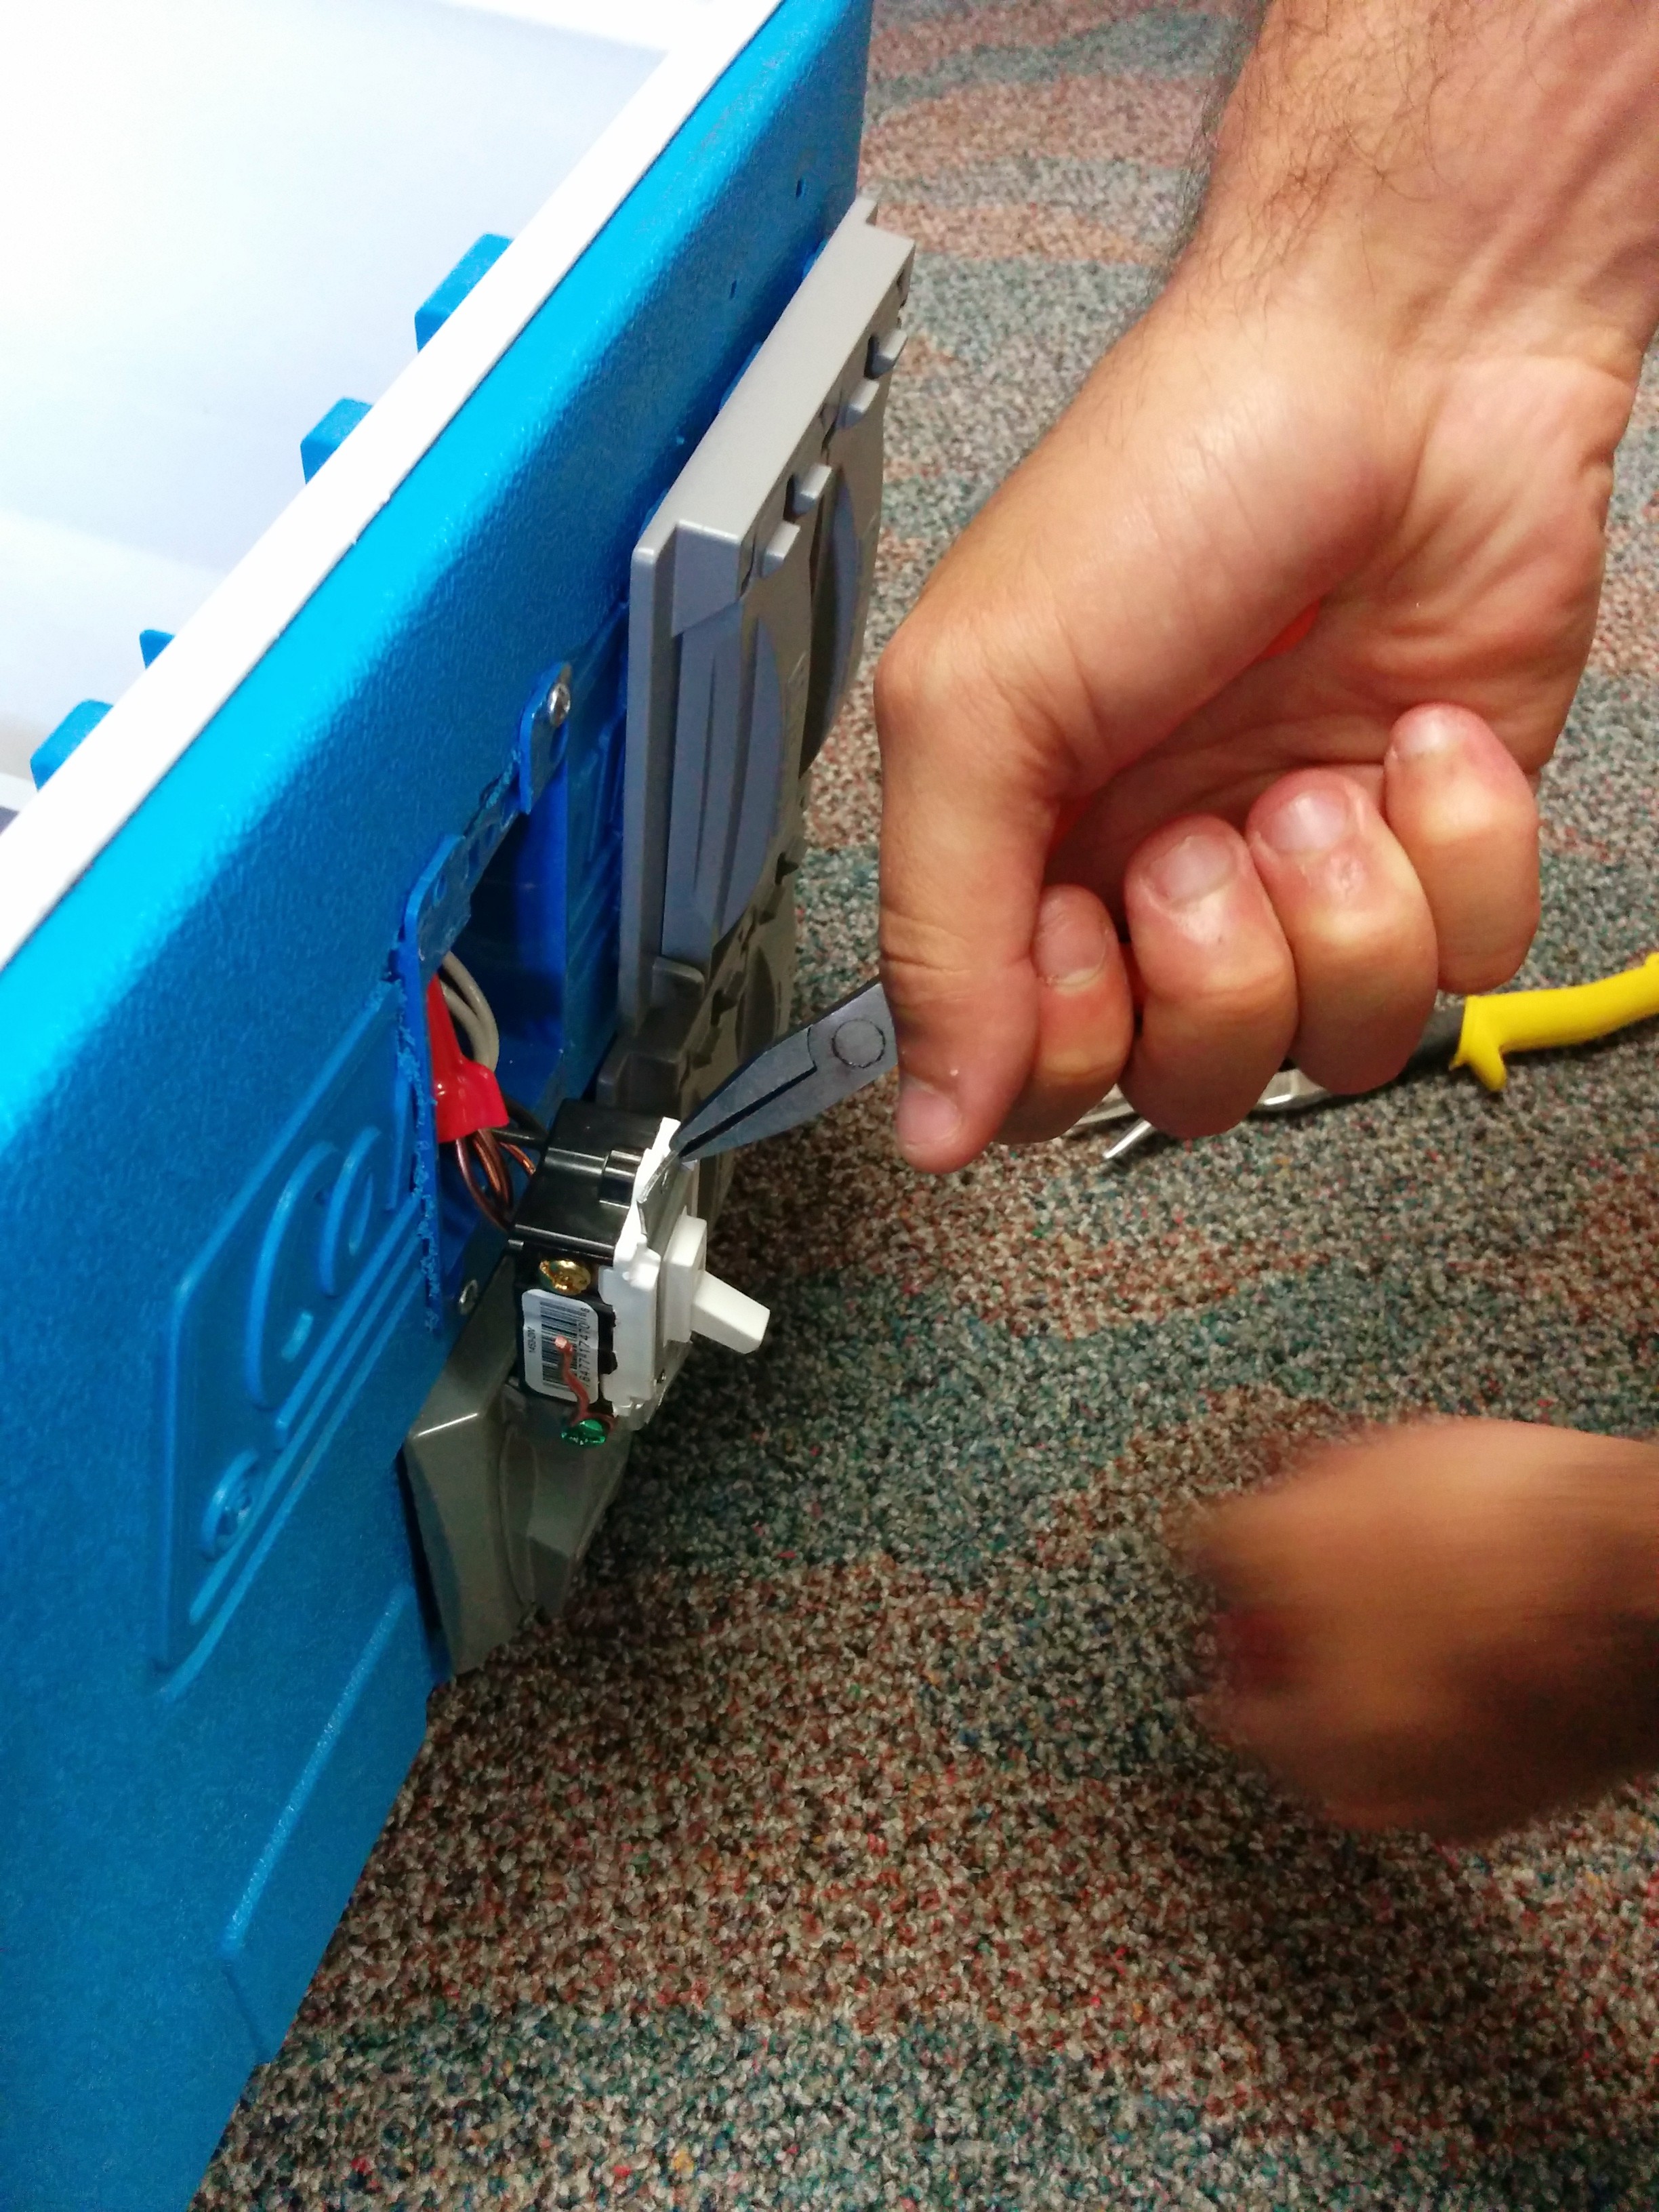
The next step was to loosely install the AC outlets to check the fit. I planned to remove them again later when doing the final wiring so here just installed them mainly as a placeholder. Prior to the install, since I wanted to individually control the outlets later, I went ahead and removed the tab connecting the hot sides together. I used pliers to wiggle the tab back and forth to break it off.
Removed hot side tab shorting the two outlets together.
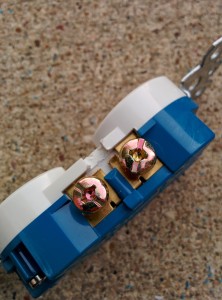
Tab removed.
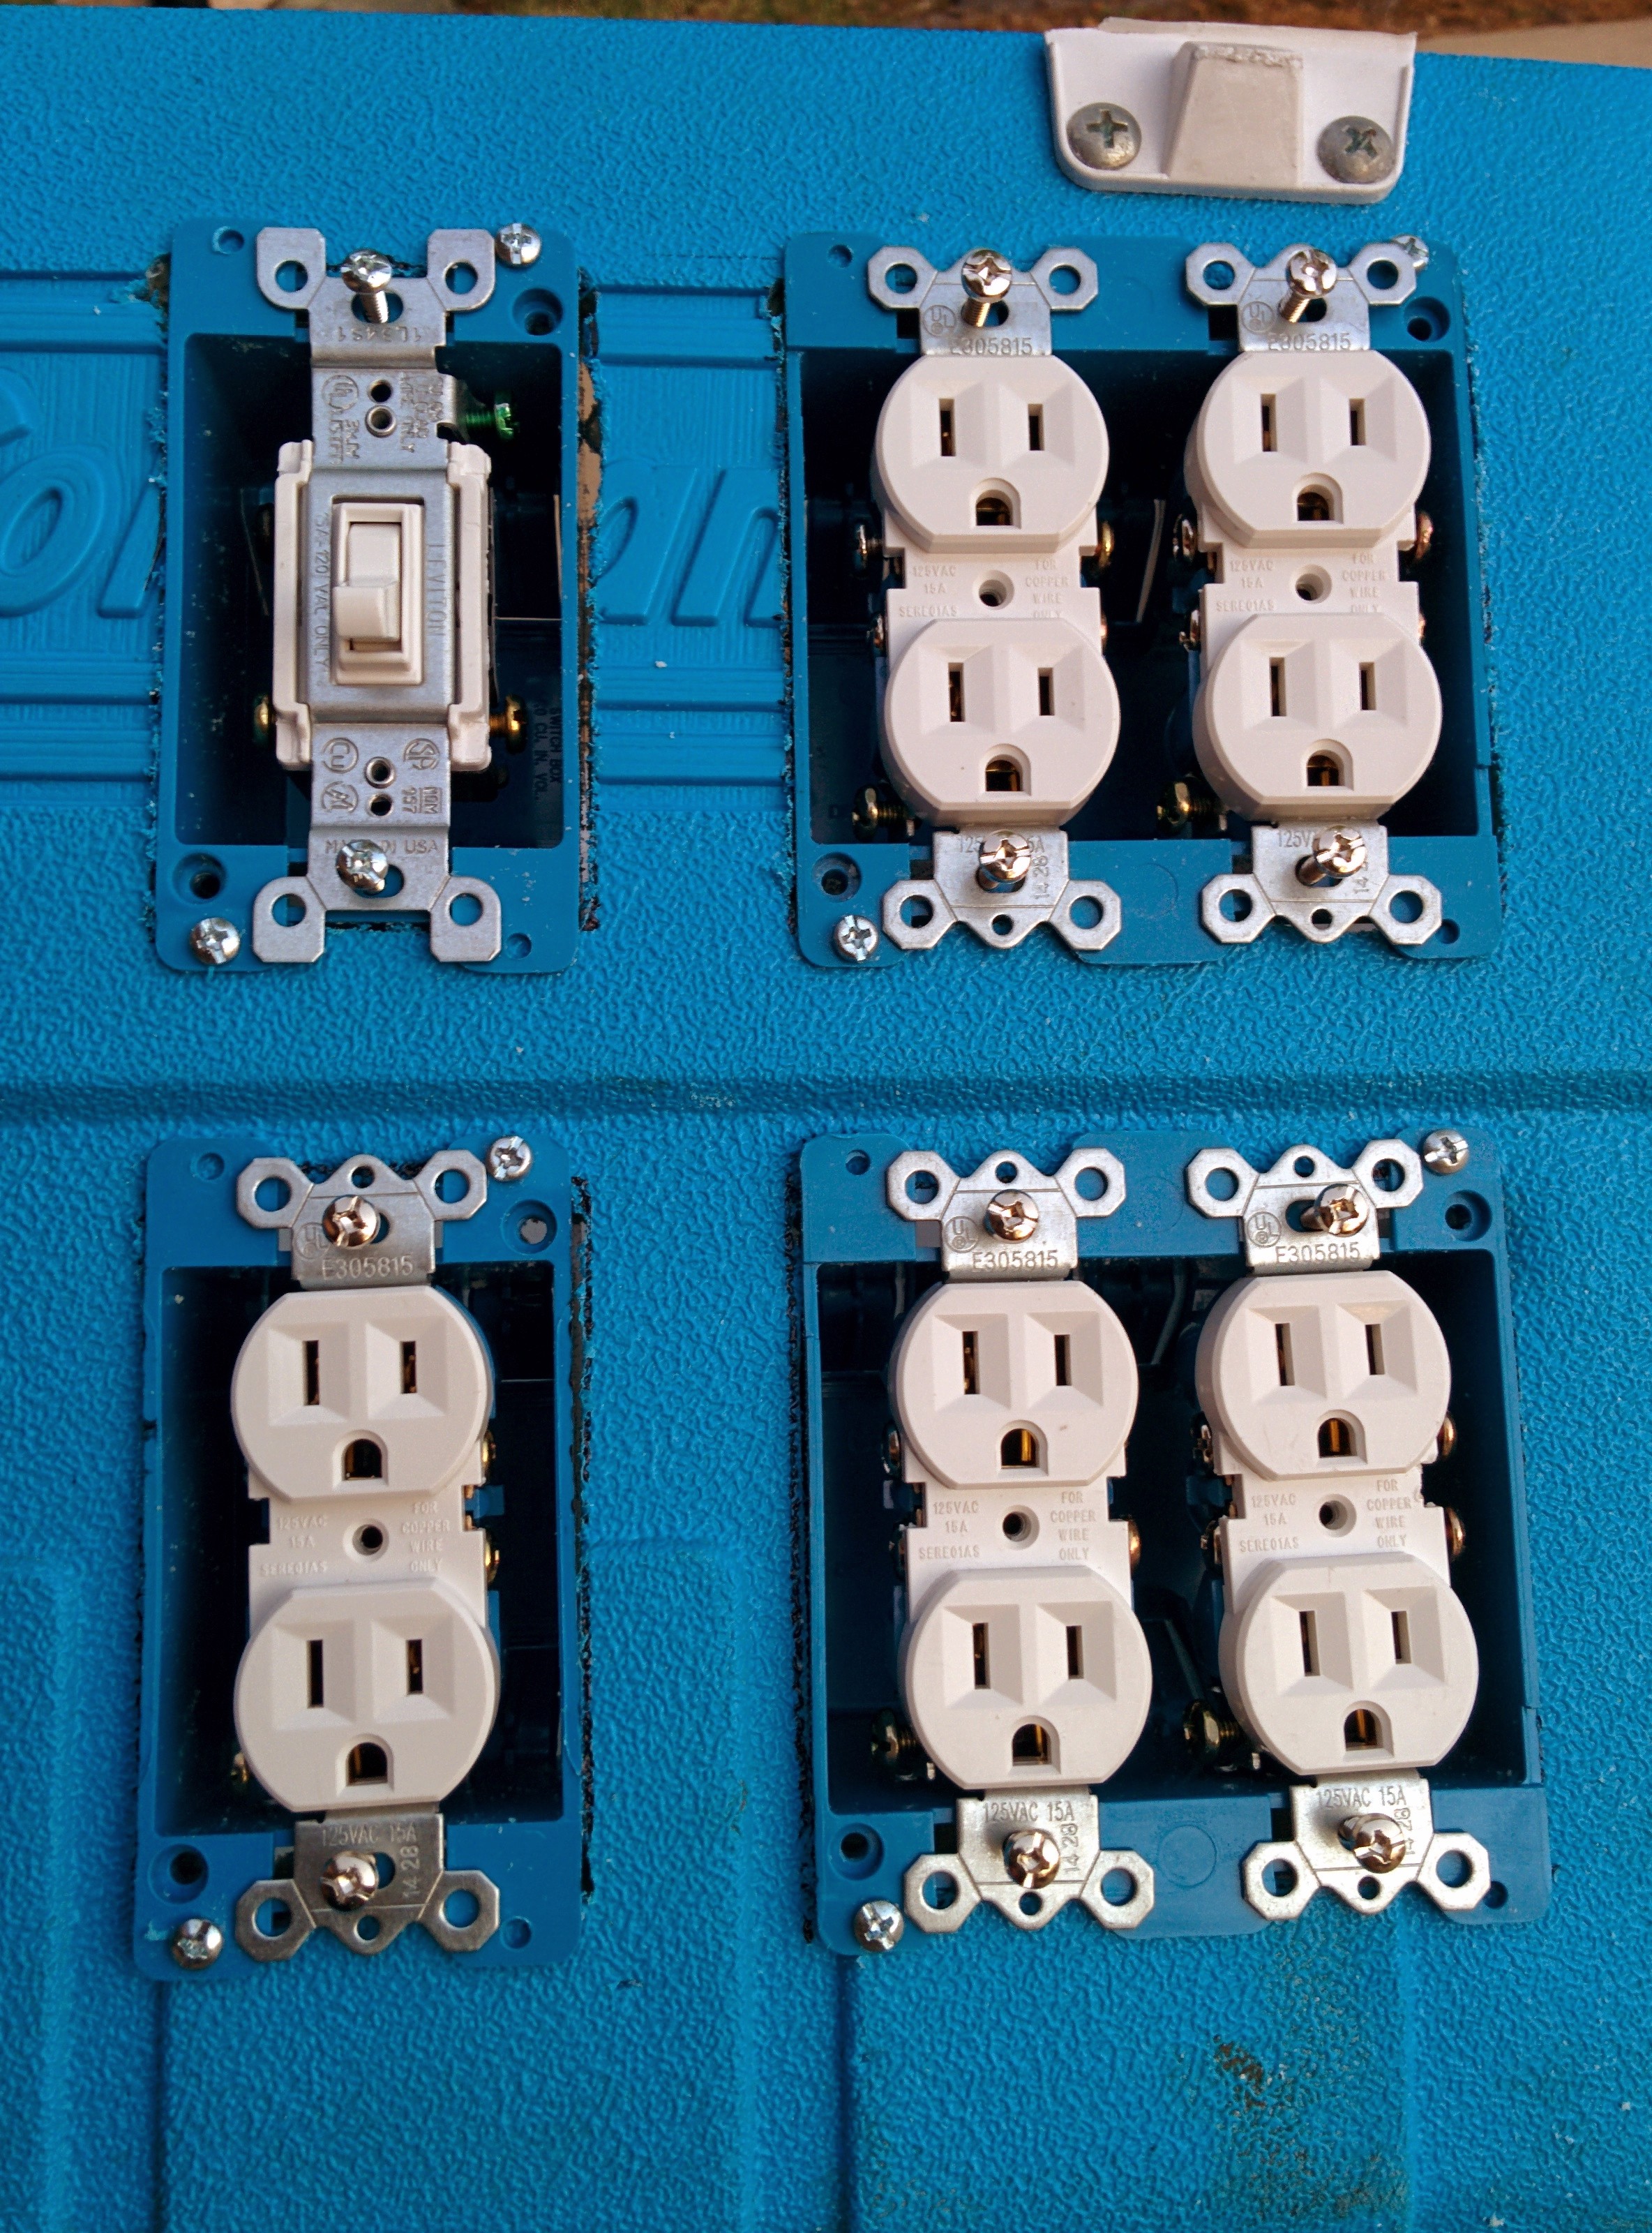
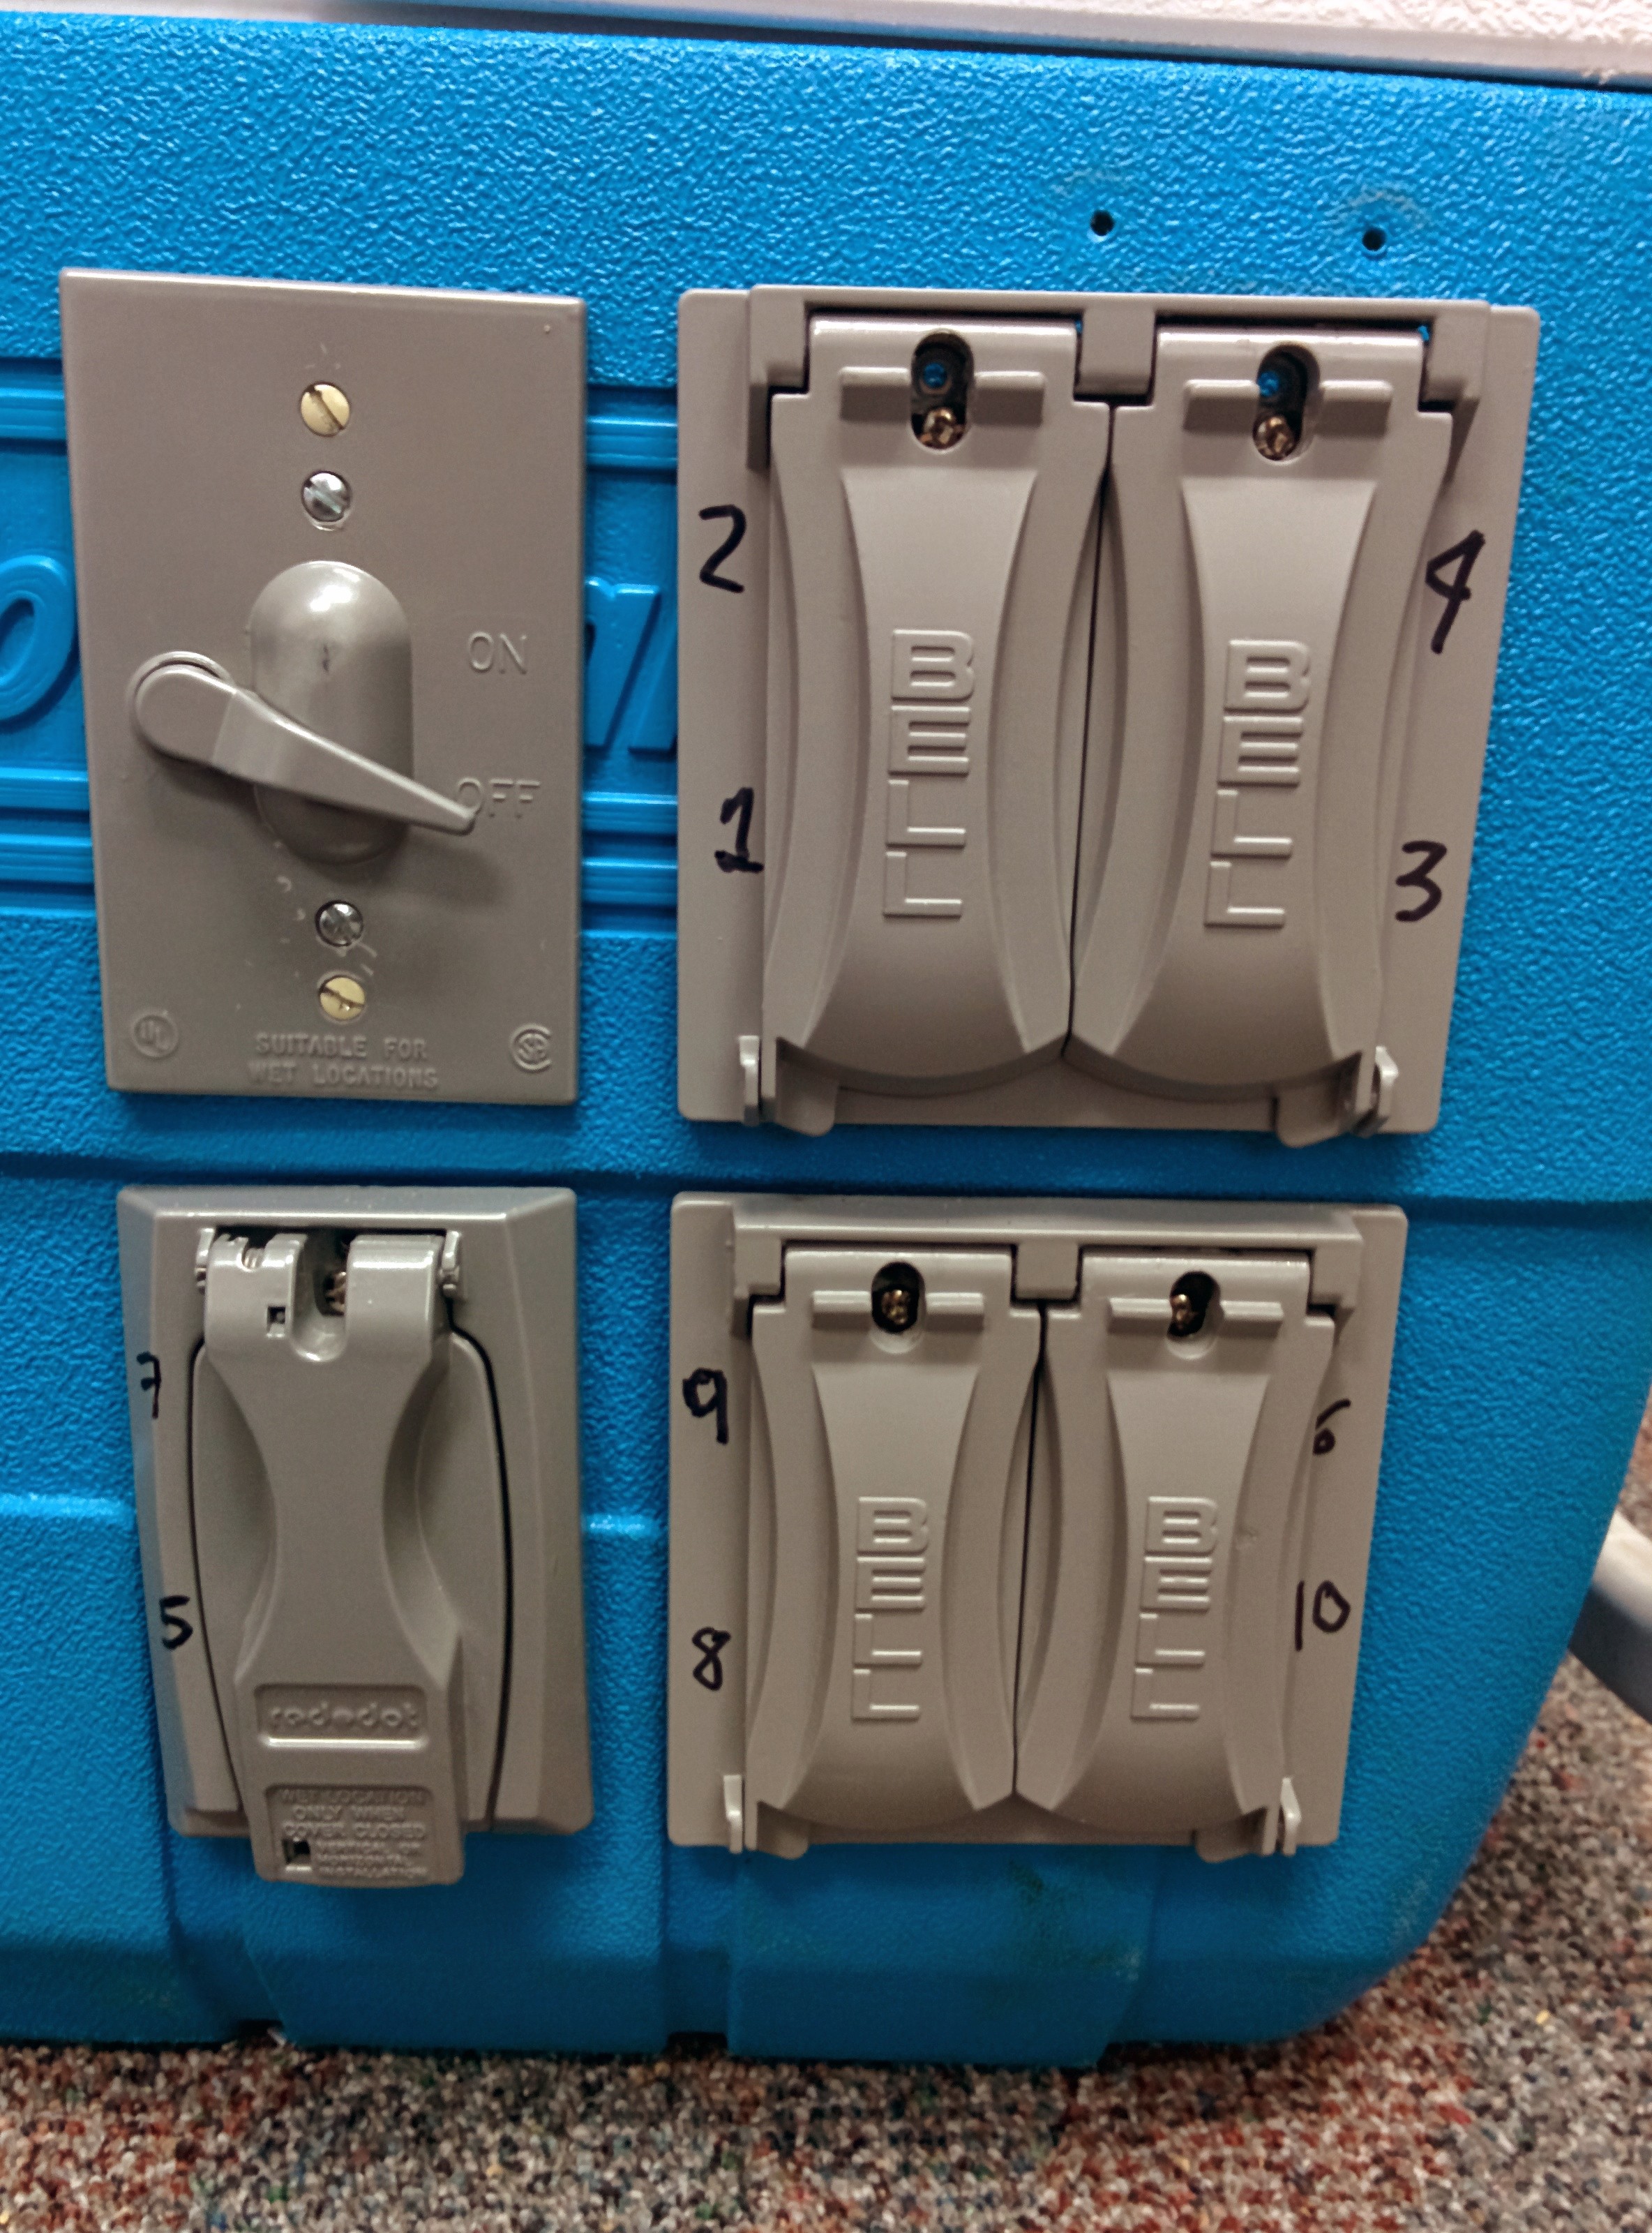
10 outlets and 1 switch added.
Wiring
Step 2, wire up the AC circuit. Here’s a diagram showing the AC side of the circuit:

AC side of Magic Cooler Circuit
Basically, power comes in to the Cooler via a 3-prong wire (hot-neutral-ground) and goes through a master switch and a GFCI outlet which will be located inside a separate blue box inside the cooler and serves to protect the remaining outlets downstream. Let’s follow each line separately:
- Ground (GREEN): Directly connects to every ground screw you can find. Not shown above is the ground connection to the metal junction box housing the 10 relays.
- Neutral (White): Connects to LINE side of GFCI outlet– comes out of LOAD side of the GFCI receptacle and connects to the Neutral connector of every downstream outlet.
- Black (Hot): Connects to LINE side of GFCI outlet– comes out of LOAD side of the GFCI receptable and connects to the secondary Light Switch. Hot leaves this light switch and connects via a bus terminal to the Normally Open side of each of the 10 relays.
- Red (Switched Hot): Connect from the common terminal of each of the 10 relays to the Hot screw for each of the 10 switched outlets.
I used #12 Romex to do the wiring, although I probably should have used something smaller gauge for the short runs here as #12 is difficult to work with (hard to bend), but at least now I know the circuit is very robust.
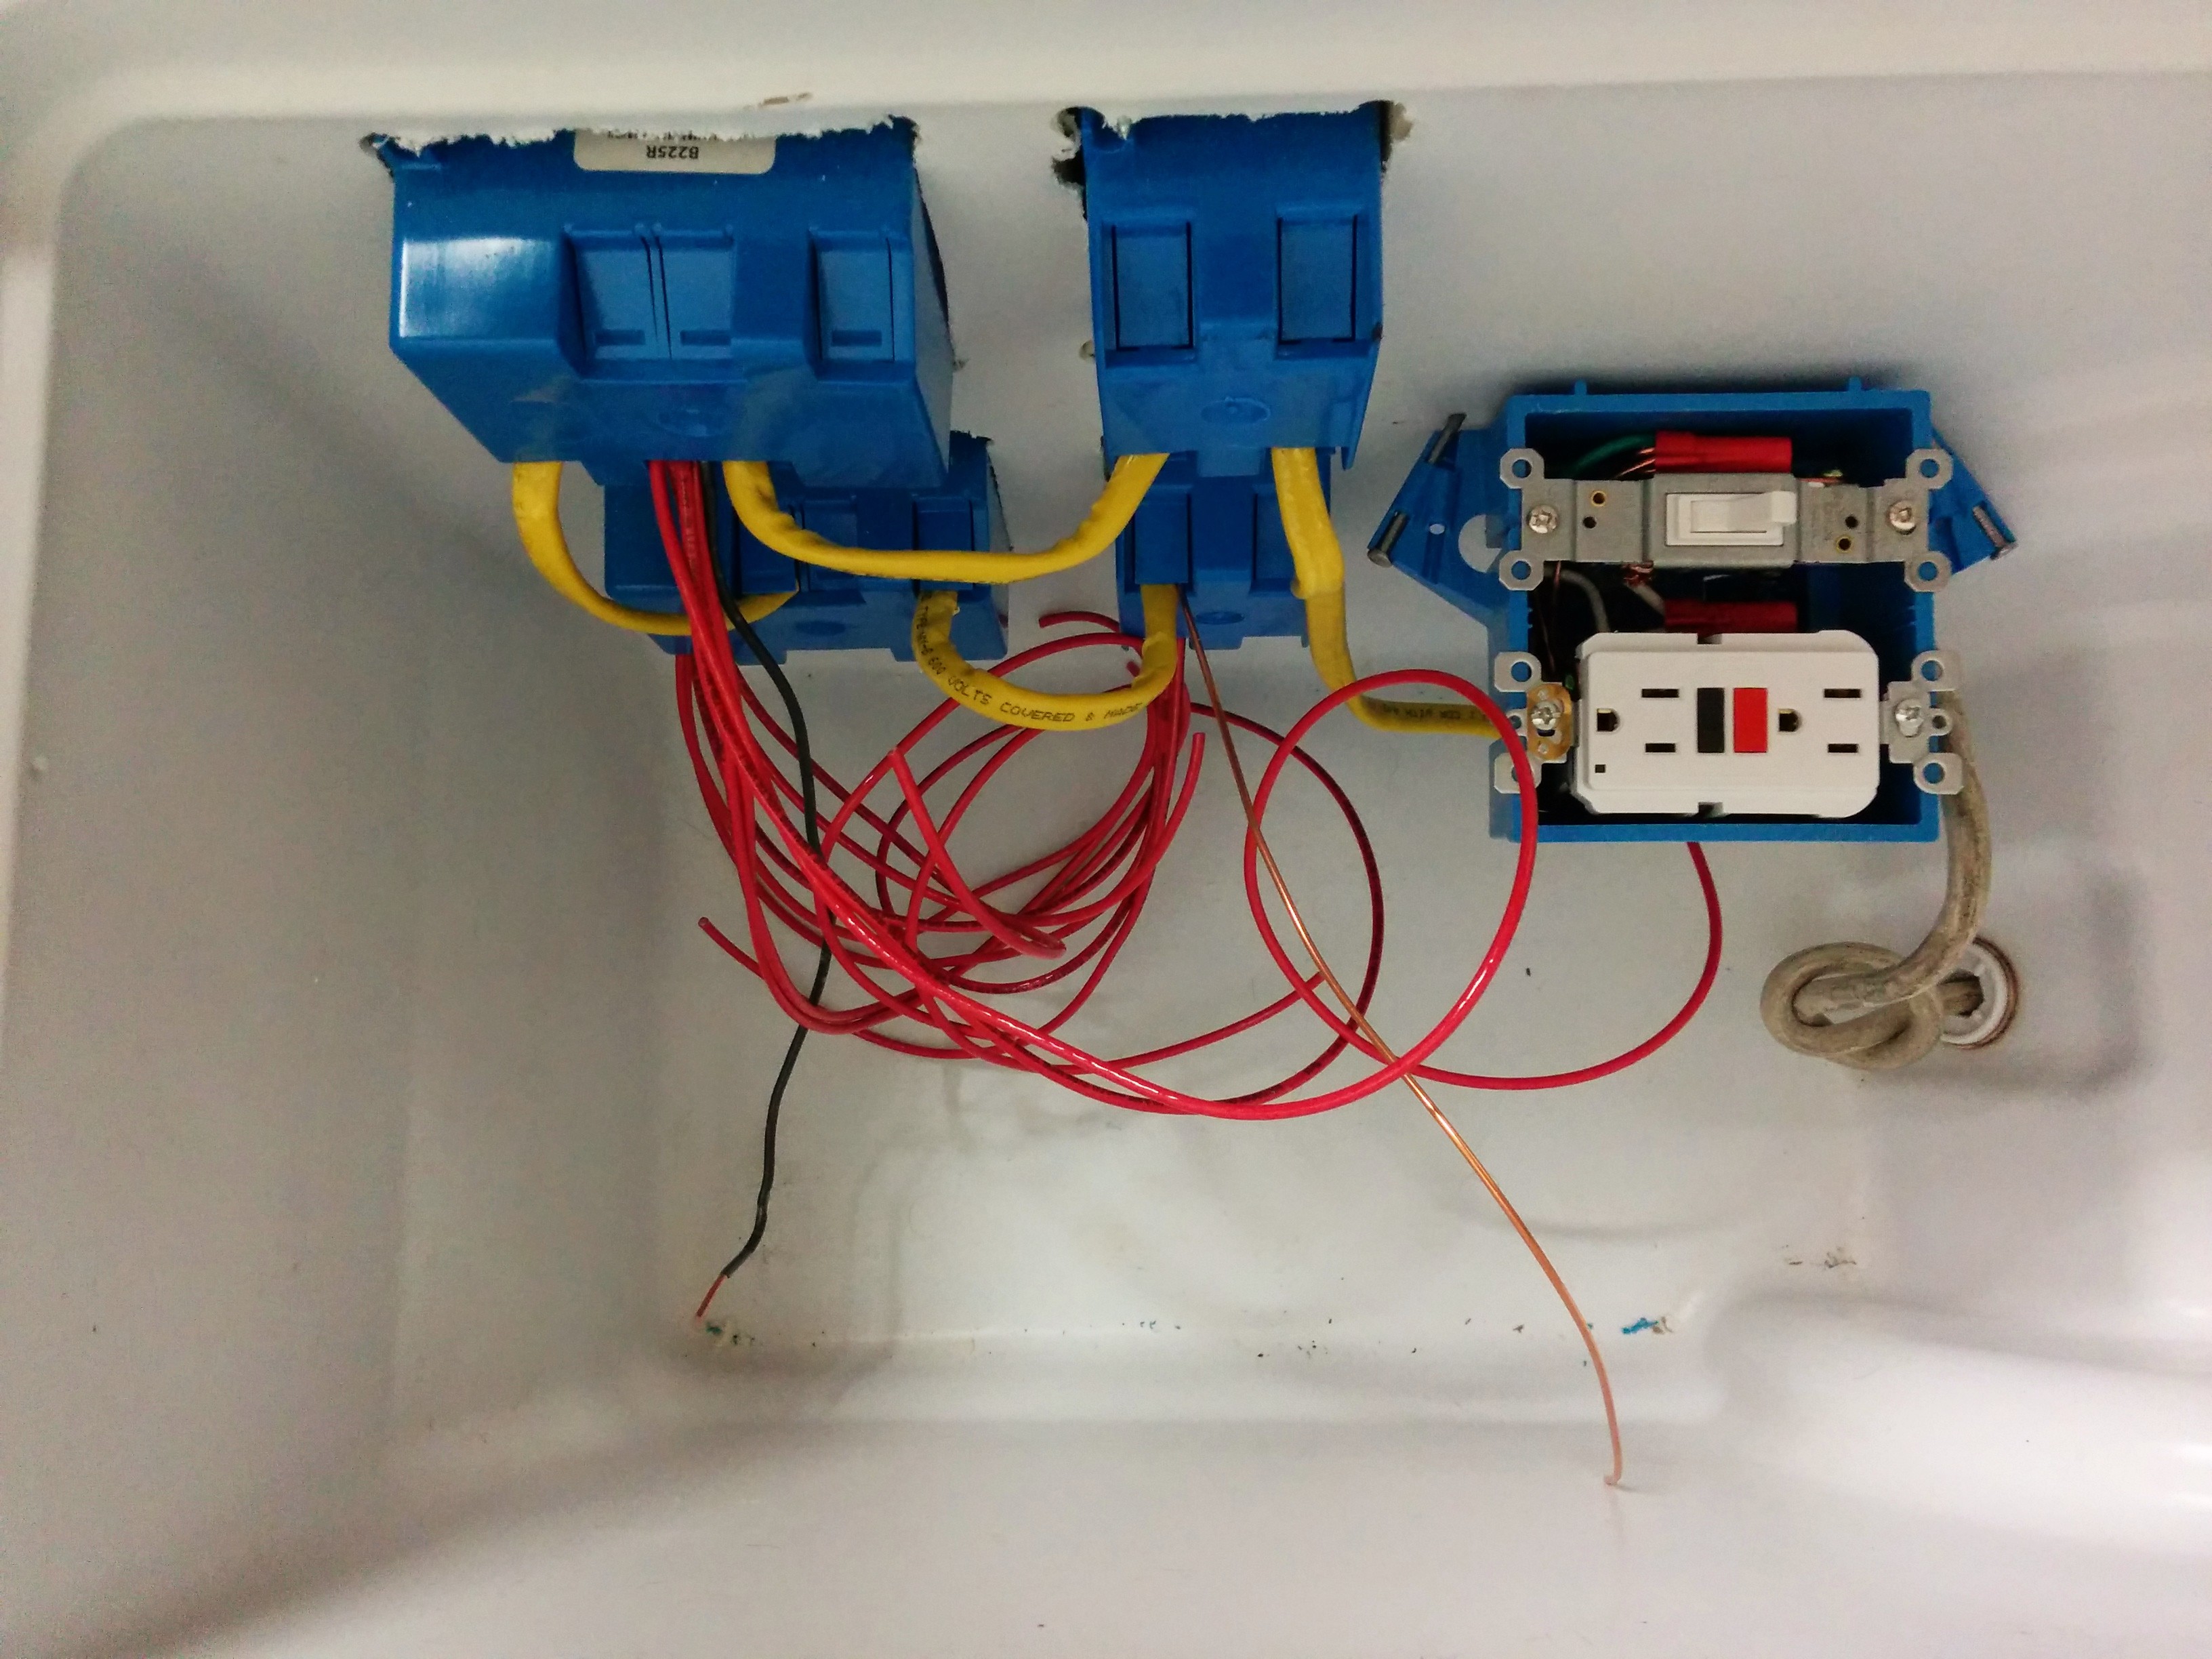
Main blue box wiring done.
I ran the 3-wire Romex box to box just as is done in a house wall. However, after the first set of duplex outlets the hot (black) wire was removed from the Romex bundle and brought down to where the future junction box would be. Red wires were connected to the hot side of each of the 10 outlets and also run down to where the junction box would eventually be.
I decided that the GFCI receptacle and master switch should be located inside the cooler. The GFCI provides some protection from accidental touching, wires coming loose creating shorts, and would help if I ever planned to take the Cooler outside. It would also serve as a standard outlet to power the microcontroller board and other accessories.
Since the Cooler already had a nice, convenient drain hole, I decided to use that to run the main power cord. I cut the power cable from a 10-outlet power strip so was confident it had sufficient current-carrying capacity. A knot was added to prevent from accidental tugs on the power cord from damaging the internal wiring.
Next step, the junction box.
Junction Box Prep
The junction box was used to house the bus terminal to expand the single hot (black) wire to the 10 relays and the connection of those relays back to the switched outlets (red wire). In case of any electrical fire or loose wire, the box would serve as containment and/or ground.
Some electrical stuff is just cheaper to get on Ebay than at your local hardware store, so I found a really nice and strong junction box on Ebay that was the perfect size.
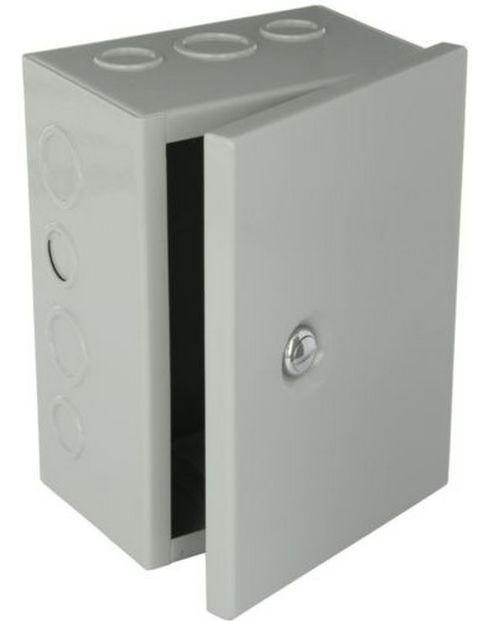
Metal Junction box off Ebay
Next, I had to pop out the 1″ and 3/4″ holes in the box (not easy!) in order to permit inserting cable clamp connectors. These served to hold any wires going into and out of the box and prevent them from rubbing against the edge of the metal hole.
Next, I screwed the box to the bottom of the cooler to hold it in place. I made the junction box door open to the side opposite the blue boxes, to permit easy access.
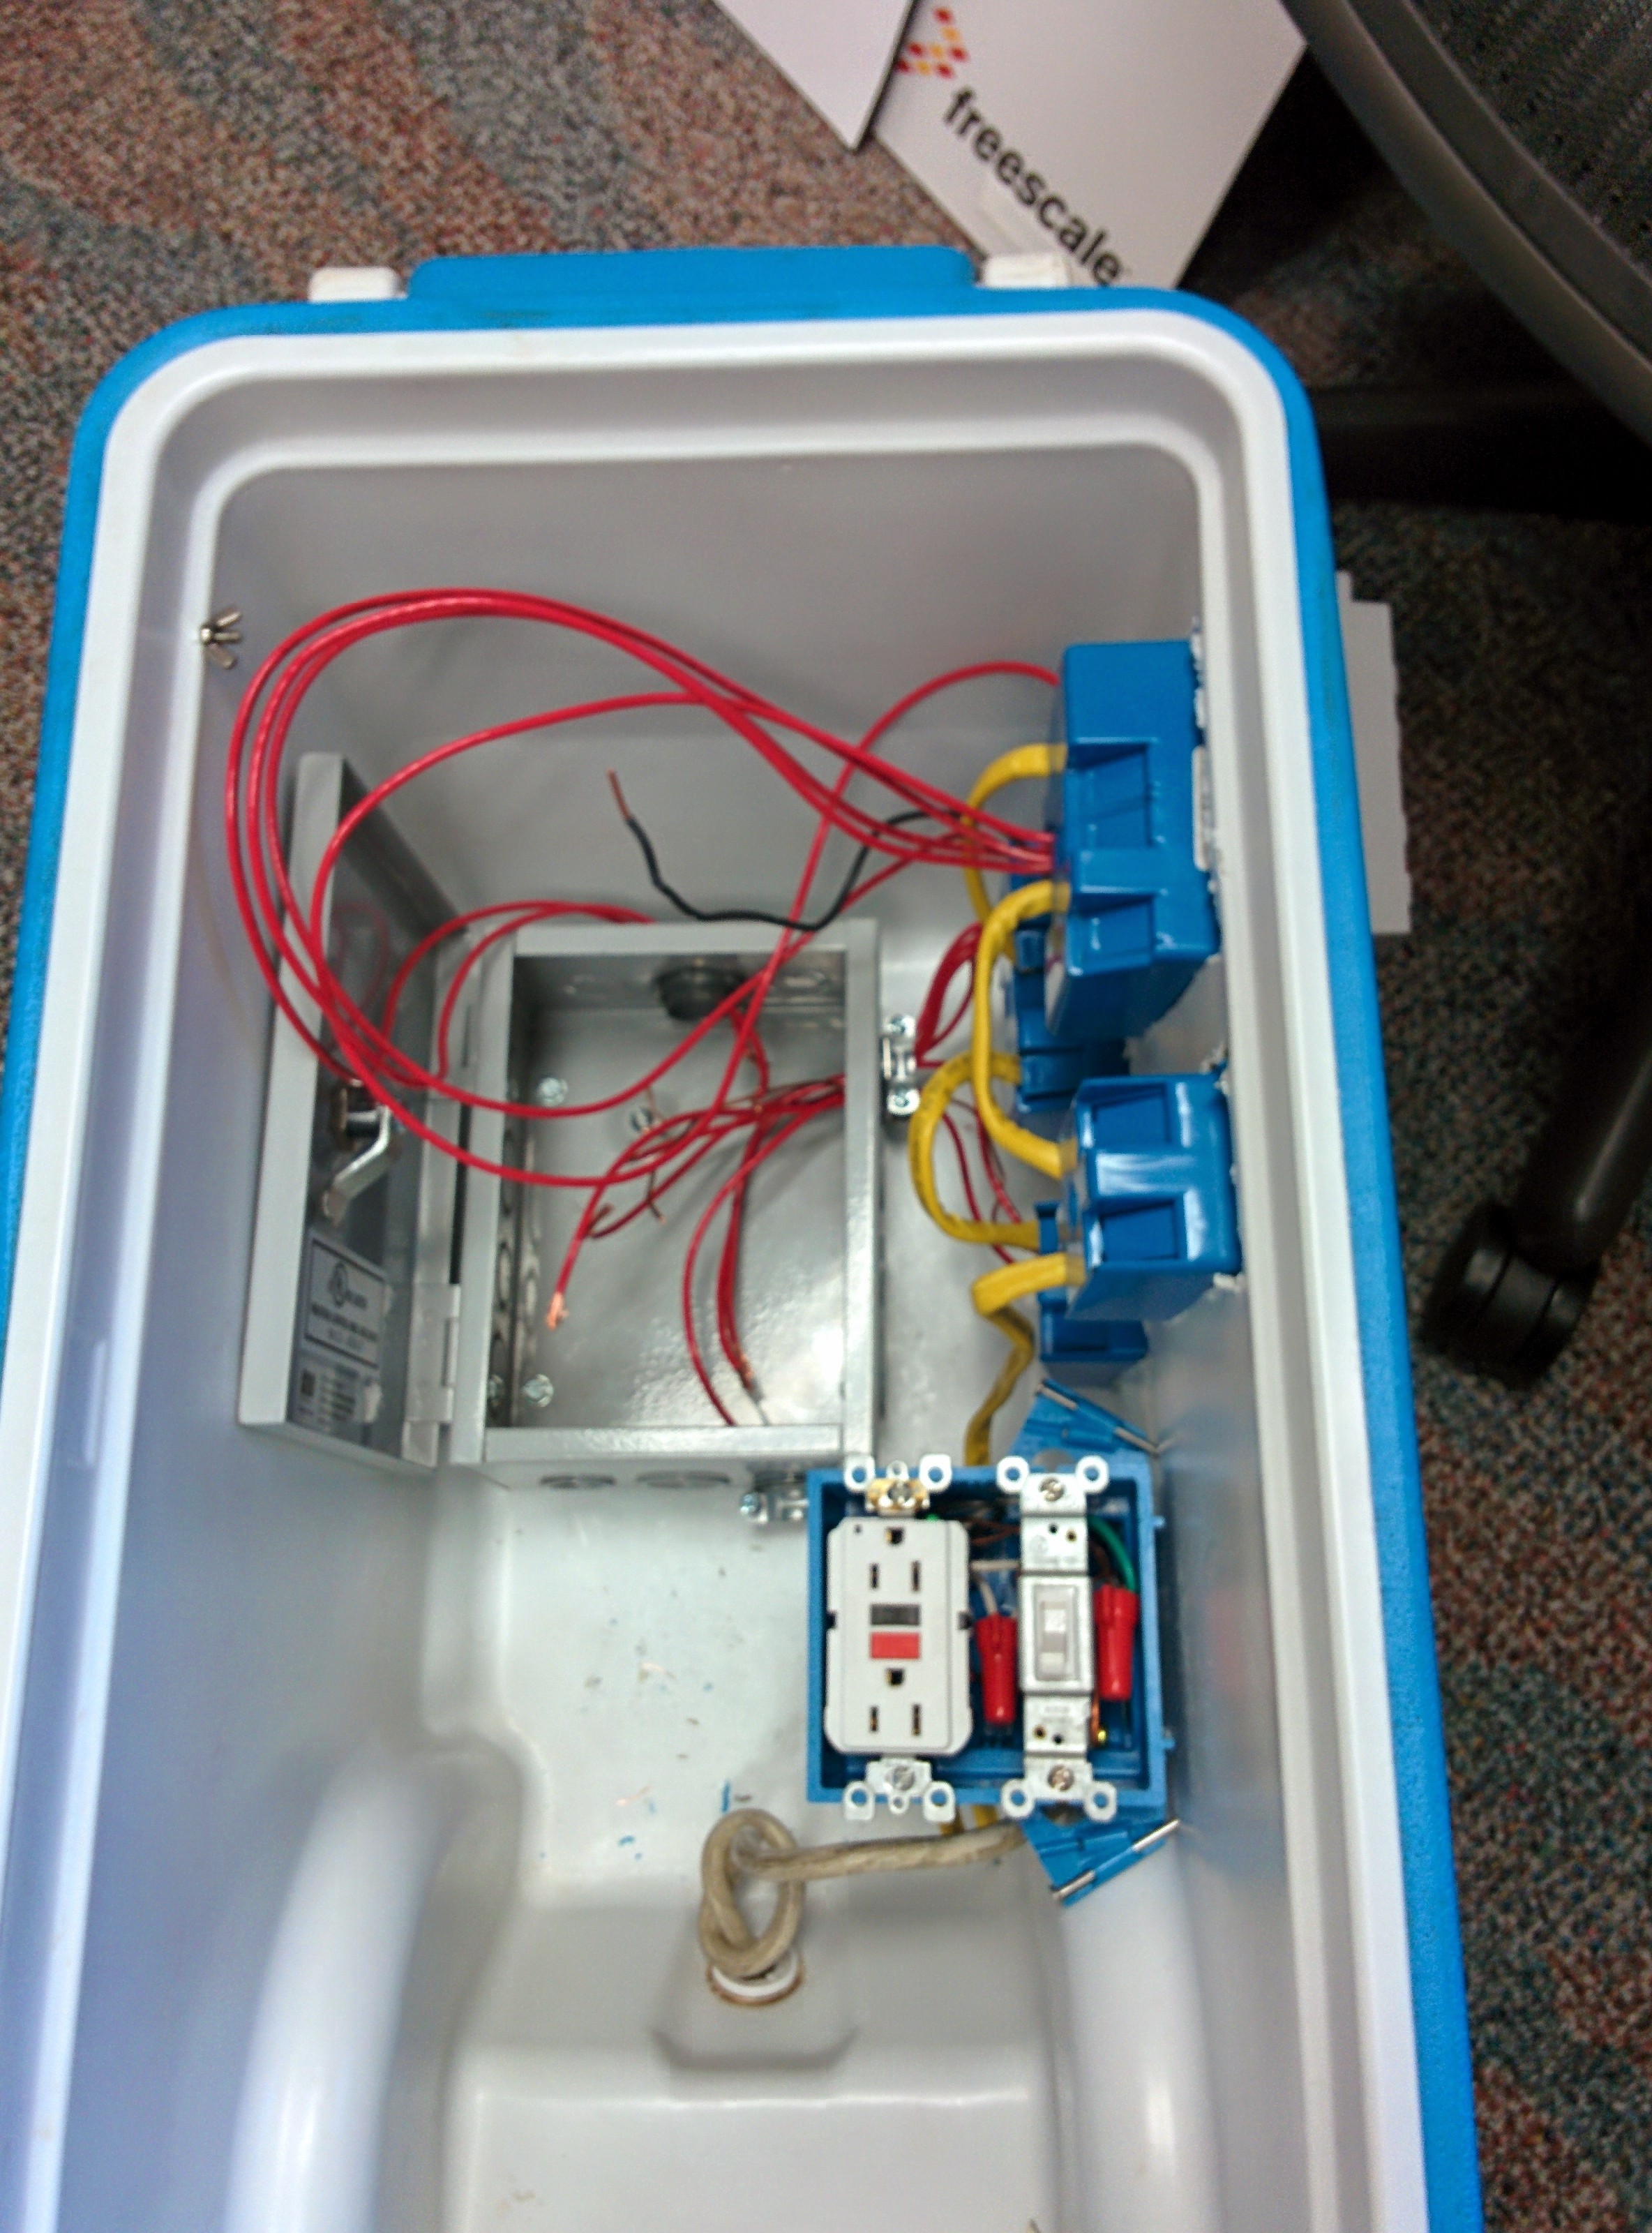
Junction box mounted to the cooler.
Then, I connected the ground line to the ground screw of the box itself. Double-stick tape was then added above each of the mounting screws to prevent shorting anything inside to ground inadvertently.
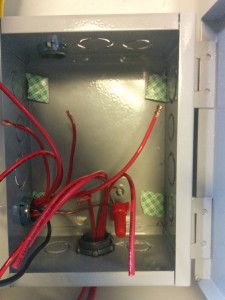
Box screwed down to cooler bottom with tape above each screw. Note the ground wire connected to the box.
Junction Box Wiring
This was probably the trickiest part of the entire build: Wiring up the relays and the bus terminal block and mounting them inside the junction box IN THE BOTTOM OF A COOLER.
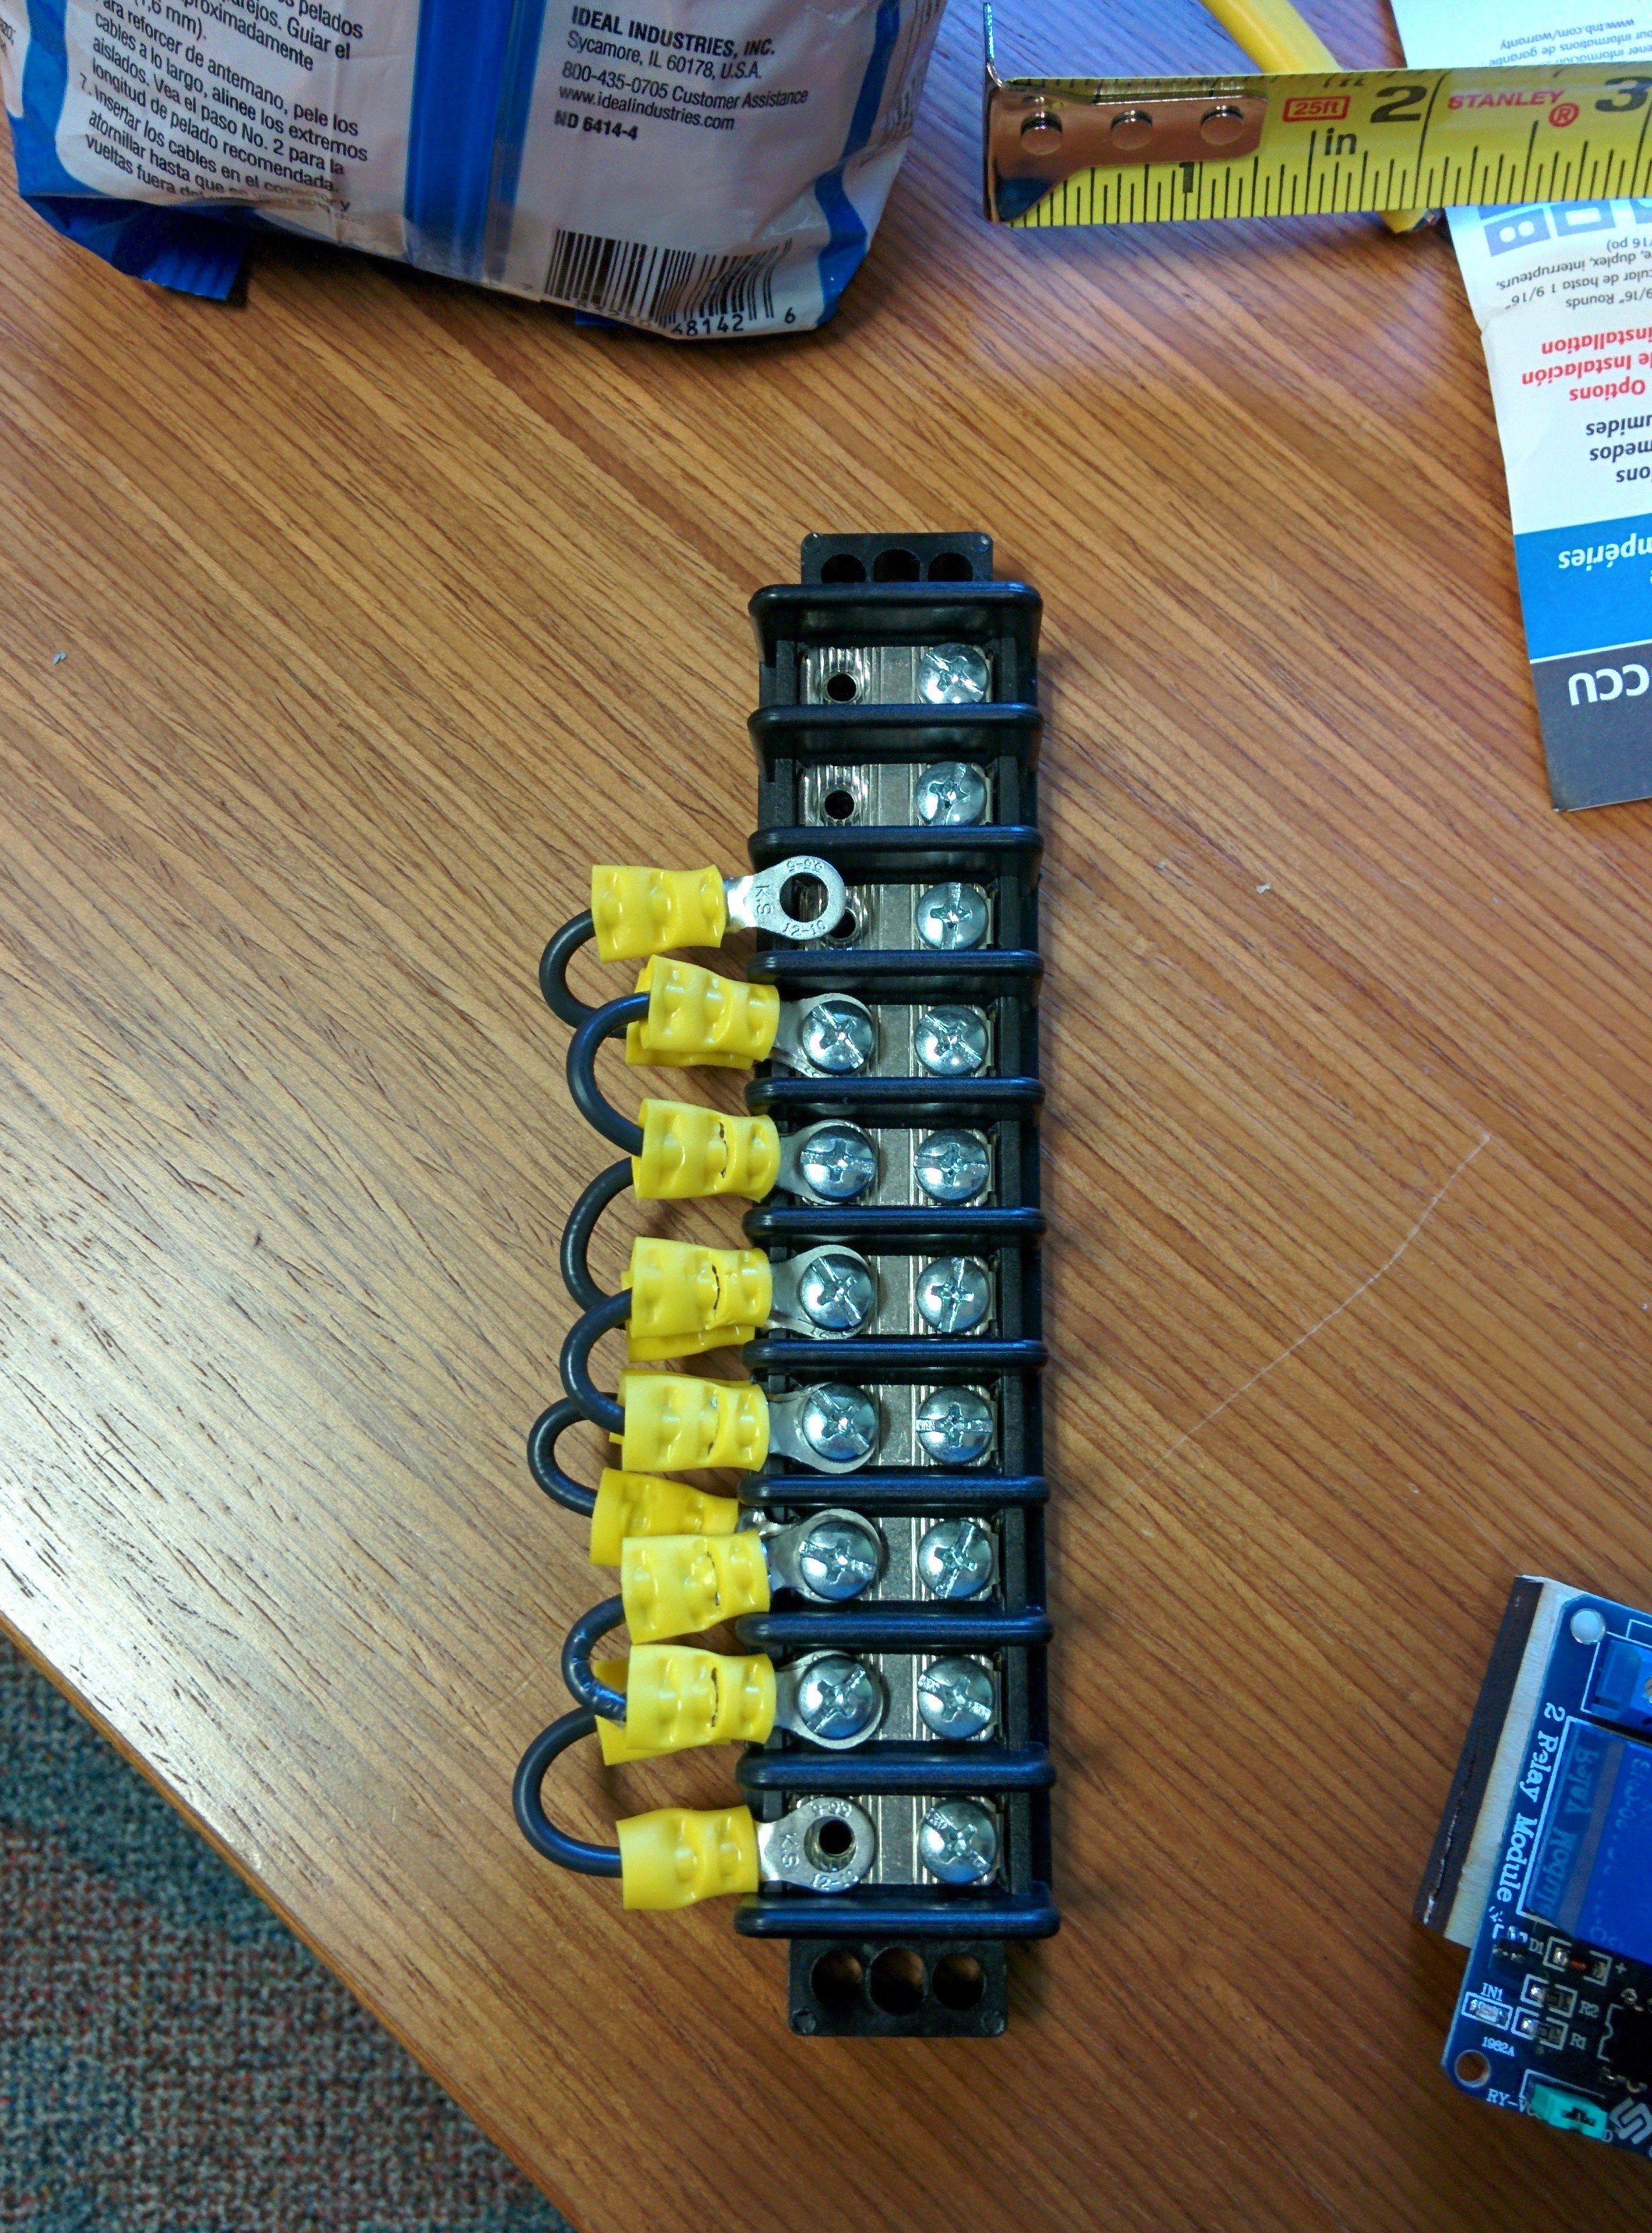
Basically a bus terminal block is just a way to connect heavy gauge wire together:
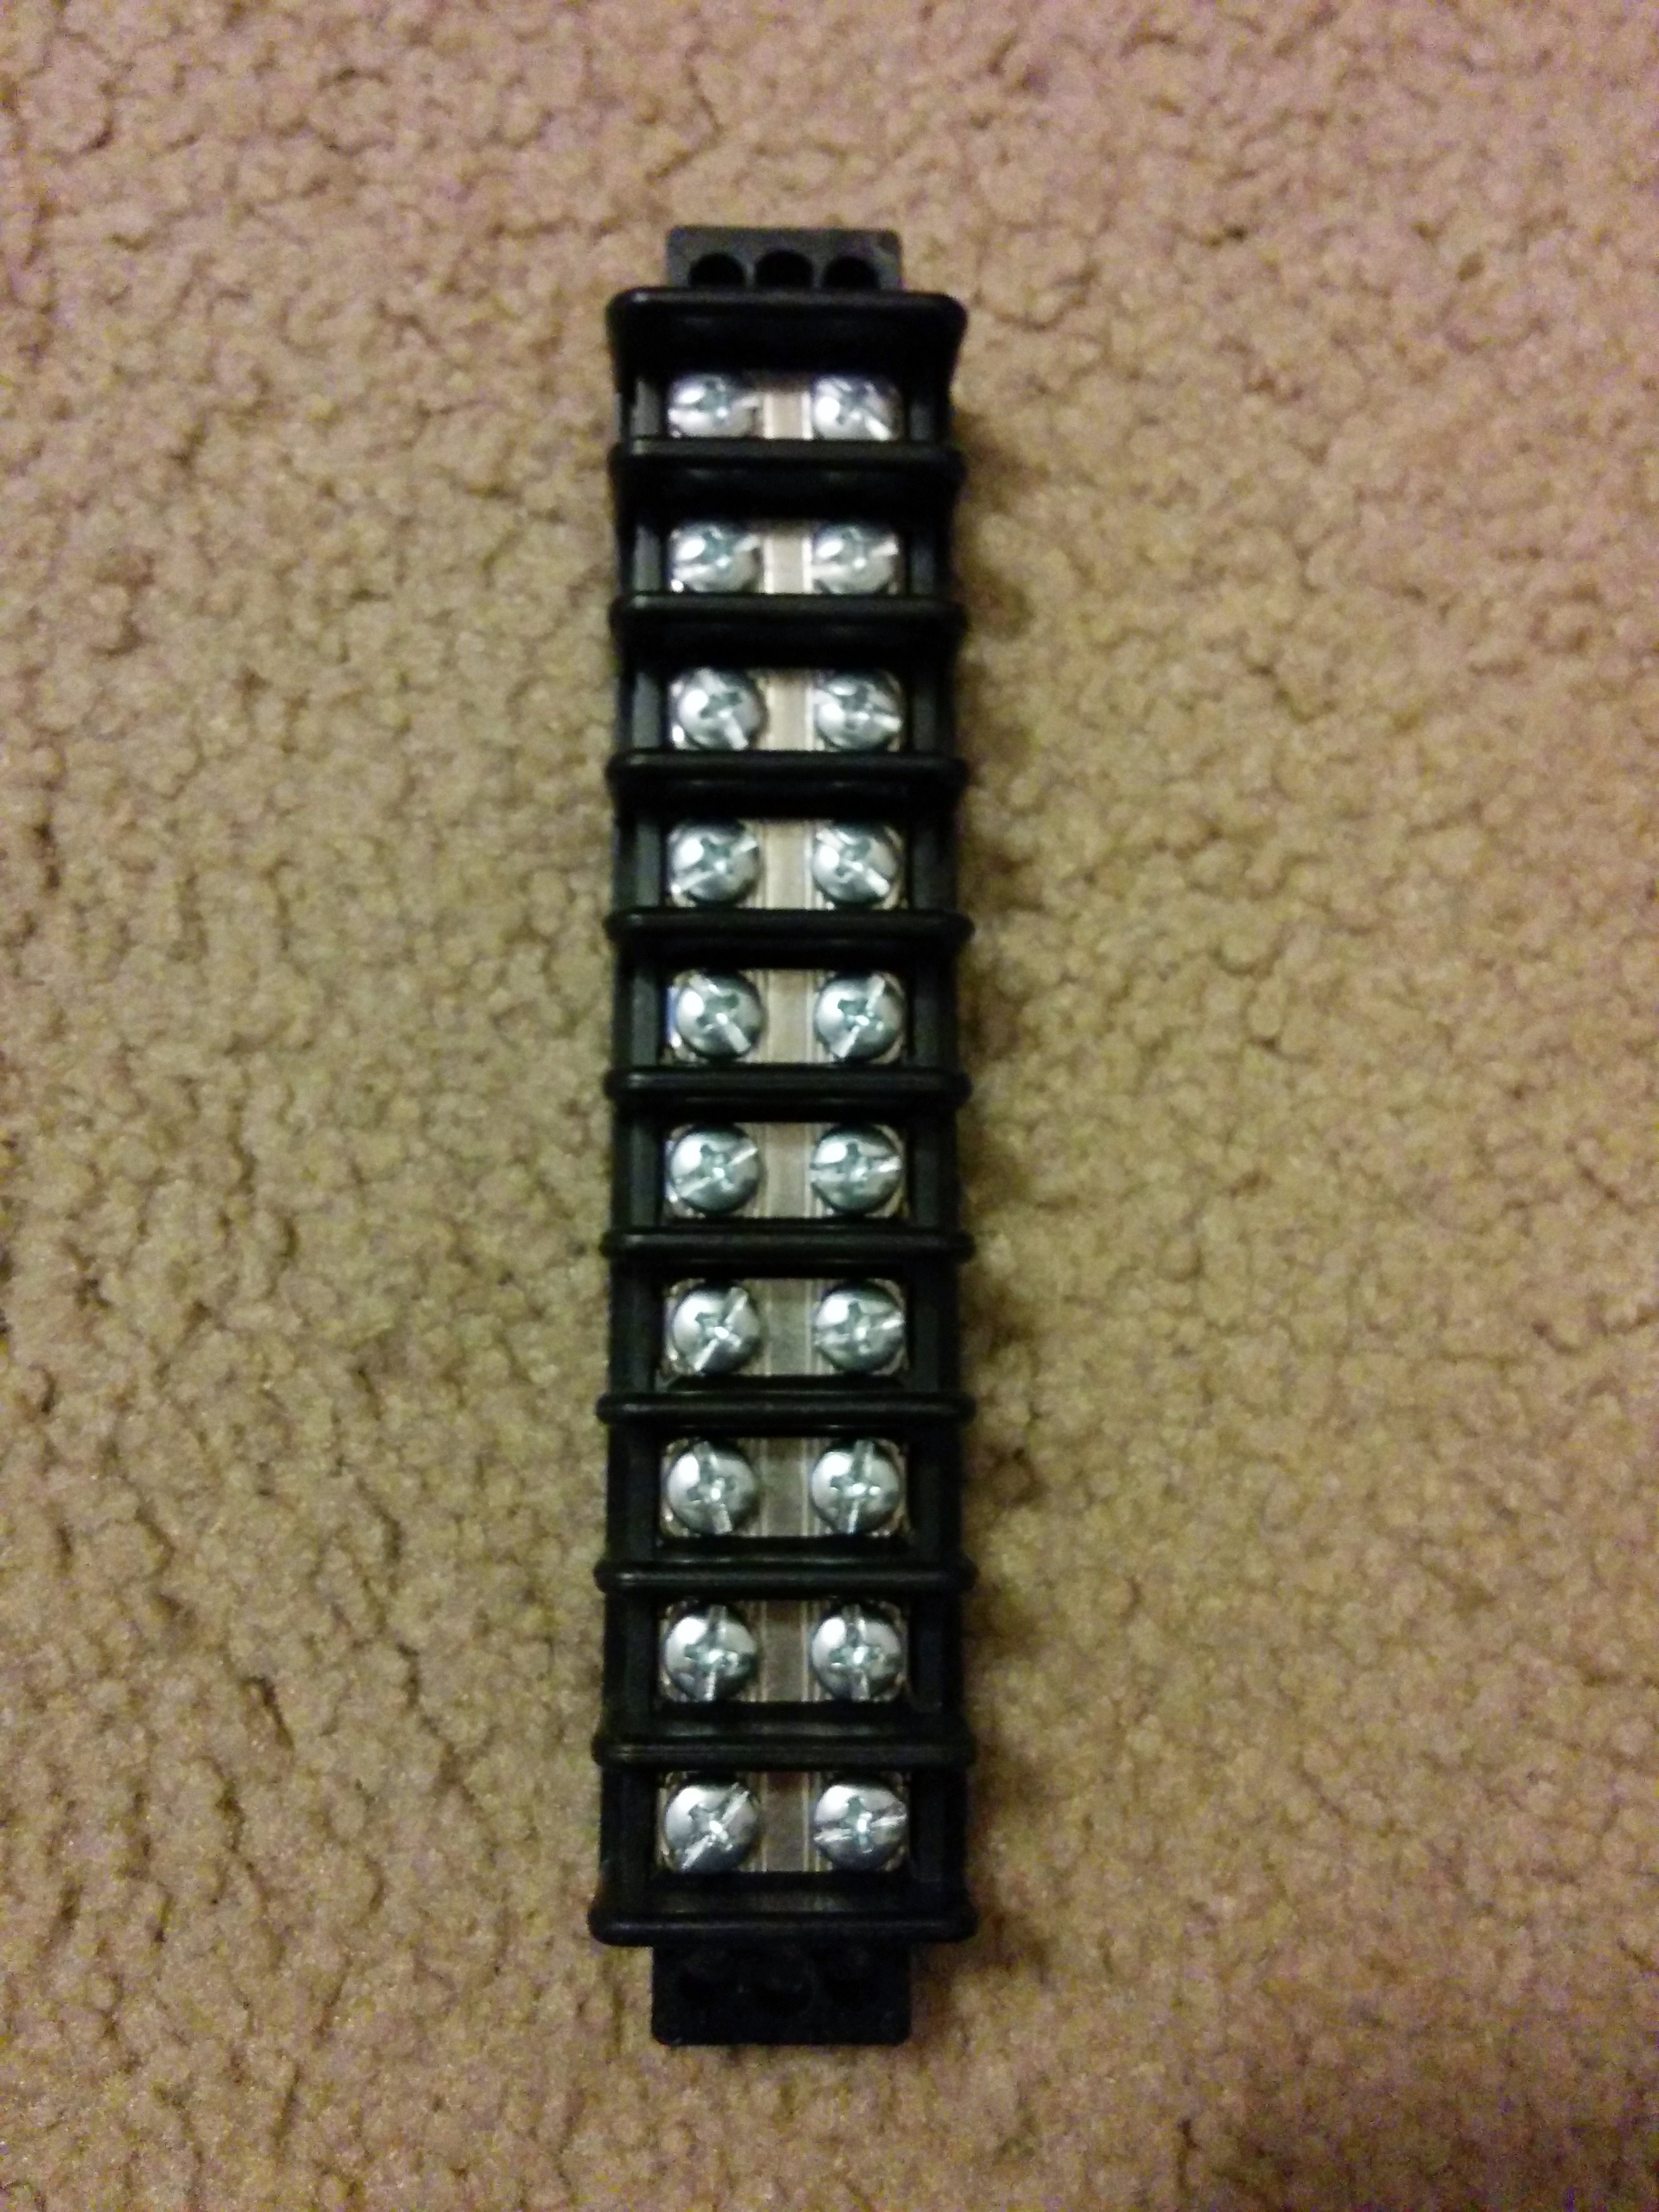
bus terminal block
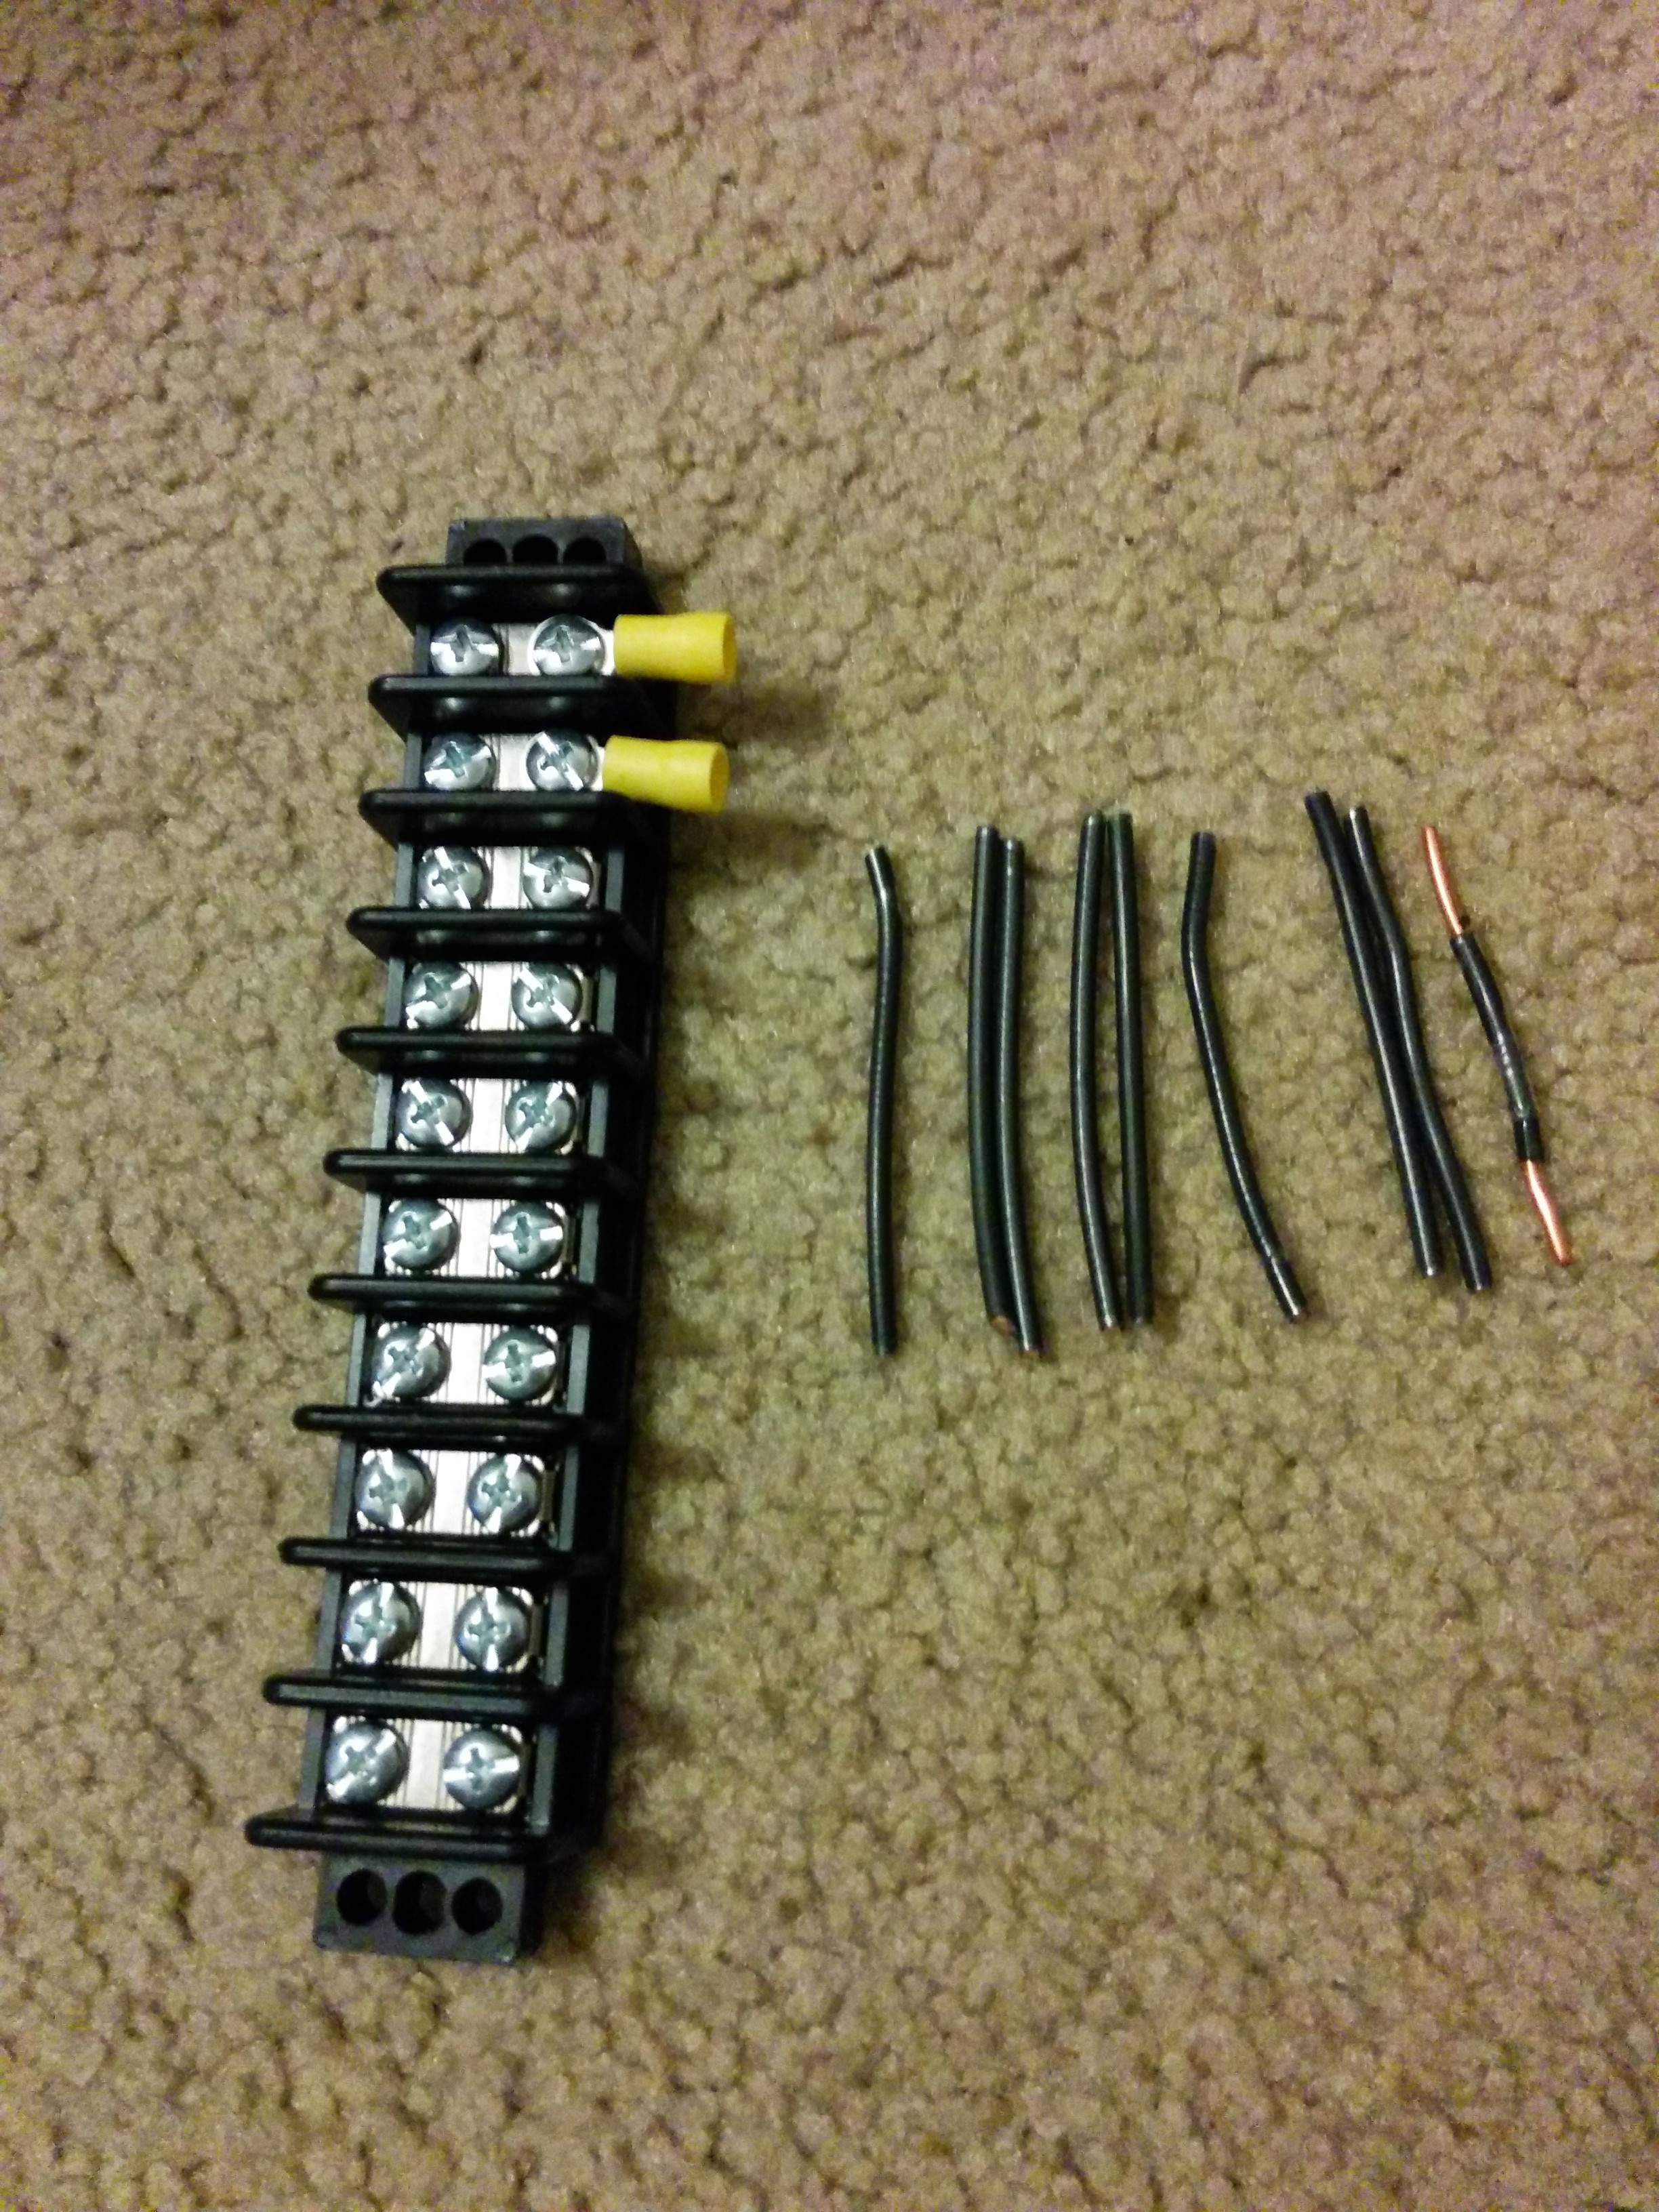
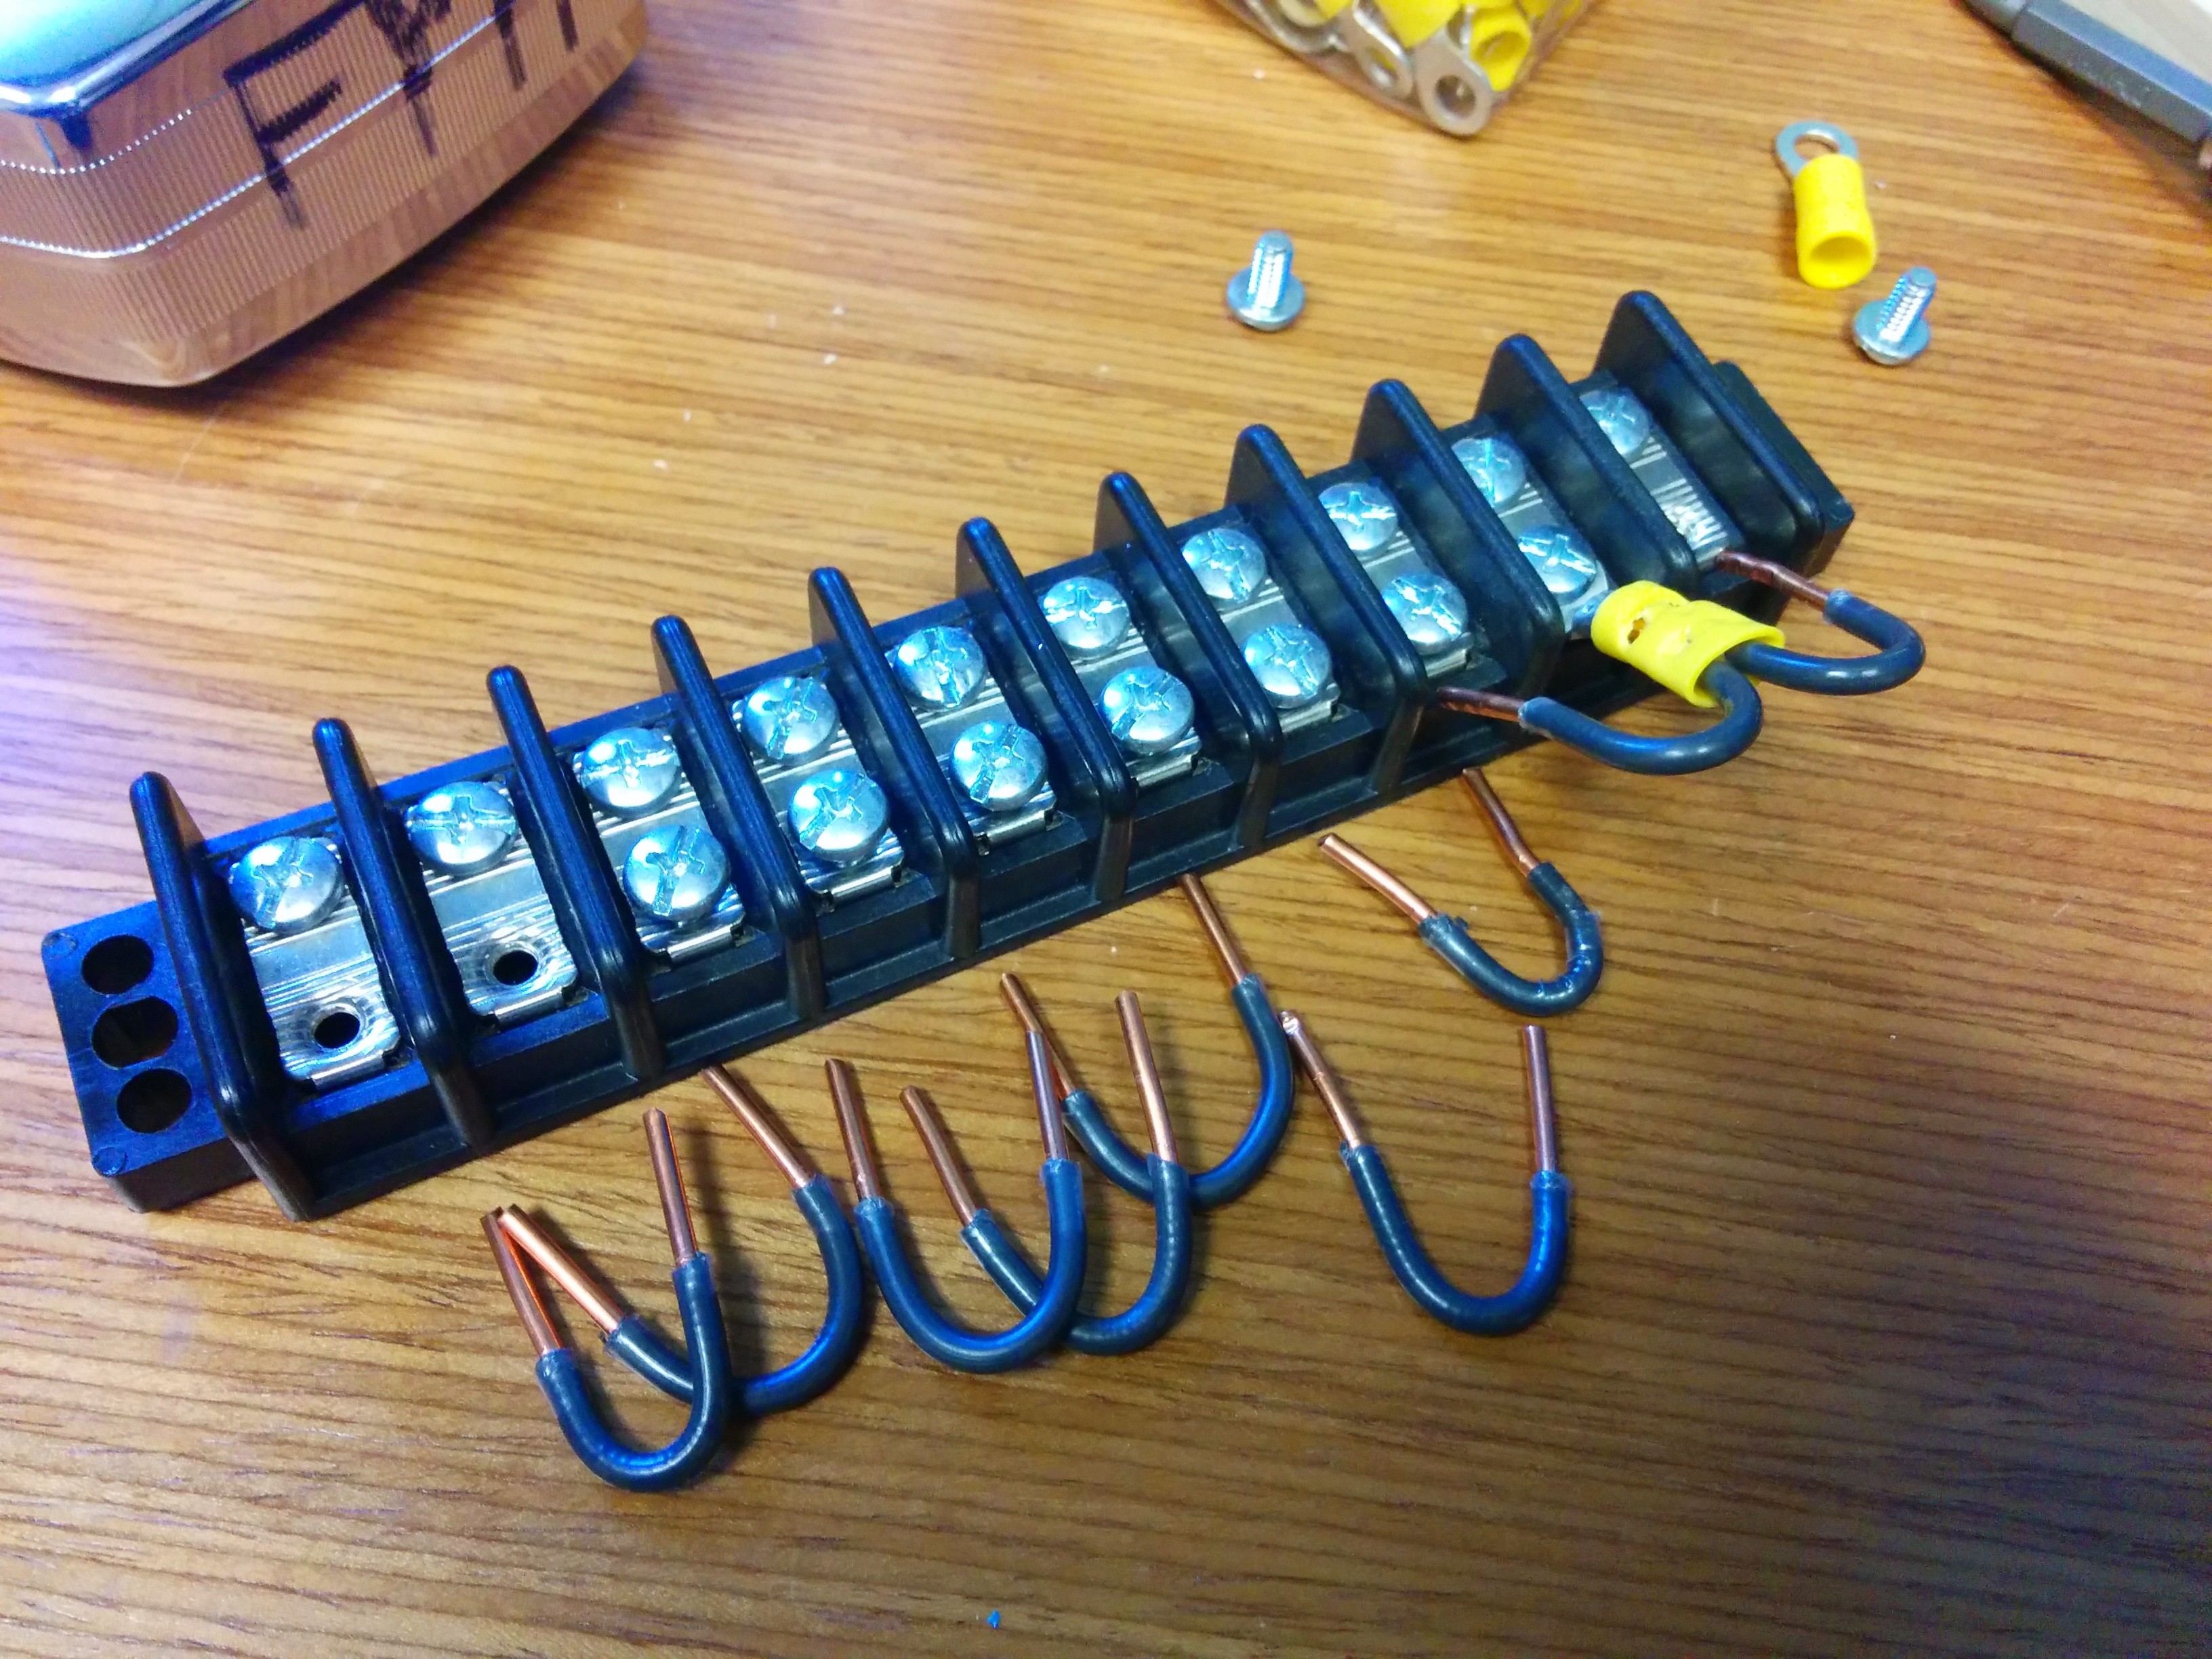
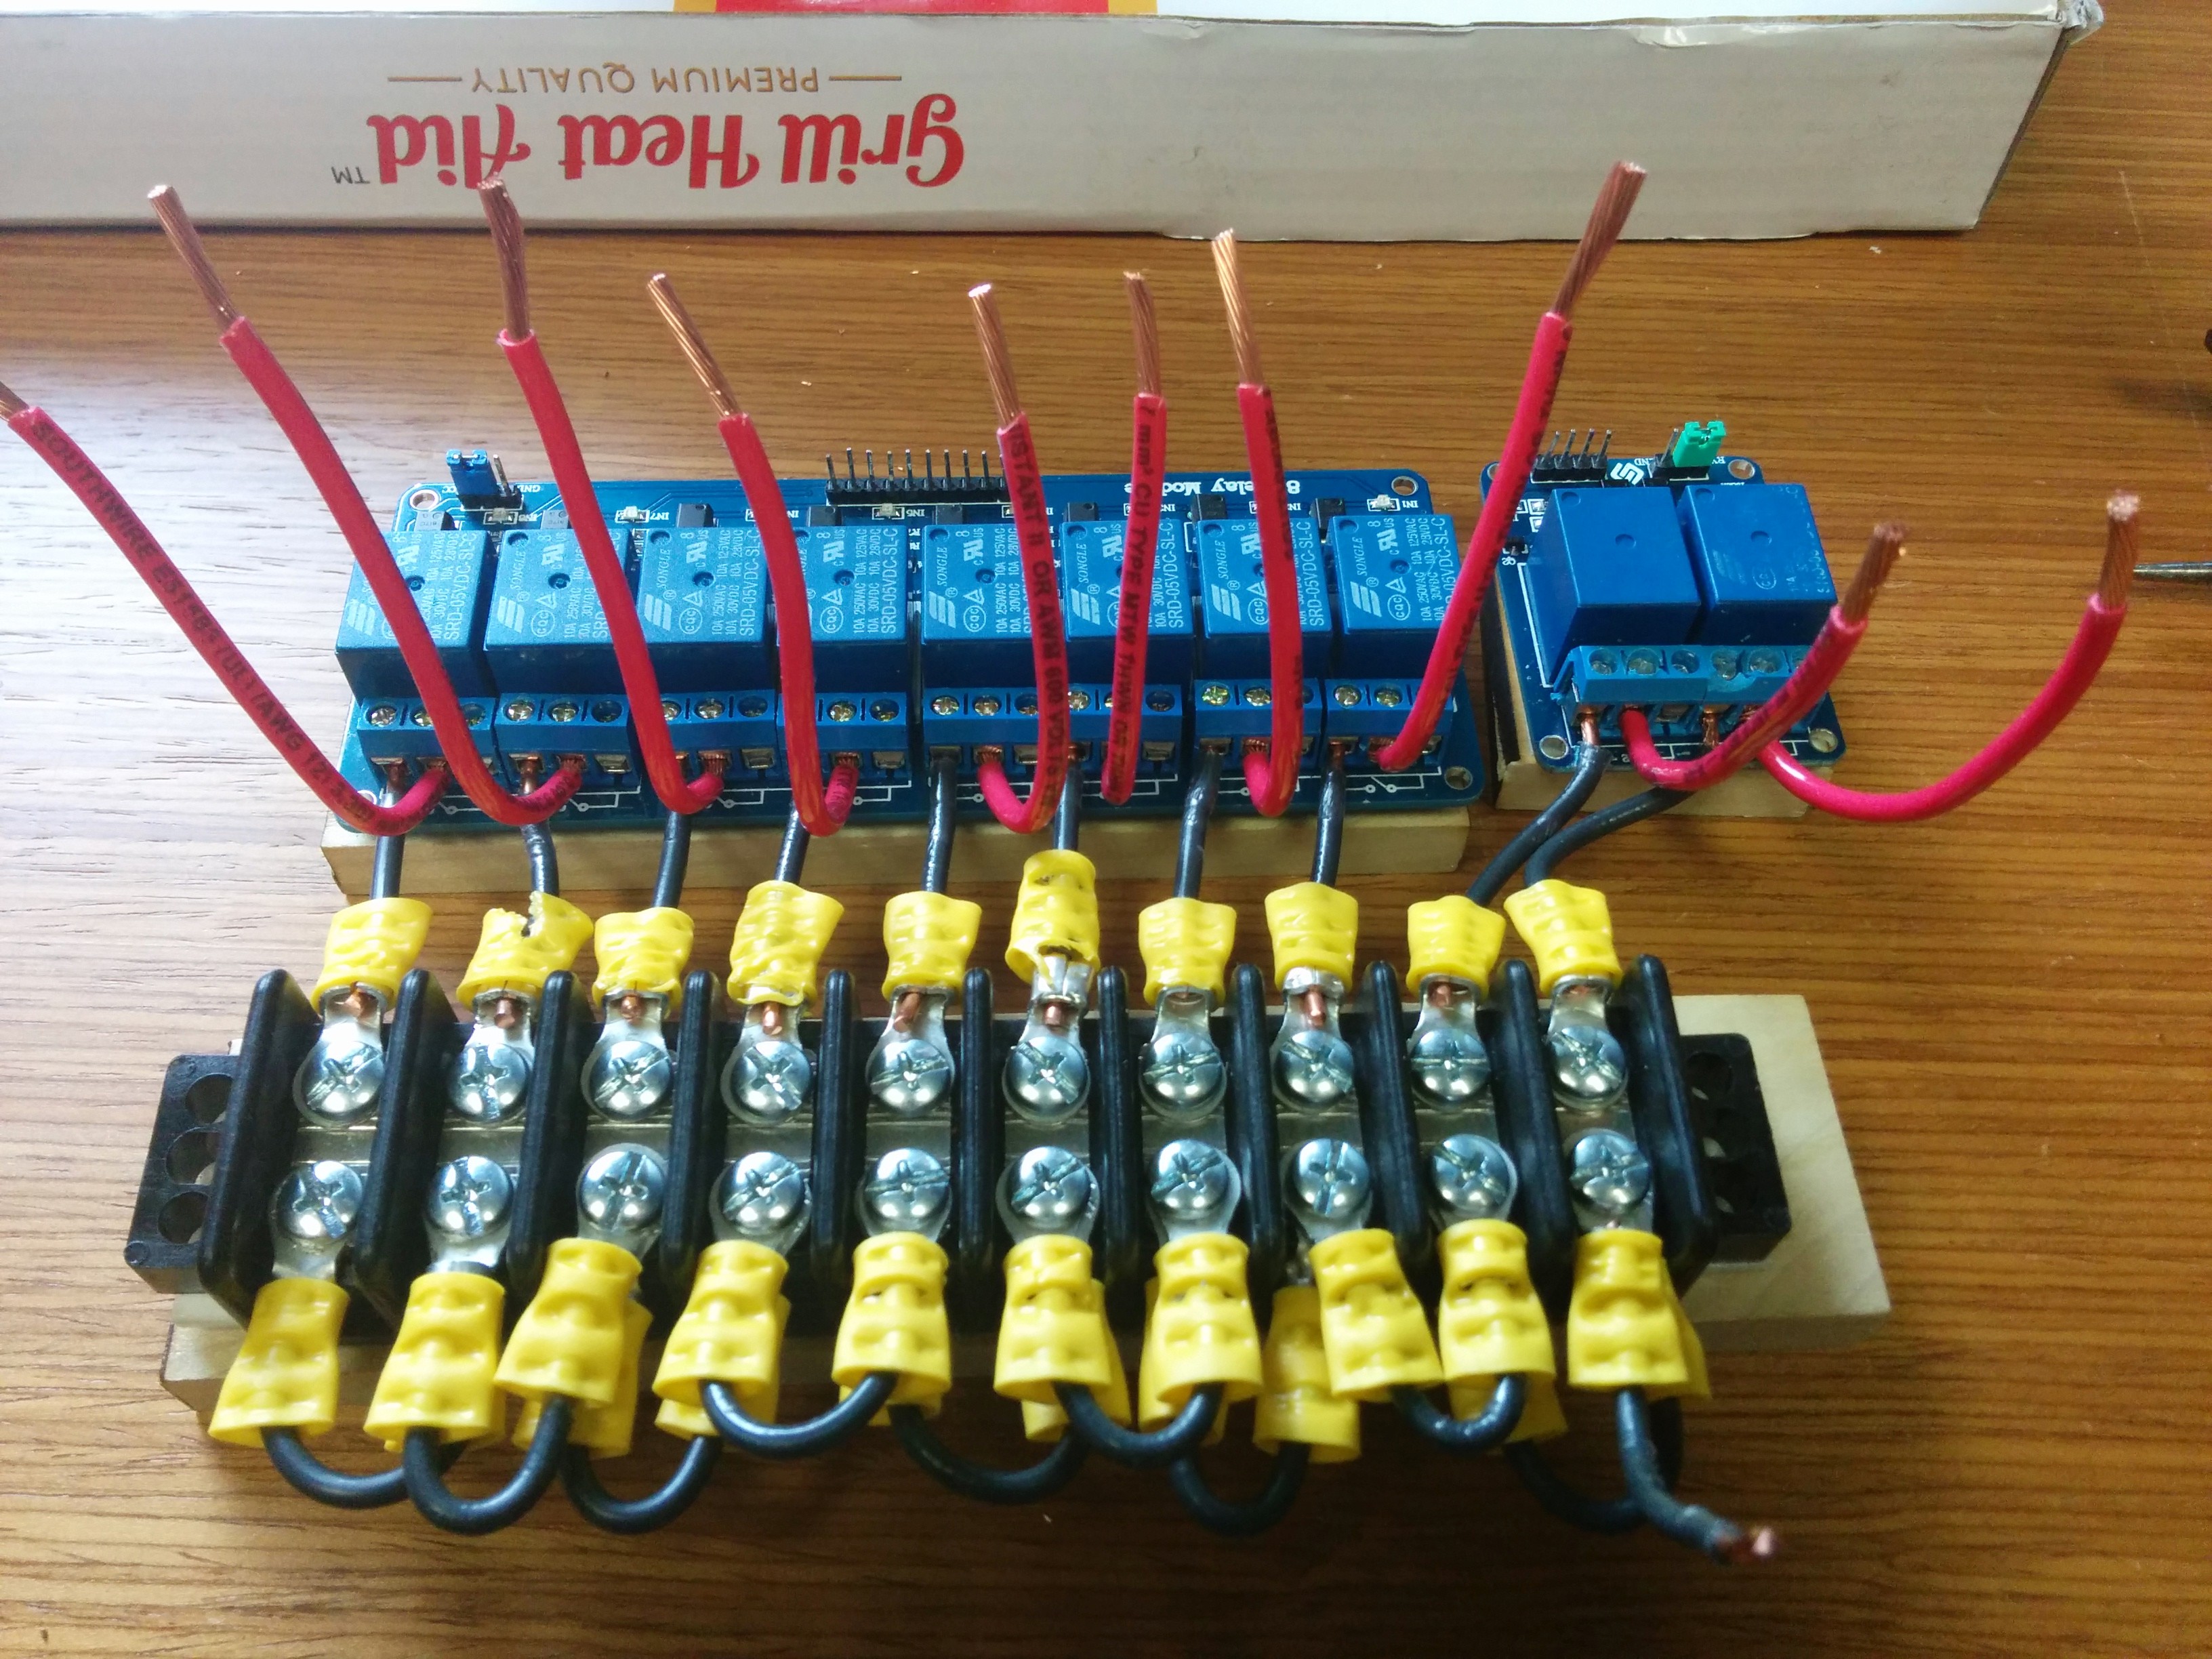
By using short U-shaped pieces of the hot (black) wire and ring terminal connectors, I was able to use the bus terminal block to help connect the line hot wire to the Normally Open (NO) side of the 10 relays.
Given the fact that I had already mounted the junction box into the cooler, I made a template out of a old box that had the same dimensions of the interior of the box to permit doing most of the the wiring in a more comfortable way.
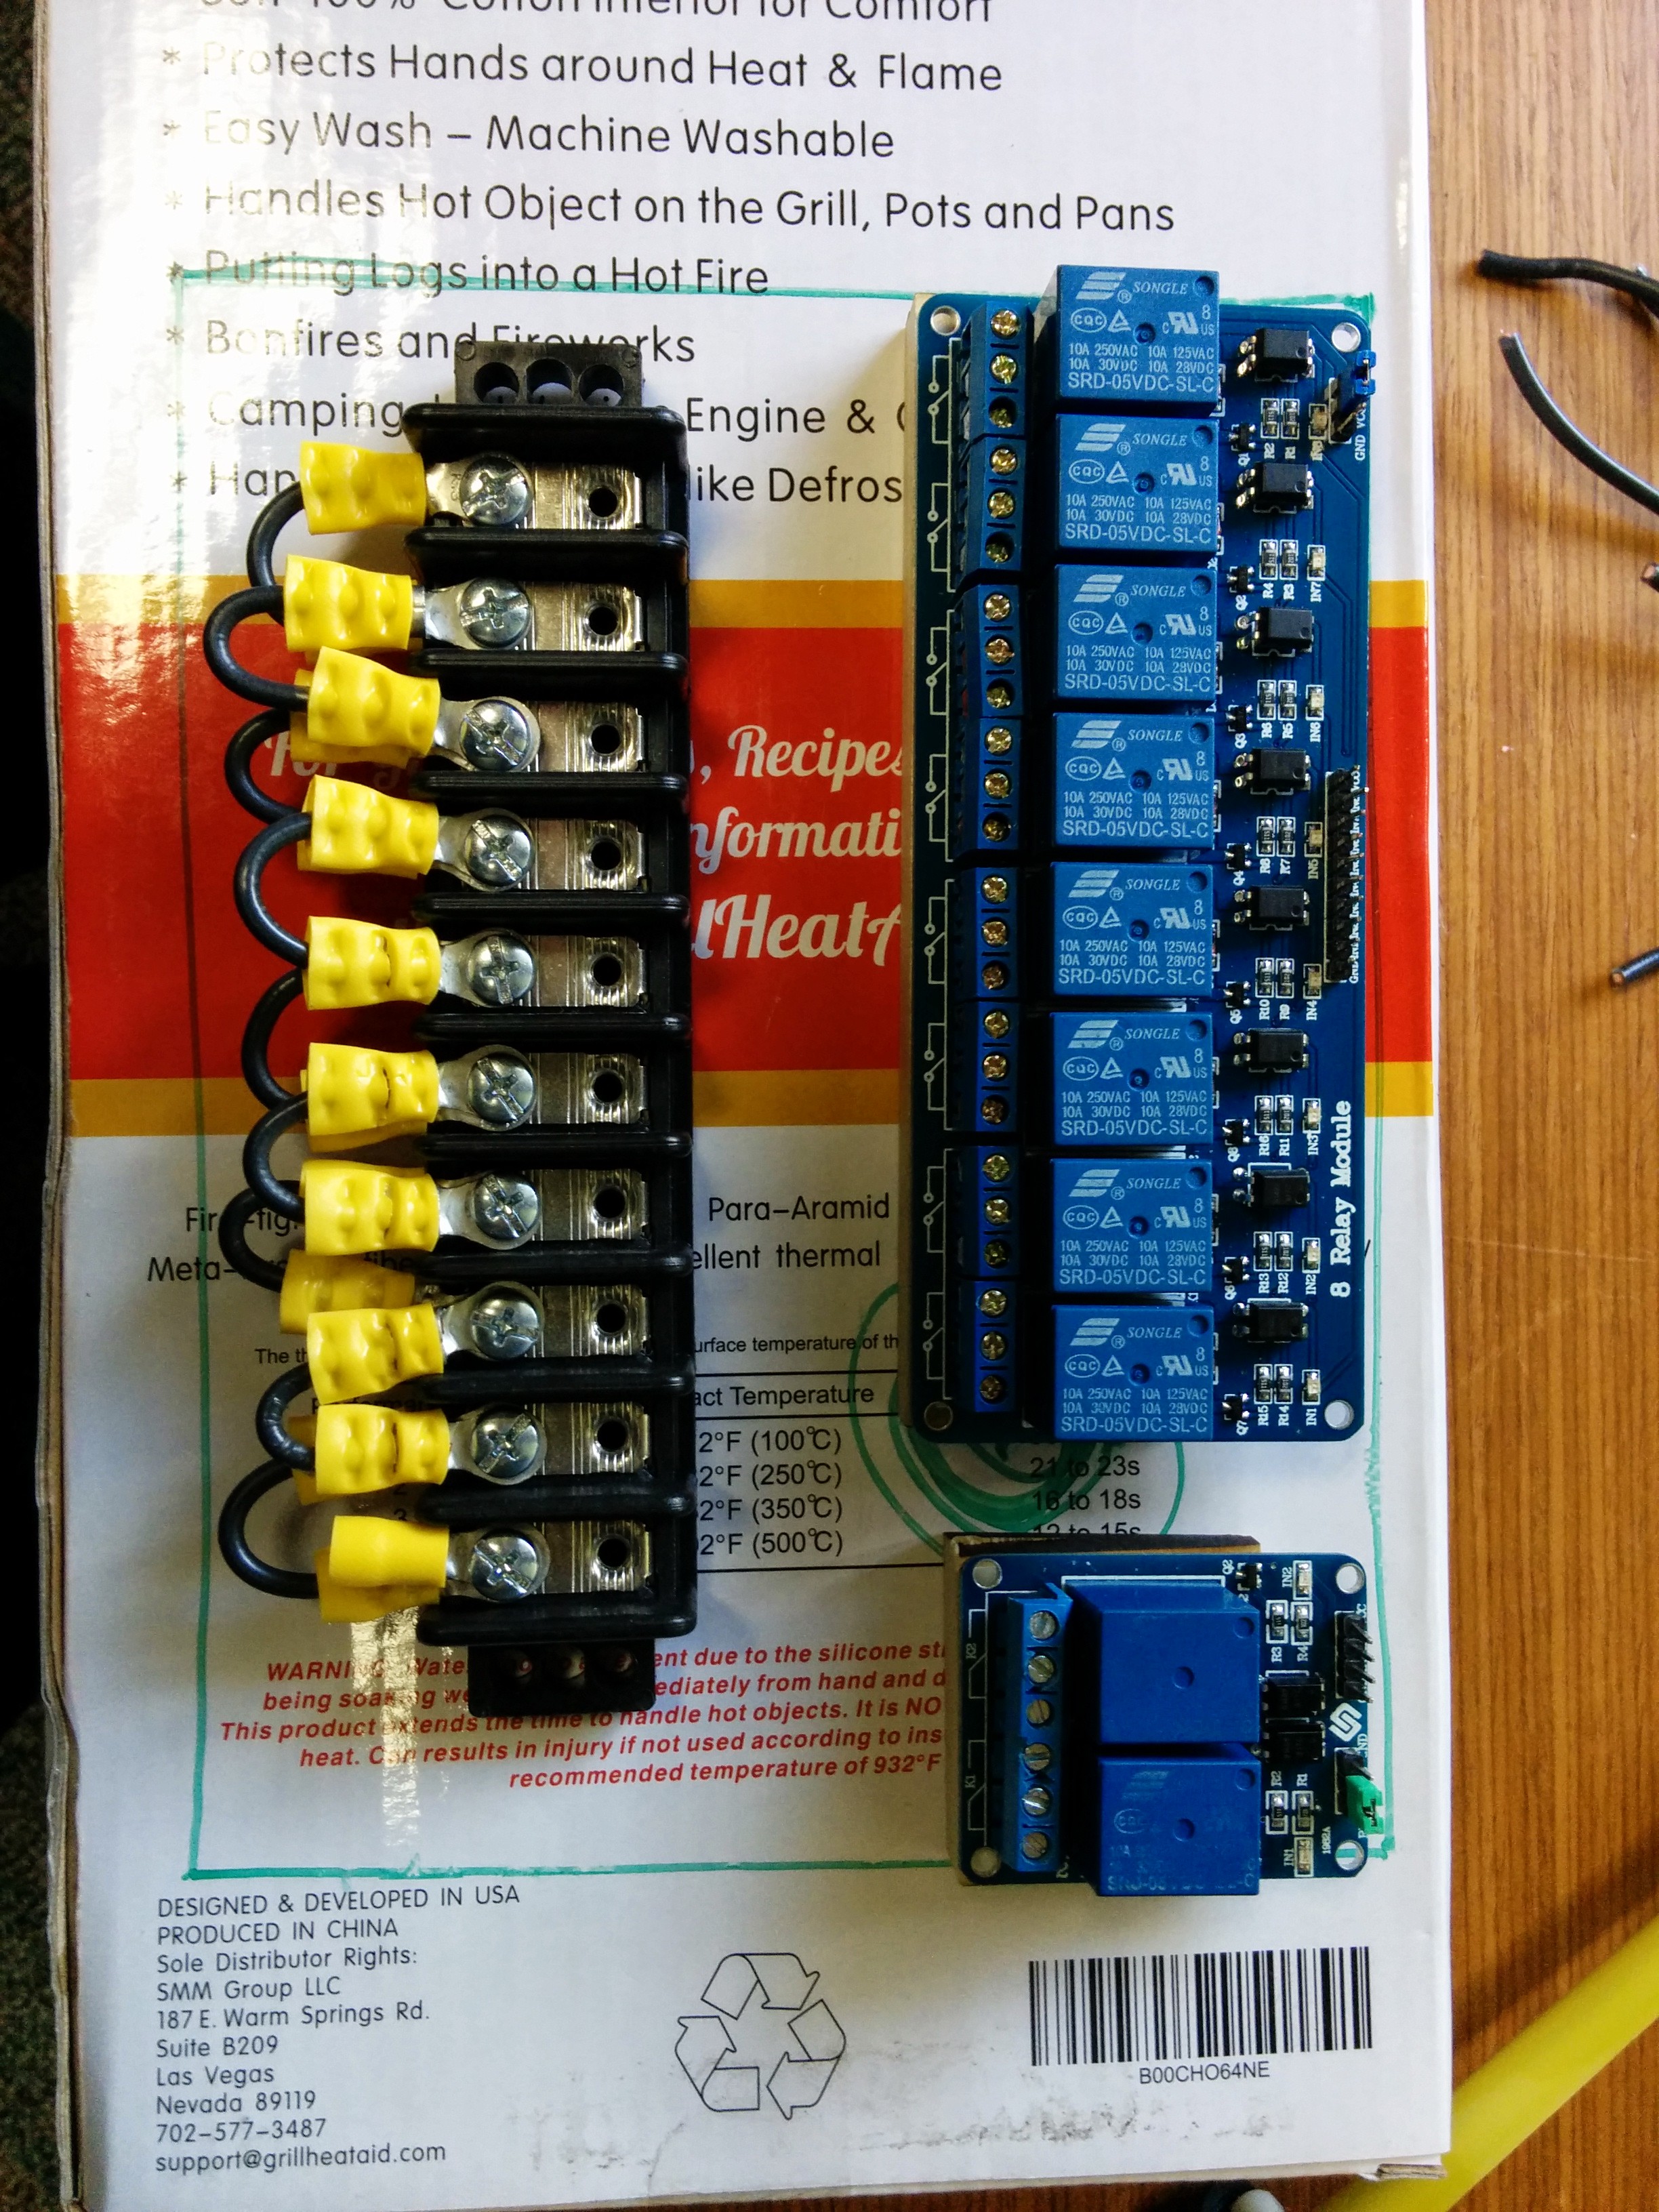
Green line here is the limits of the inside of the junction box.
It was a good thing too that I didn’t have a single x10 relay board– as the junction box has a big bump around the ground screw. So the break between the x2 and x8 relay boards helped to accommodate this bump.
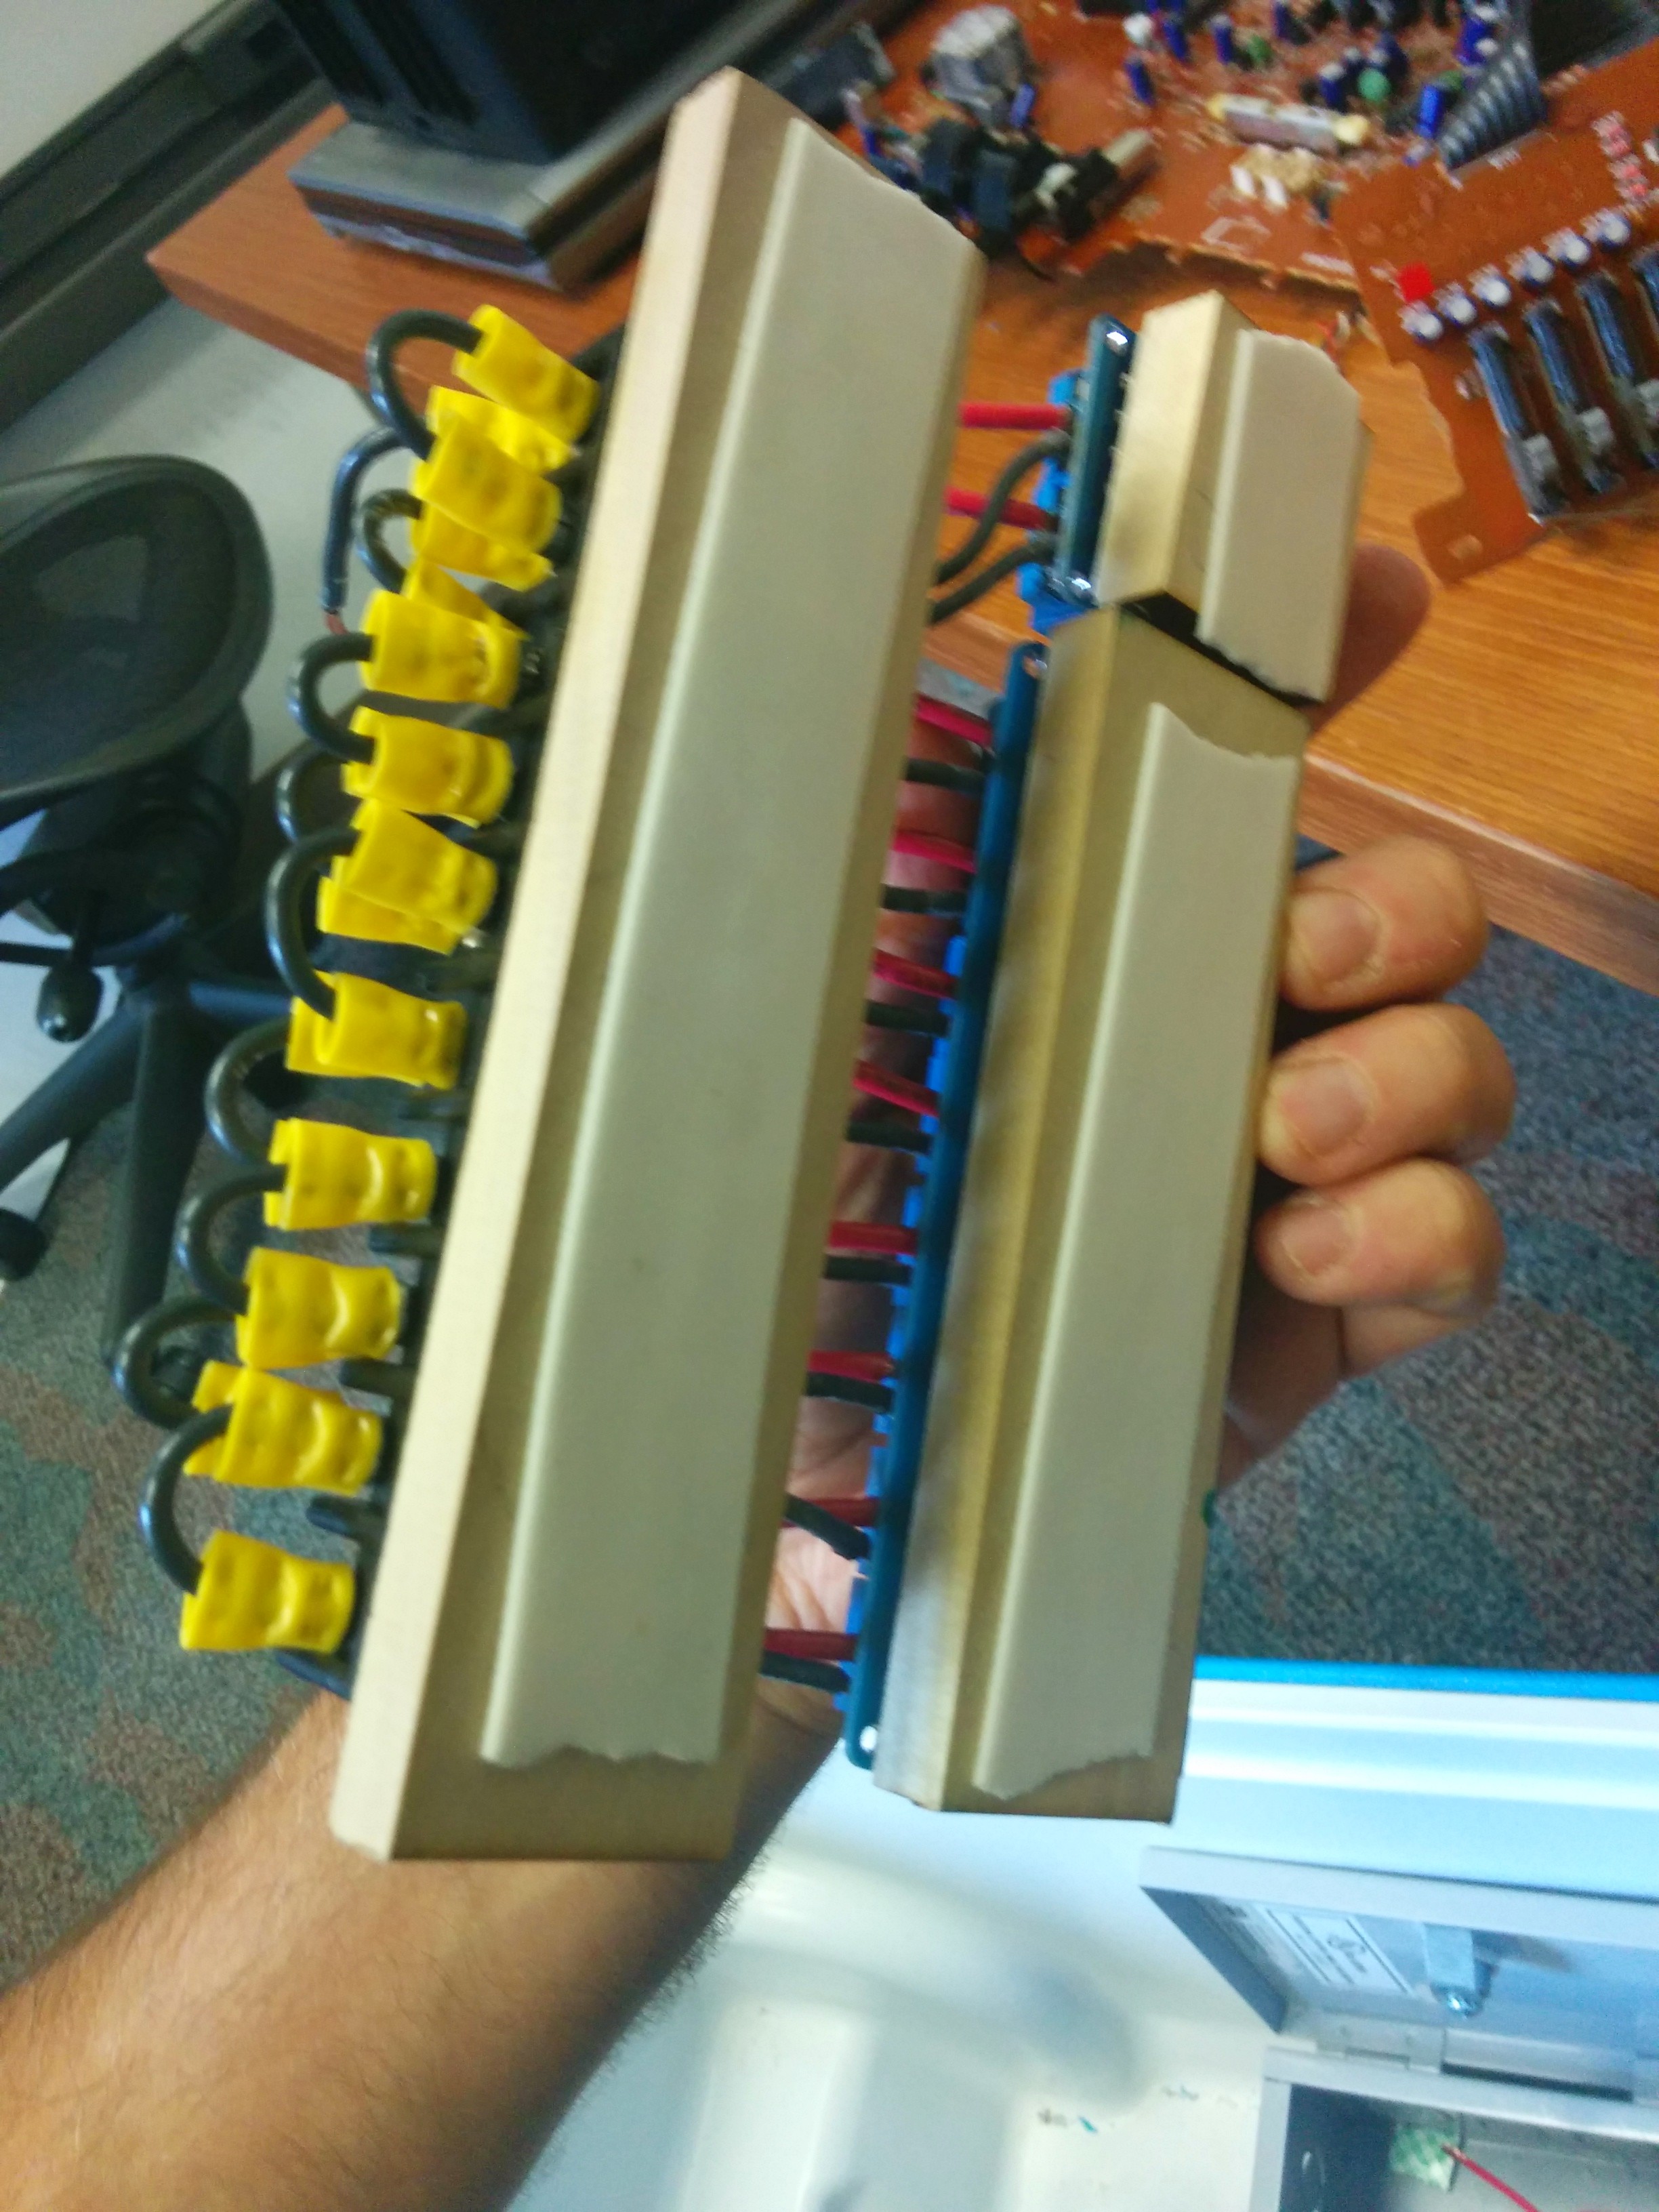
Each of these placed on a block of wood to provide stability and isolation from ground.
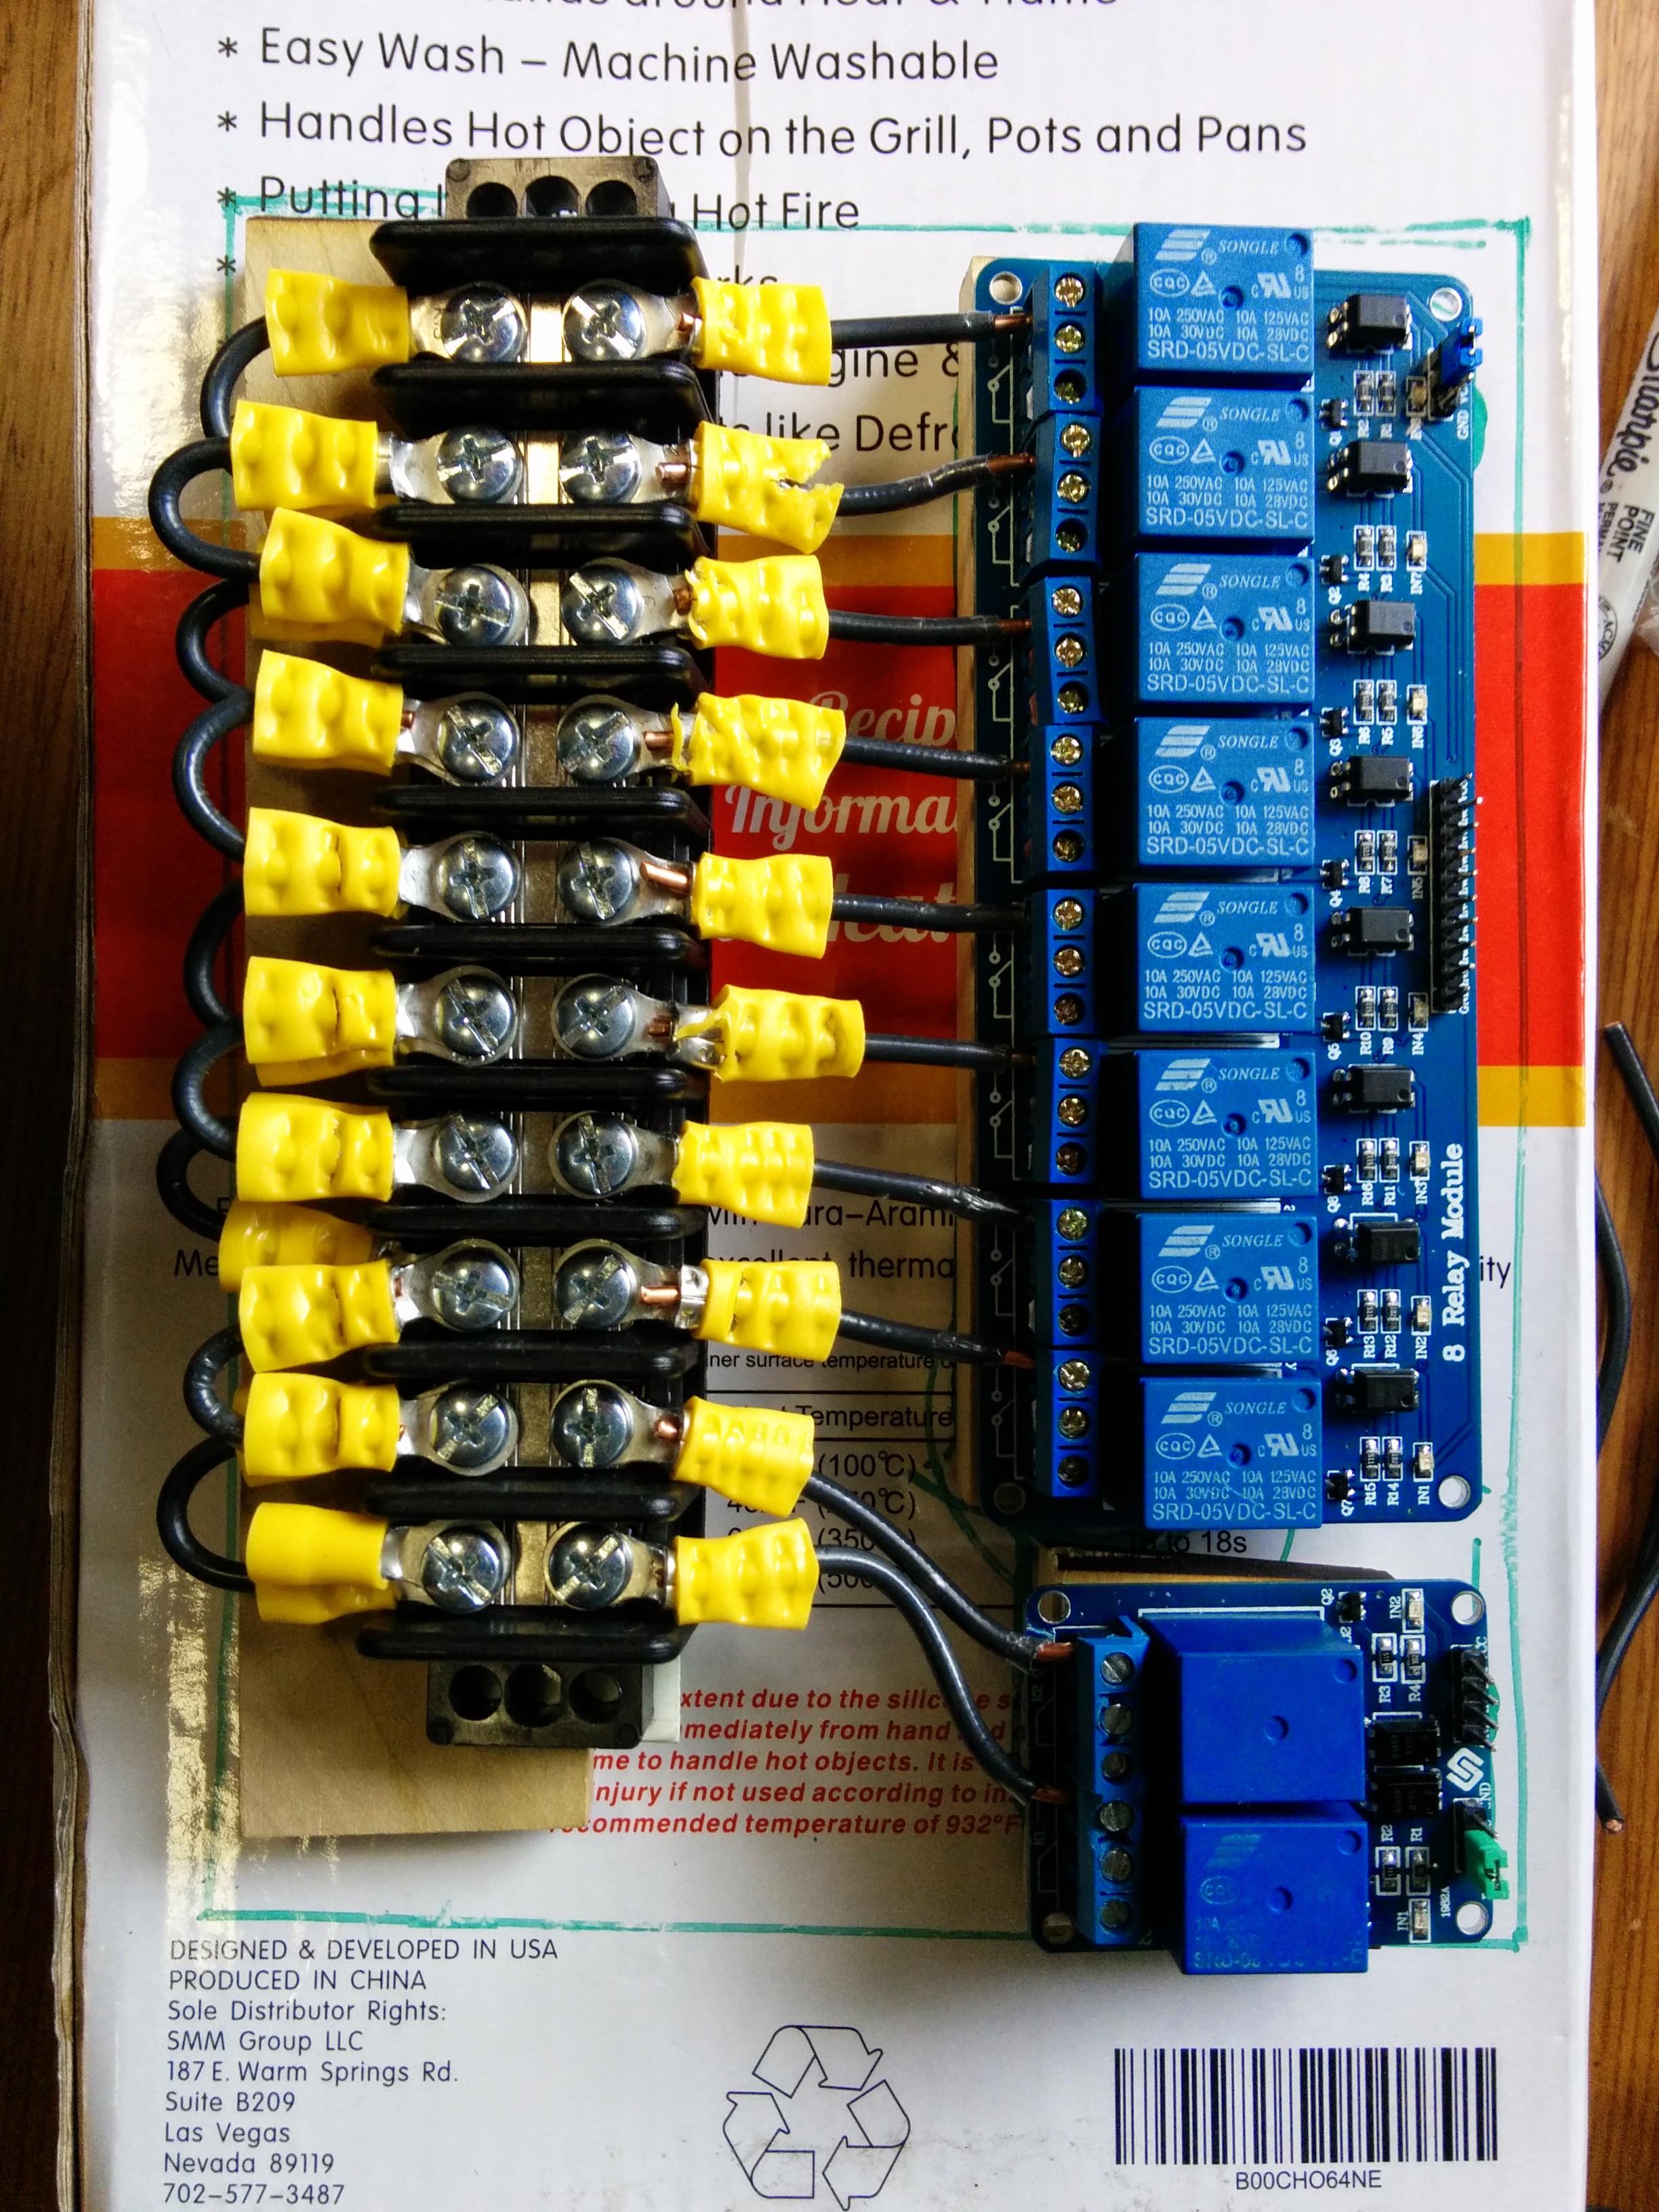
Given that #12 Romex is very stiff, this was the best way to ensure that the final assembly would in fact fit into the box. Although, if I had to do it over again, I would probably have used a smaller gauge wire, as with #12 it was very difficult to interface with the relay terminal blocks. I had to ‘encourage’ them to connect.
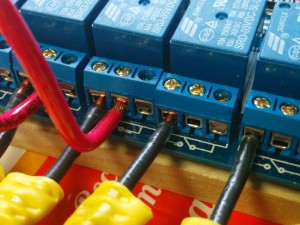
Get in there…
What happens when you force 12-gauge Romex into relay terminal block. This board had to be replaced.
Finally done!
Double-sided tape added!
By the way, color coding when working with AC circuits is VERY important: Black connects to black, red to red, ground to ground.
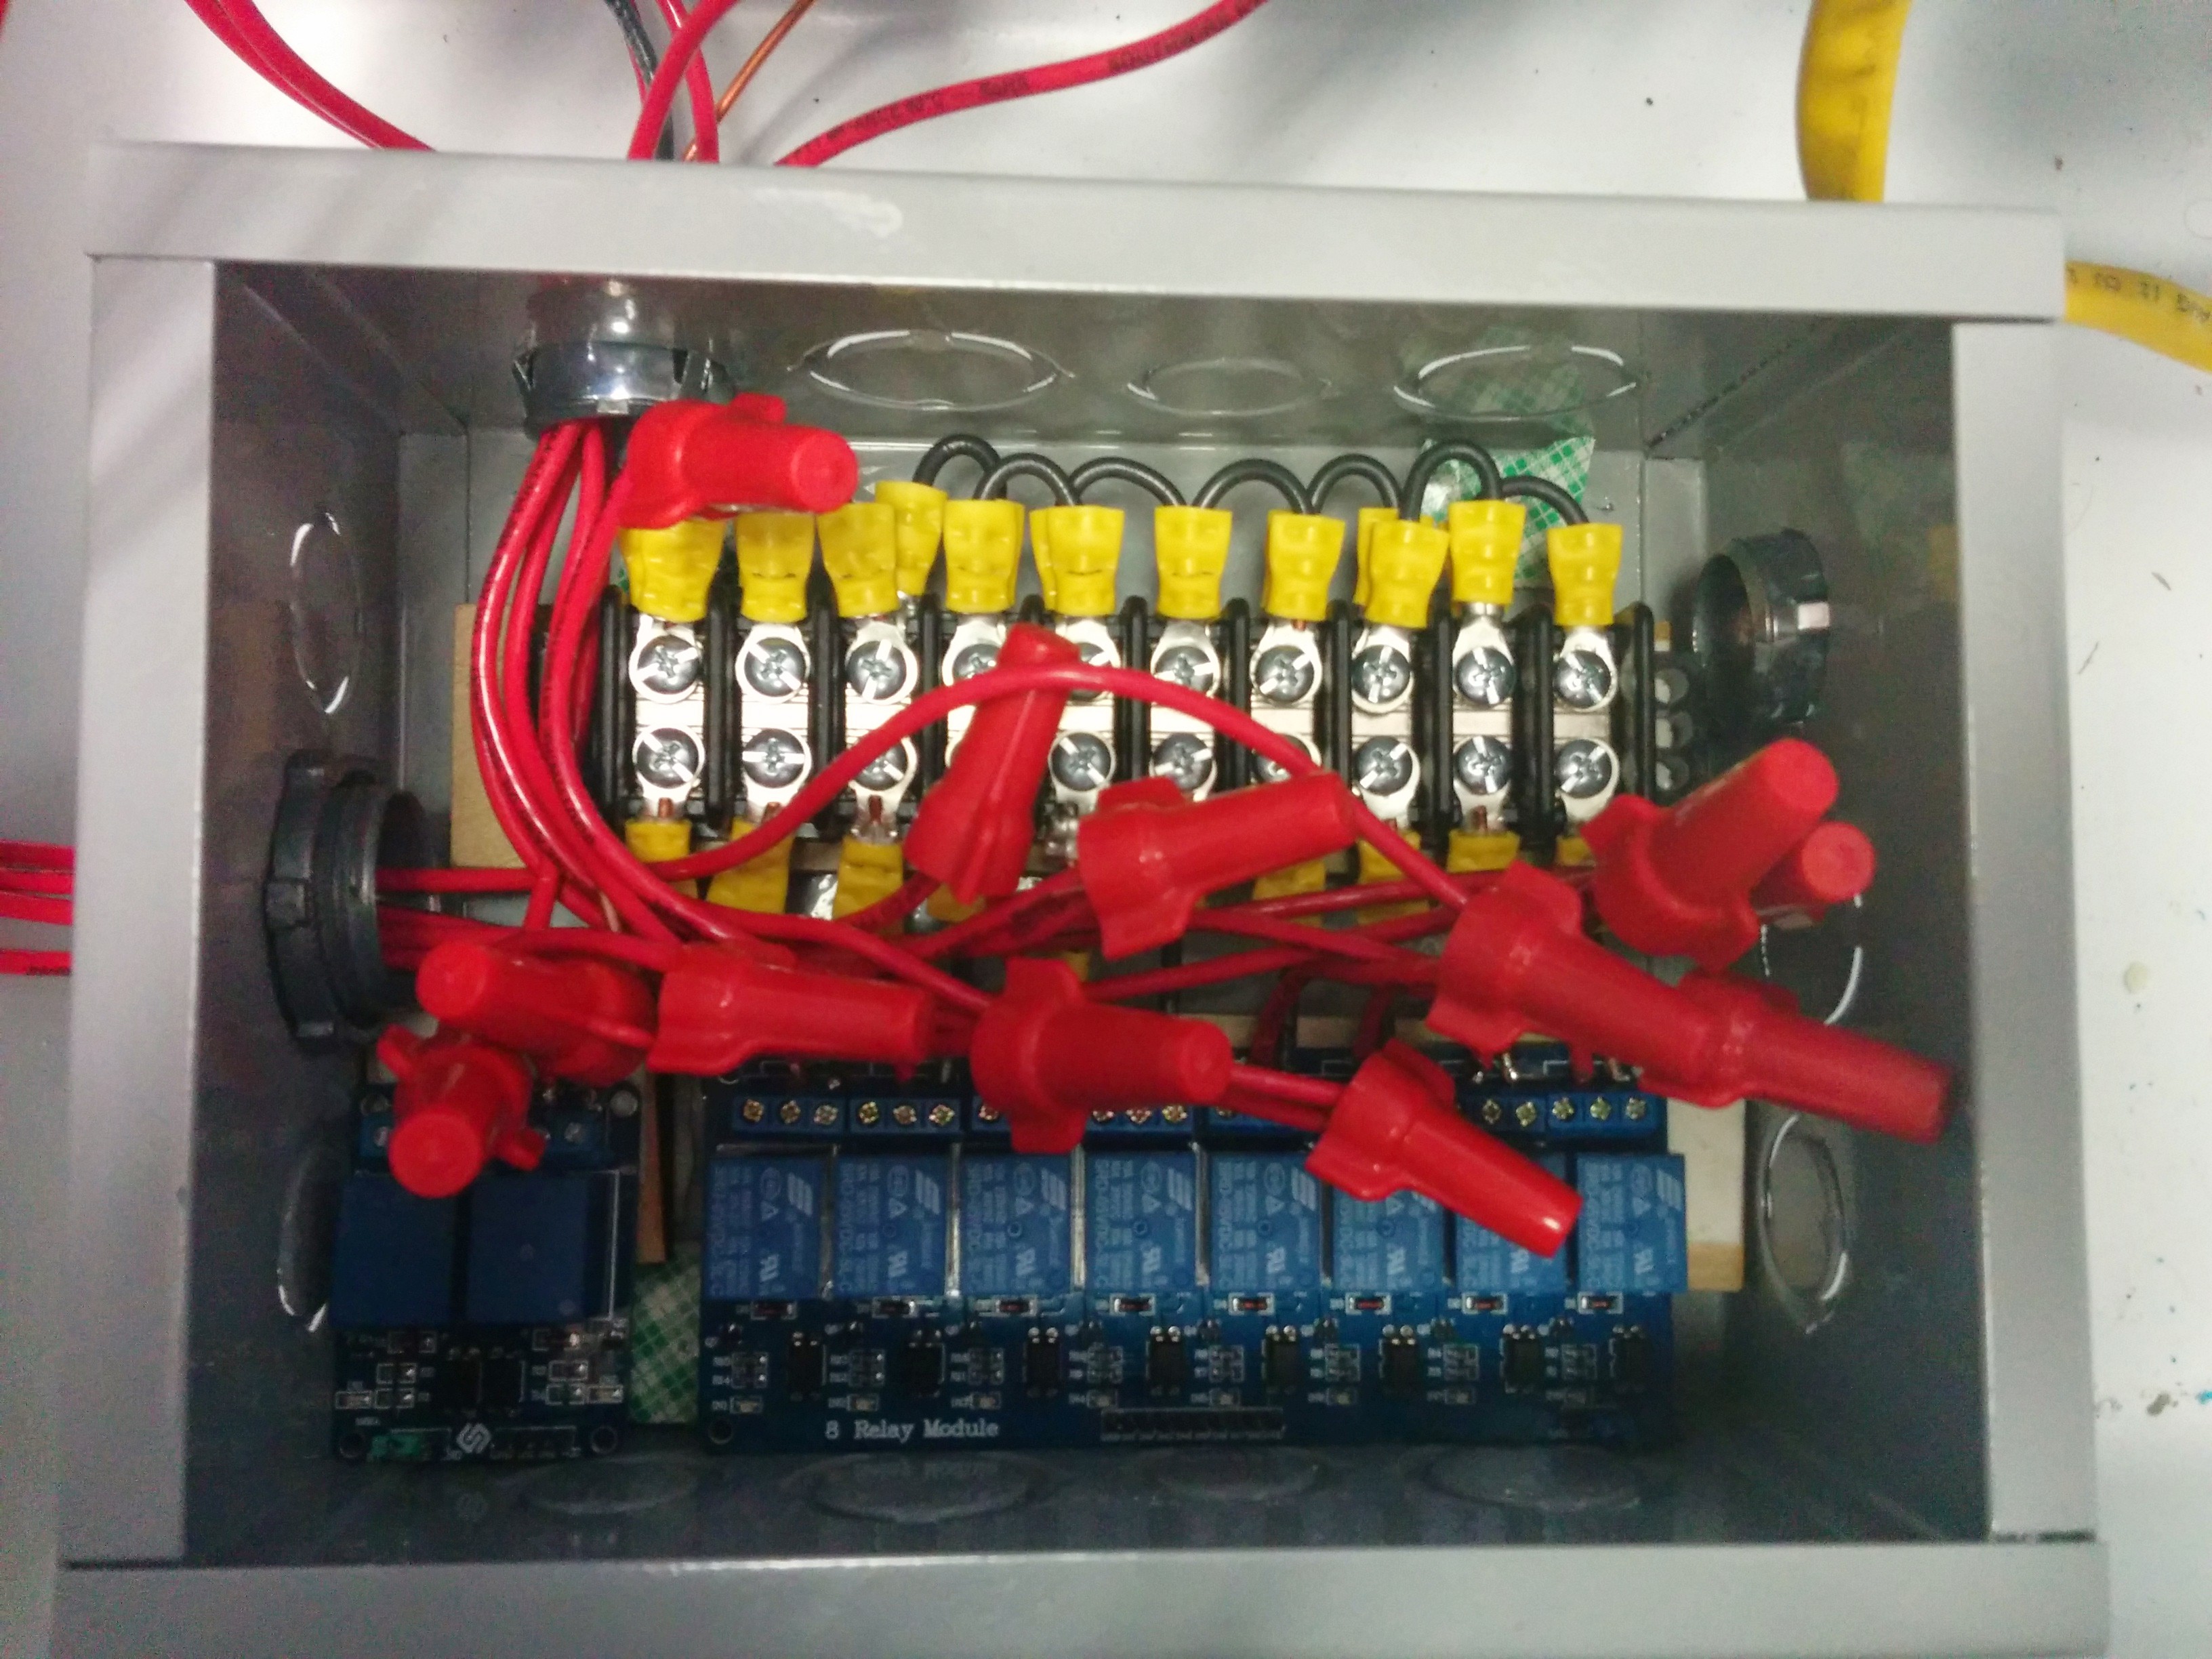
Perfect fit!

Not bad!
Enclosing
Now that the AC wiring was done, the next step was to enclose all AC circuitry to prevent accidental mishaps.
(Well, in reality the next step was testing all the connections with an ohmmeter, of course without connecting the AC! This should be done at ALL stages of the AC wiring).
To enclose the exterior outlets and light switch, we decided to add weatherproof covers. These were readily available at the hardware store.
Andres clipping excess metal to add the switch cover.
Outlet and switch covers added
Note that we still need to caulk the gap (like you would at your house) around these enclosures if we truly want the Cooler to be waterproof. The covers were numbered with which relay they were connected. I cared more about the relay order being numbered sequentially than the outlets.
The next step for safety was to enclose the entire interior of the cooler with an acrylic “lid”, so the curious could still view the interior, but do so safely. The idea was that all AC circuitry would be below the lid, and all DC or microelectronics and prototyping related stuff would be sitting on the lid like a shelf.
The cooler provides a nice lip around the top of the inside where the lid/shelf fits and since it’s very thin doesn’t interfere with placing the Cooler top/lid in place. The Cooler lid actually has a large interior as well so you can still fit several inches worth of stuff on the acrylic lid/shelf.
In order to fit the hole exactly, we used a laser cutter to round off the corners. Cardboard test pieces (not shown) were put into the laser cutter until we got the corner exactly right then the same design was reused on the acrylic. Due to limitations of the interior of the laser cutter, we had to use two separate pieces of acrylic.
To join the two parts of the lid together, two handles were 3-d printed and attached. Holes were then added where control and other wiring between the AC and DC parts of the system would go. A notch was added to one side for the power plug for Computer speakers that would be doing the sound.

Safety lid
Finally, a warning sticker was added to indicate the dangerous nature of what was beneath.
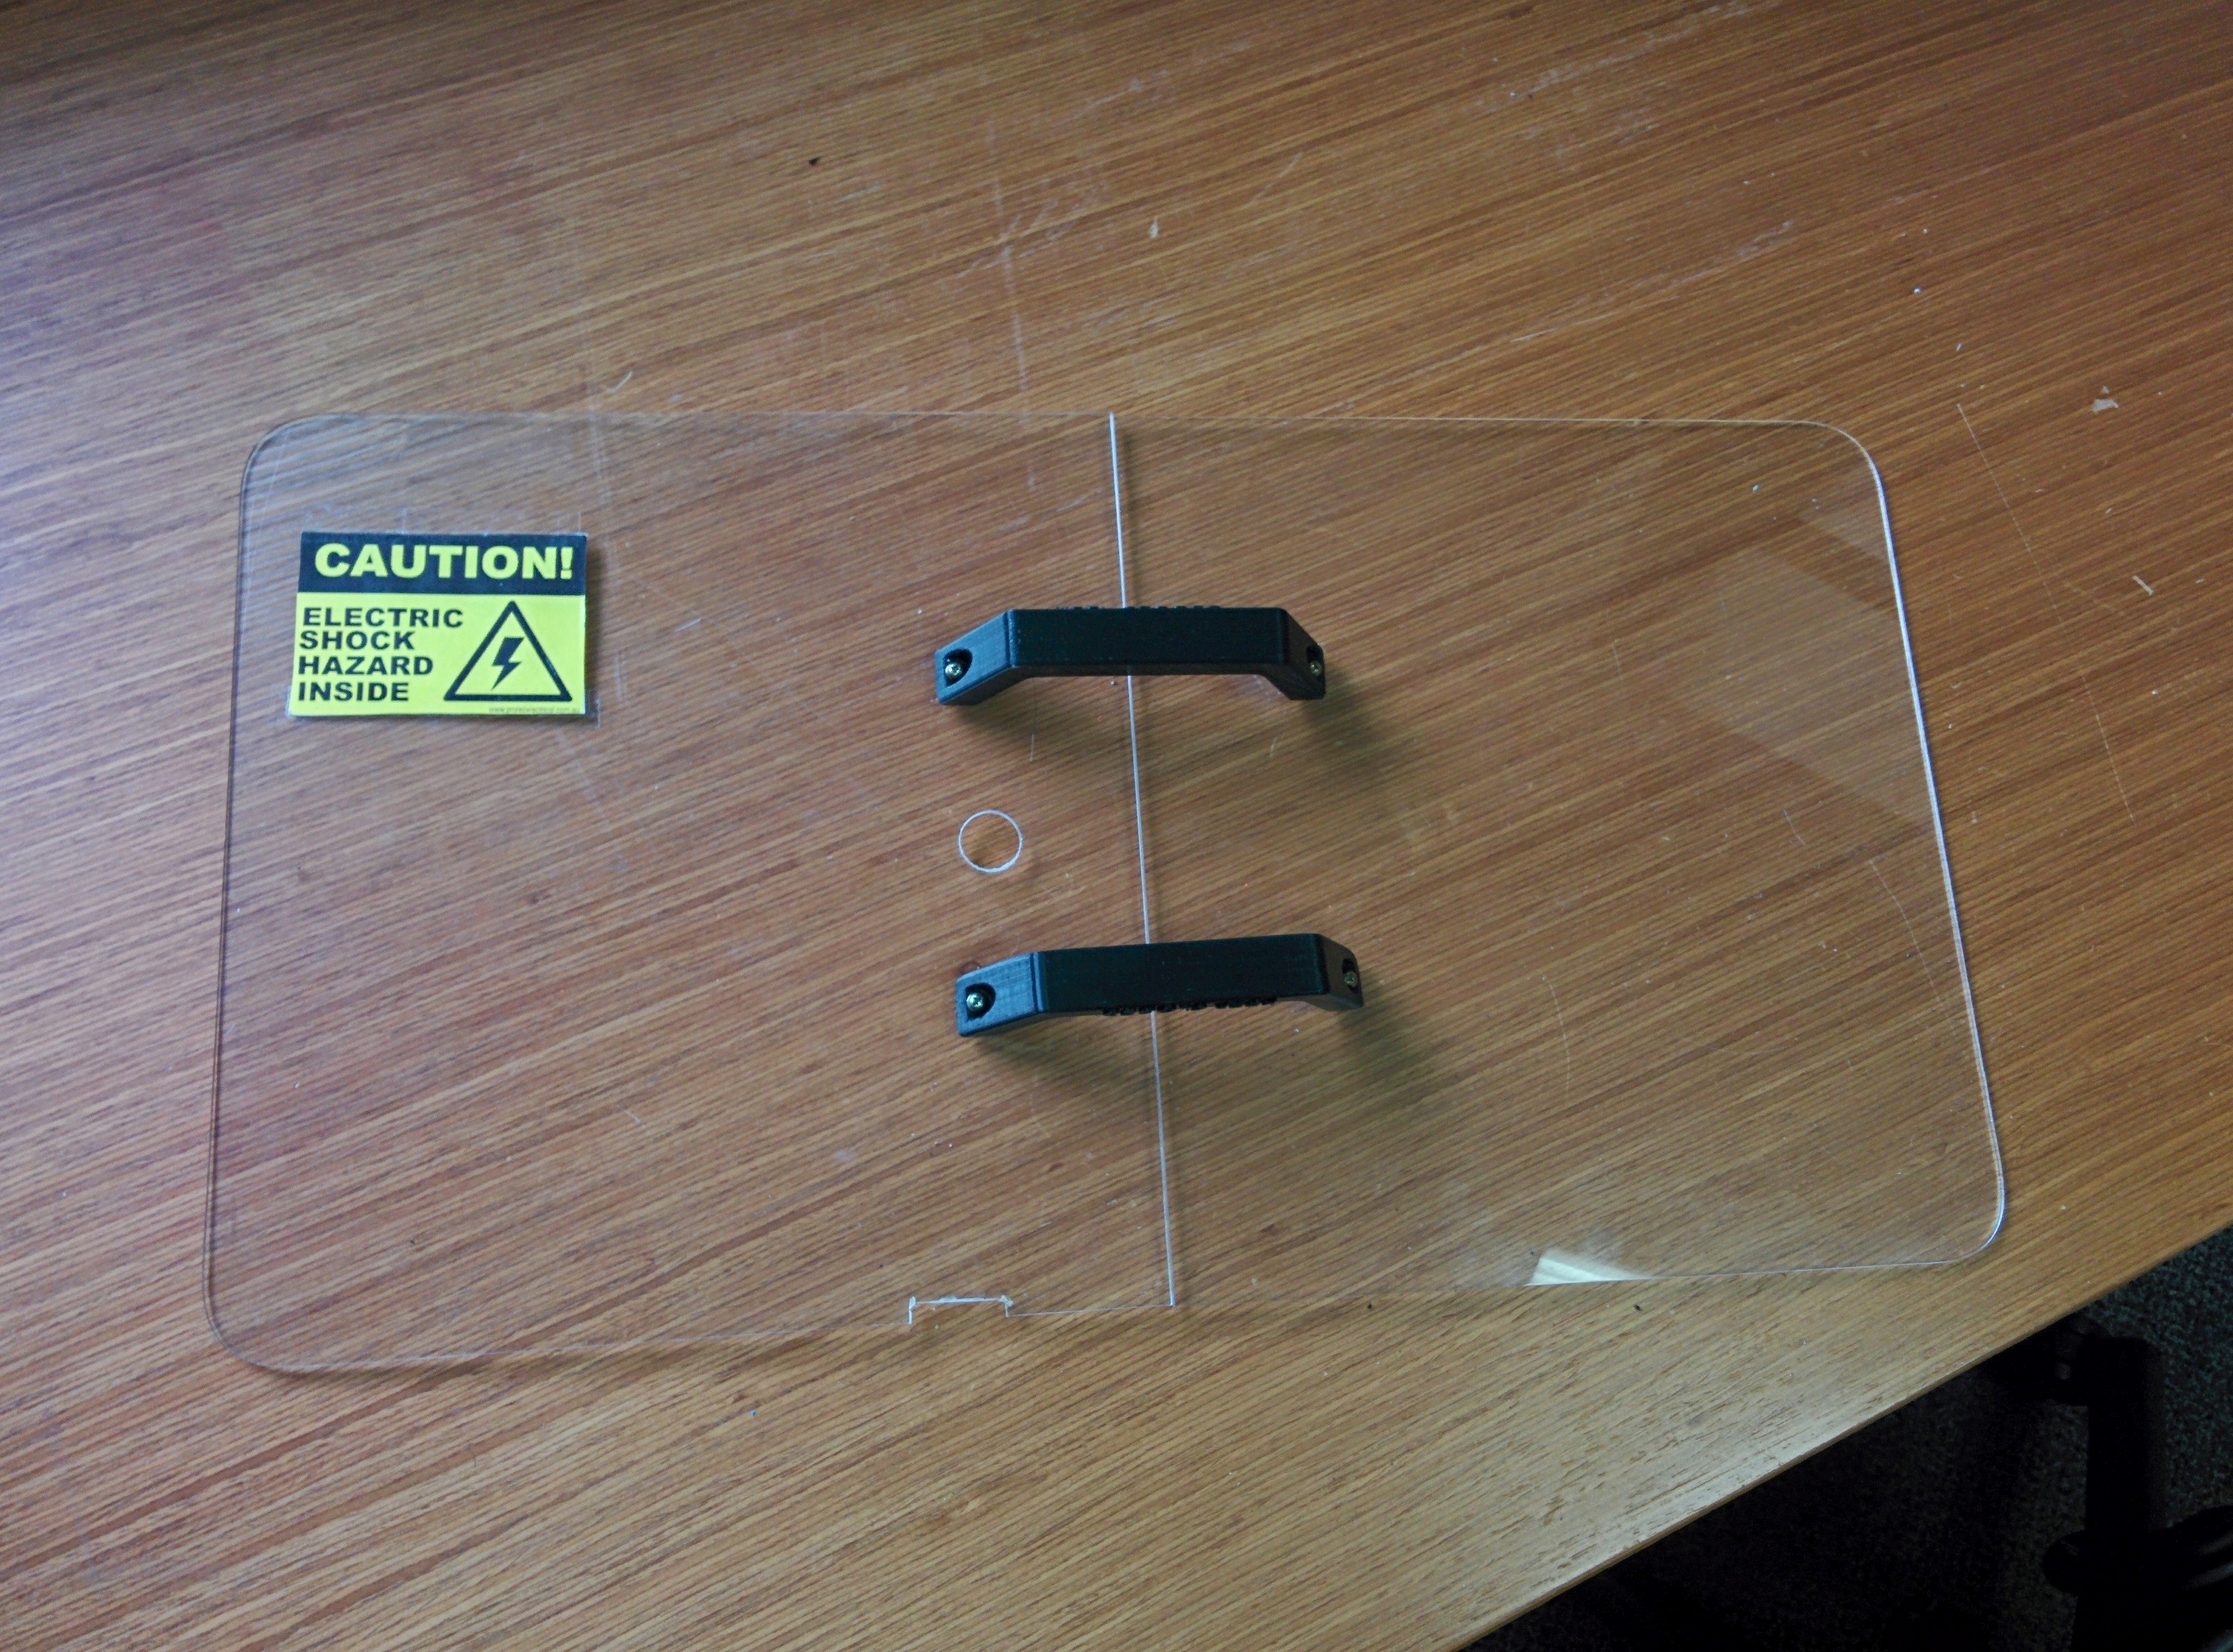
Safety lid with warning
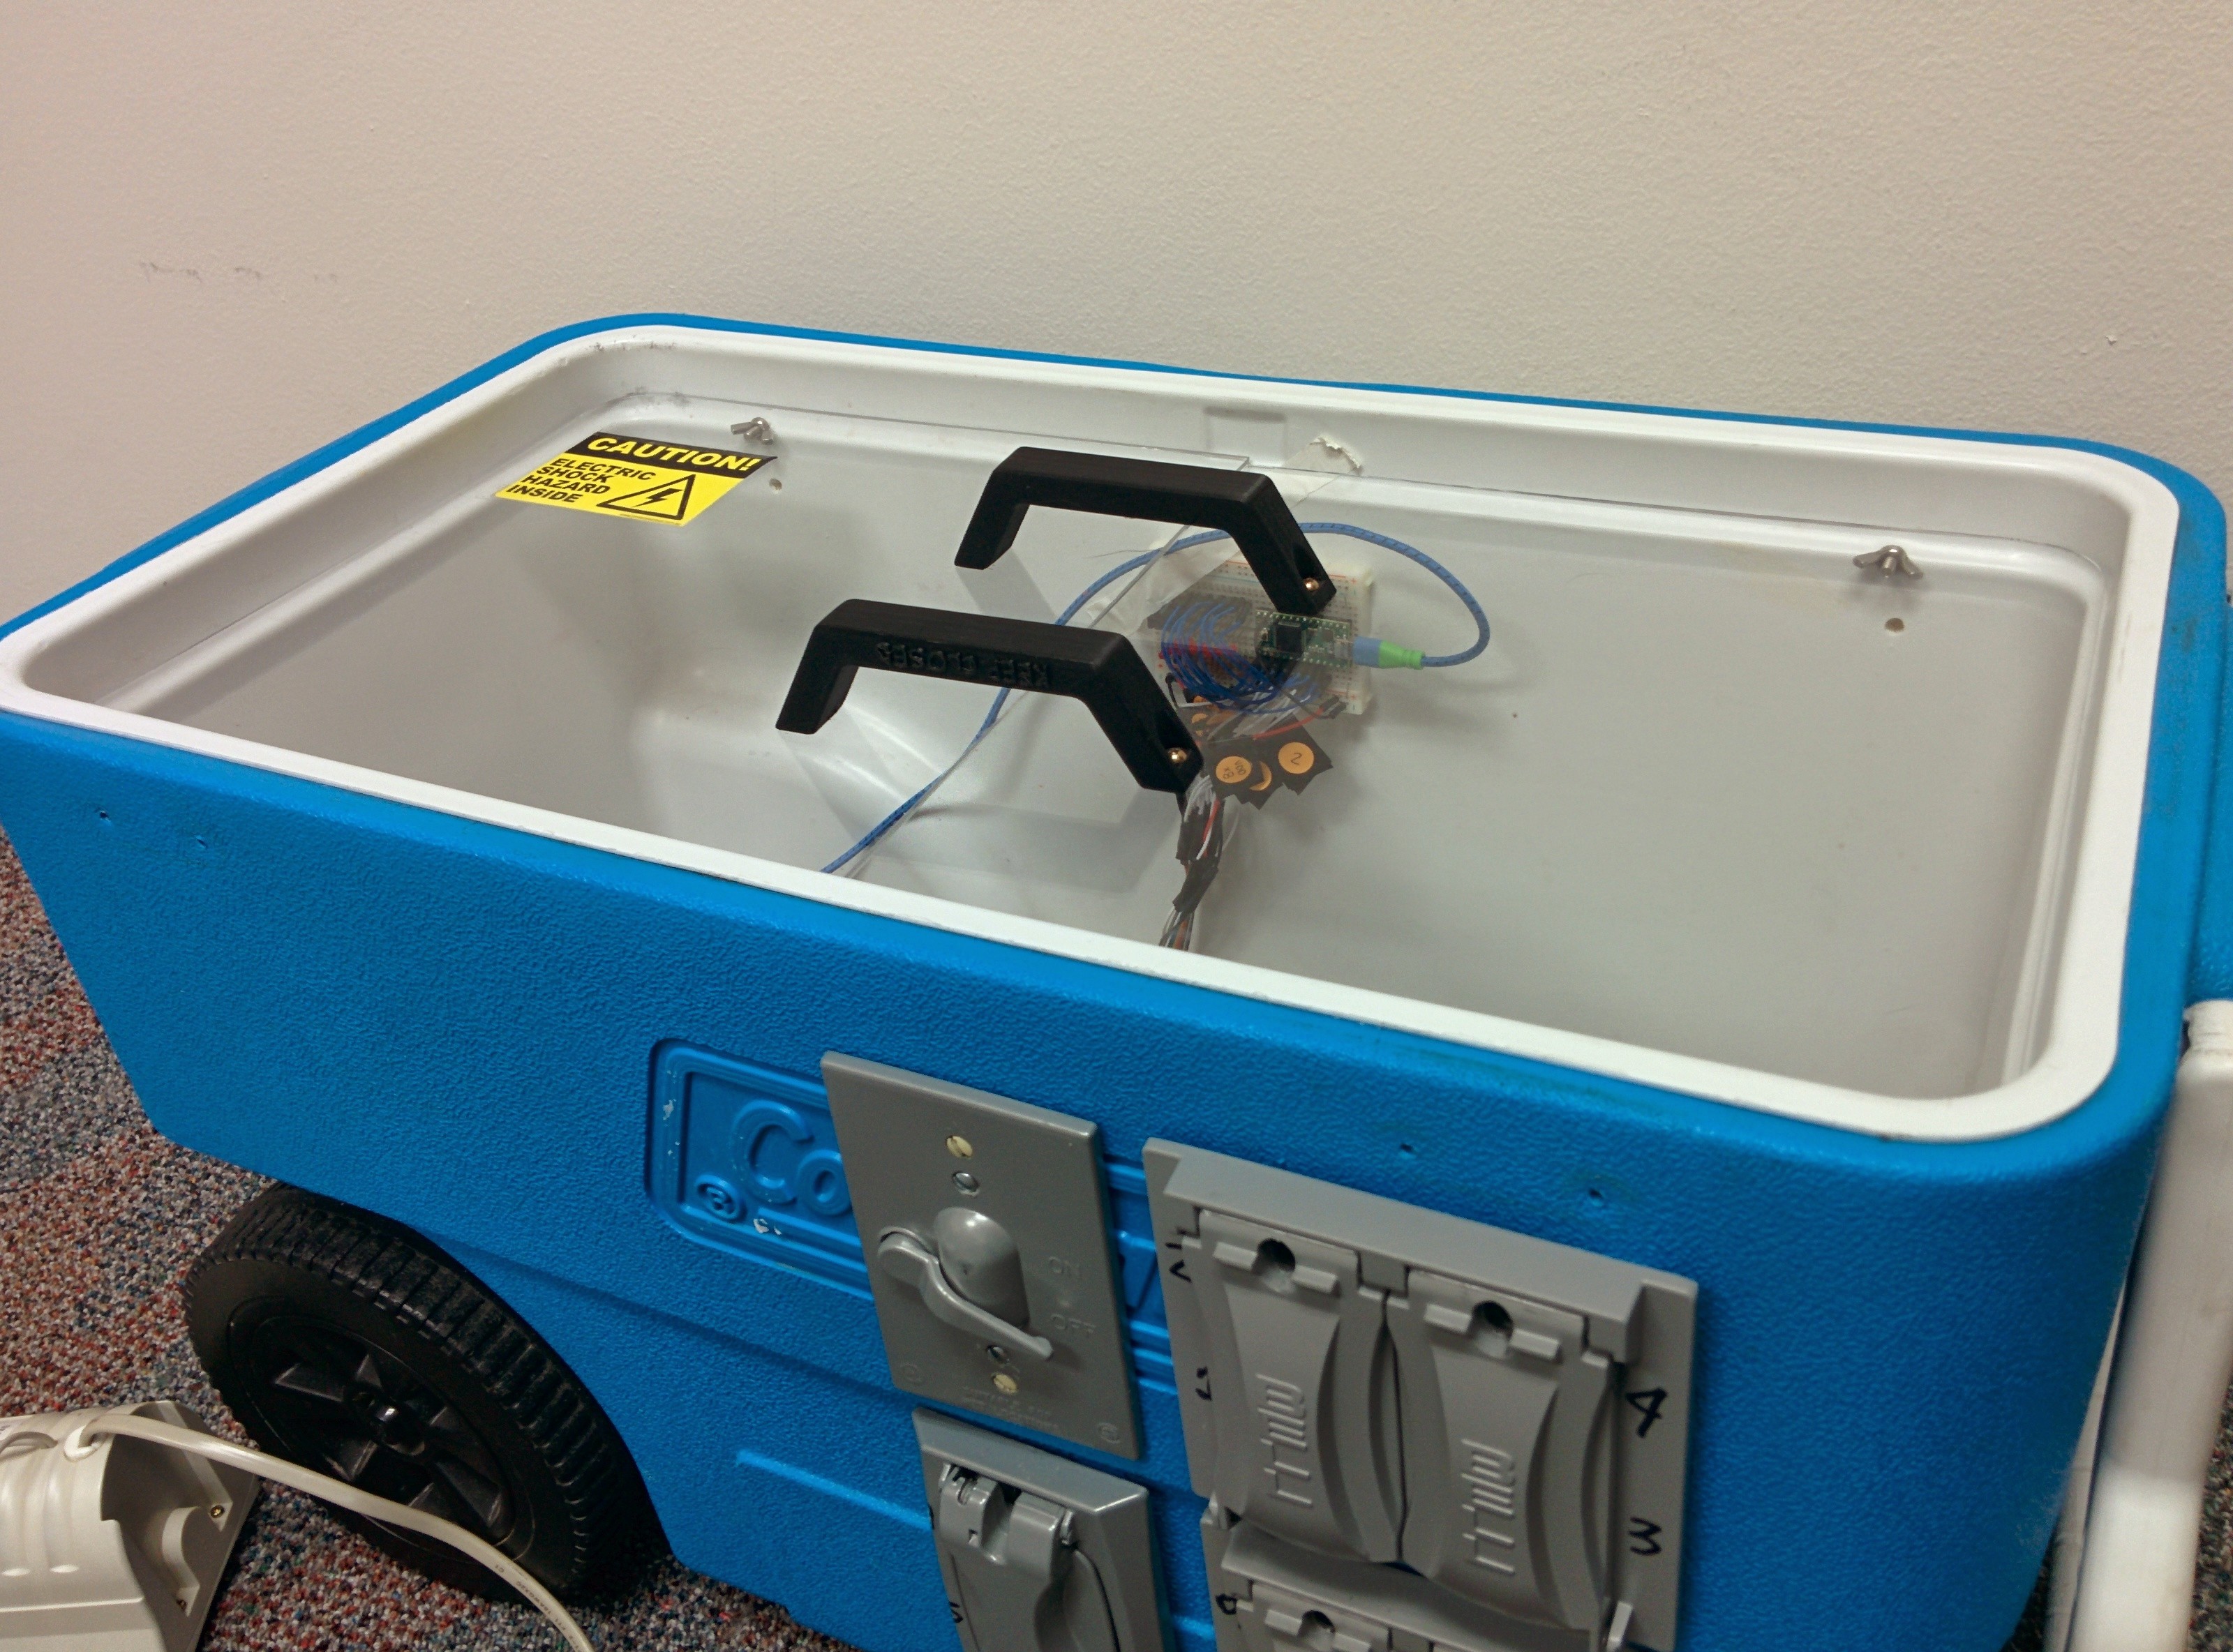
Safety lid in place in Cooler.
Now we just needed to hook up the microcontroller to the relays to control the lights, and to the speakers to make sound!
Stay tuned for Part 2 of this article!!